Imagine having a beautiful, custom-made bookshelf that fits perfectly in your space and showcases your favorite reads. Sounds amazing, right?
You might think building a bookshelf is a daunting task, but it’s easier than you might imagine. This guide will show you how to create a stunning, sturdy bookshelf step-by-step, even if you’ve never picked up a hammer before. Whether you’re a DIY enthusiast or just looking to save some money, building your own bookshelf is a rewarding project.
Dive into the process with confidence, and soon you’ll have a masterpiece that reflects your style and creativity. Ready to transform your space with a personal touch? Let’s get started!
Choosing Materials
Wood is the heart of any bookshelf. Pine is light and easy to cut. Oak is strong but heavy. Plywood is affordable and smooth. Each type has its charm. Choose what fits your style.
Tools make building fun. Use a saw to cut wood. A drill helps with holes. Sandpaper makes wood smooth. A hammer joins parts together. Measuring tape ensures perfect size. Keep tools handy for quick work.
Hardware holds the shelf in place. Screws are small but strong. Brackets give support. Shelf pins adjust height. Glue adds strength. Choose hardware that suits your design.

Credit: schuttelumber.com
Planning The Design
Measure the available space carefully. Use a tape for accuracy. Note the width, height, and depth. This ensures the bookshelf fits perfectly. Always leave some extra space. Extra space helps in easy movement. Measure twice, cut once.
Decide on a style you like. Modern, classic, or rustic are options. Each style has its own charm. Ensure it matches your room’s decor. A matching style enhances the room’s look. Think about the colors and materials, too. Wood, metal, or glass can be used.
Draw a simple sketch of your bookshelf. Start with a basic outline. Add details like shelves and supports. A sketch helps in visualizing the design. Use a ruler for straight lines. Keep your sketch neat and clean.
Cutting The Wood
Crafting a bookshelf begins with cutting the wood precisely. Accurate measurements ensure a sturdy and balanced structure. Use quality saws for smooth edges and avoid splintering, setting a solid foundation for your project.
Safety Precautions
Wear safety gogglesto protect your eyes. Use ear plugsto guard your ears from loud noises. Keep your handsaway from the blade. Make sure the workspaceis clean and free of clutter. Check the toolsare in good working order. Always be mindful of your surroundings.
Using Power Tools
Choose the right toolfor the job. Read the instruction manualcarefully. Make sure the bladeis sharp. Securethe wood firmly before cutting. Start the tool slowlyto avoid mistakes. Keep a steady hand while using the tool.
Precision Techniques
Measurethe wood twice before cutting. Use a pencilto mark your cut line. Follow the markcarefully with the blade. Double-check the measurementsafter cutting. Ensure all pieces are evenand smooth. Take time to check the final cuts.
Assembling The Frame
Begin by laying out the frame pieces on a flat surface. Connect them securely with screws and brackets. Ensure everything is aligned for stability before moving to the next step.
Joining Techniques
Choosing the right joining technique is crucial. Wood screws are common for beginners. Easy to use and hold well. Dowel joints offer strong connections. They need precise drilling. Mortise and tenon joints are traditional. Strong and durable. They require skill and patience. Glue is often used to strengthen joints. Choose wood glue for best results.
Securing Joints
Securing joints ensures the bookshelf stays together. Clamps hold pieces tight while glue dries. Use enough clamps for even pressure. Nails can help secure joints. But don’t rely on them alone. Screws are better for lasting hold. Pre-drill holes to prevent wood splitting. Check that each joint is firm before moving on.
Ensuring Stability
Ensuring stability keeps the bookshelf safe. Level the base carefully. Use a spirit level to check. Attach a back panel to prevent wobbling. It adds strength. Use brackets for extra support. They help stabilize taller shelves. Test the stability before loading books. Make adjustments if necessary.
Adding Shelves
Measure the space for each shelf. Use a tape measure. Write down the numbers. Mark the spots for screws. Make sure lines are straight. Use a level tool to check. Straight lines help shelves stay flat.
Shelves need strong supports. Use brackets or cleats. Attach them to the wall. Use screws and a drill. Make sure they are tight. Loose supports can cause falls. Double-check each support.
Adjustable shelves are useful. They let you change shelf height. Use pegs or pins for adjustment. Drill holes for these pins. Make sure holes are even. Adjust height as needed. This helps fit different books.
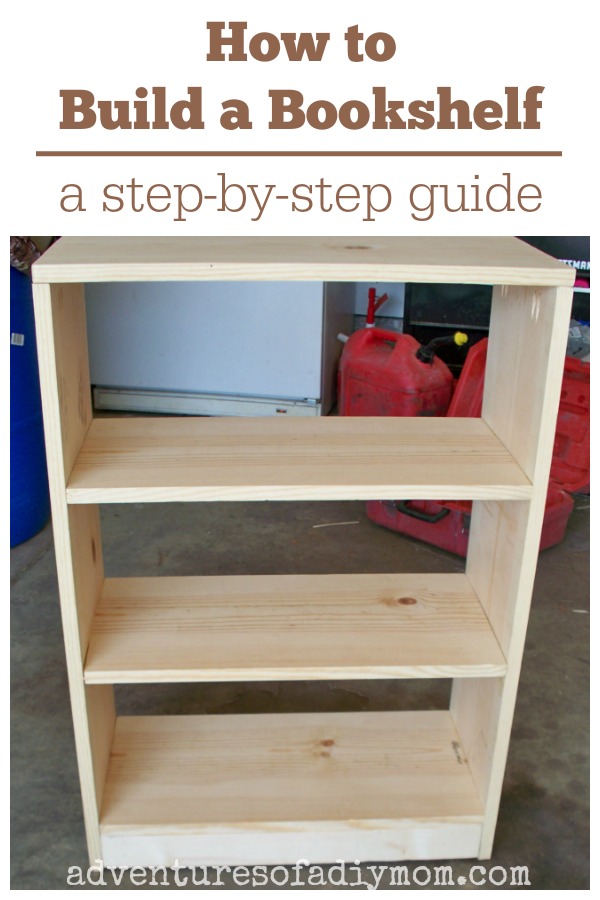
Credit: www.adventuresofadiymom.com
Finishing Touches
Adding final touches transforms your bookshelf from simple to stunning. Sand edges and apply a coat of wood finish. Arrange books and decorative items to personalize your space.
Sanding Surfaces
Before painting, surfaces must be smooth. Use sandpaper to remove rough spots. Start with coarse grit and switch to fine grit. This makes the surface very smooth. Be sure to sand every edge. It helps the finish look better. Dust off the shelf after sanding.
Applying Finish
Choose a finish that fits your bookshelf style. Paint, stain, or varnish are common options. Apply thin coats for best results. Let each coat dry completely. This prevents sticky surfaces. Use a brush or cloth for even coverage.
Decorative Elements
Add decorative pieces for a personal touch. Use stickers, decals, or paint designs. Stencils make it easy to add shapes. Attach small knobs or hooks for style and function. These elements can make your shelf unique. Simple changes can add lots of character.
Installation Tips
Place your bookshelf in a stable and flat location. Avoid areas with heavy foot traffic. Make sure the shelf is away from direct sunlight. This prevents books from fading. Check that the shelf is not blocking doors or windows. A good spot is against a sturdy wall.
Use brackets to anchor the shelf to the wall. This keeps it from tipping over. Screws should be tight and secure. Choose wall studs for the strongest hold. Kids and pets stay safe with a well-anchored shelf. Safety first!
Group books by size or color for easy finding. Use bookends to keep them upright. Heavier books should be on the bottom shelf. Light books go on top. This helps keep the shelf balanced. Arrange books in a fun and creative way.
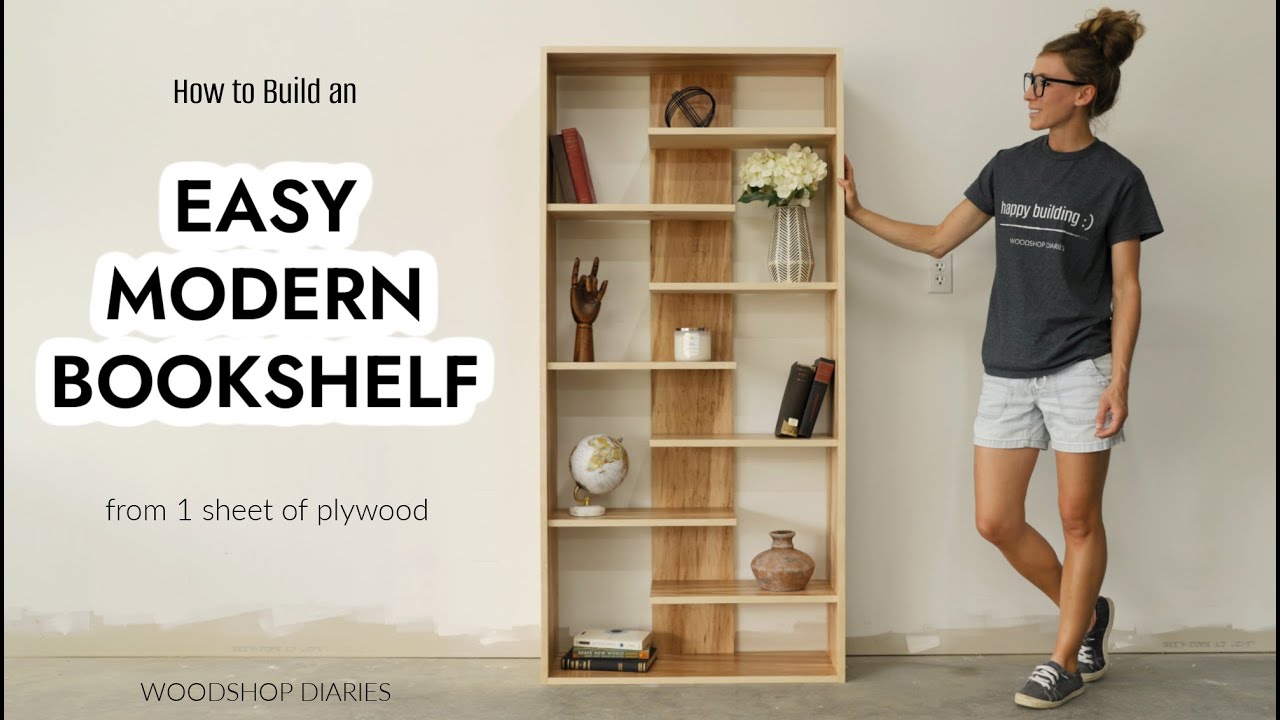
Credit: www.youtube.com
Frequently Asked Questions
What Tools Are Needed To Build A Bookshelf?
To build a bookshelf, you’ll need basic tools: a saw, drill, measuring tape, level, and screws. A screwdriver and sandpaper are also essential for finishing touches. Using quality tools ensures precision and sturdiness. Choose tools based on your comfort and the complexity of your bookshelf design.
How Do I Choose The Right Wood?
Choosing the right wood depends on your budget and style preference. Pine is affordable and easy to work with, while oak offers durability and a classic look. Consider the weight of your books when selecting wood. Ensure the wood is well-seasoned to prevent warping over time.
How Can I Ensure A Sturdy Bookshelf?
To ensure sturdiness, use quality wood and secure joints with screws. Reinforce shelves with brackets if needed. Properly measure and level each shelf during installation. Regularly check and tighten screws over time. Avoid overloading shelves with heavy items to maintain structural integrity.
What Finish Options Are Available For Bookshelves?
Bookshelves can be finished with paint, stain, or varnish. Paint offers a variety of colors and a smooth look. Stain enhances the wood’s natural grain and color. Varnish provides a protective layer against moisture and wear. Choose a finish that complements your room decor.
Conclusion
Building a bookshelf is a rewarding task. You now have a unique piece. It adds character to your space. You learned basic carpentry skills. You also saved money by doing it yourself. Your books have a new home. They are neatly organized and easy to find.
Invite friends to admire your work. Share your experience with them. Who knows? You might inspire someone to start their own project. Keep exploring new projects. Each builds your confidence and skills. Enjoy your handcrafted bookshelf. It reflects your style and effort.
Happy crafting!

Home Interior Design & Renovation Expert at HomeFixio
Sierra Wellington is a skilled home interior designer with extensive experience in plumbing, fittings, and home renovations. Having worked on numerous residential projects, Sierra specializes in creating functional and aesthetically pleasing spaces. With a keen eye for design and a deep understanding of the technical aspects of home improvement, he provides expert advice on everything from layout planning to fixture installations. As a writer for HomeFixio, Sierra shares his practical insights and creative solutions, helping homeowners elevate their spaces with precision and style.