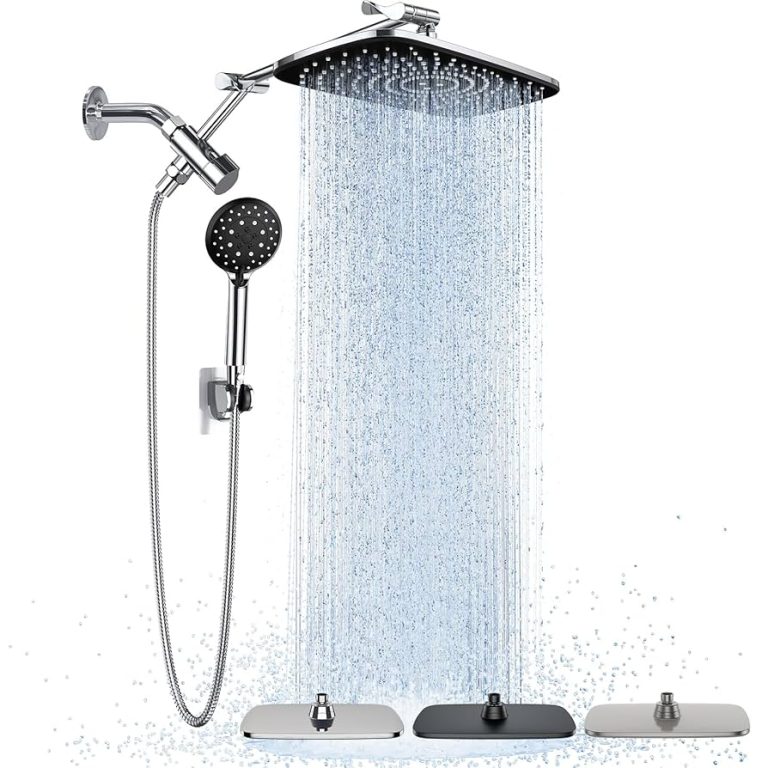
How to Open Jolie Shower Head: Step-by-Step Guide
Are you tired of dealing with a clogged or malfunctioning shower head? Perhaps you’re eager to enjoy that refreshing, rainfall-like experience that your Jolie shower head promises.
Opening up and maintaining your shower head can seem daunting, especially if you’re not a DIY enthusiast. But don’t worry! You’re about to discover a simple, step-by-step guide that will make the process a breeze. Imagine the satisfaction and comfort of having a perfectly functioning shower head, delivering a soothing cascade of water every morning.
Stick with us to learn how to easily open your Jolie shower head and enhance your shower experience.
Tools And Materials Needed
Opening a Jolie shower head requires some basic tools and materials. It’s essential to gather these before you start. Being prepared ensures a smooth process.
Tools Needed
First, you’ll need a wrench. A standard adjustable wrench works well. It helps in loosening the shower head. A pair of pliers is also useful. It provides extra grip when needed.
Materials Needed
You’ll need a soft cloth. This prevents scratches on the shower head. A roll of plumber’s tape is essential. It ensures a tight, leak-free fit.
Safety Gear
Wear safety glasses. They protect your eyes from any debris. Gloves are optional, but recommended. They provide a better grip and protect your hands.
Work Area Preparation
Clear the shower area. Remove any items that might obstruct your work. Place a mat on the floor. It prevents damage if tools fall.

Credit: jolieskinco.com
Safety Precautions
Opening the Jolie Shower Head requires careful attention to safety. Understanding the necessary precautions can prevent accidents. Ensure you are prepared before starting the process.
Check Water Supply
Ensure the water supply is turned off. This prevents water from spraying unexpectedly. Locate the shut-off valve and turn it to stop water flow.
Use Proper Tools
Gather the right tools for the job. A wrench or pliers may be needed. Avoid using sharp tools that can damage the shower head.
Protect Your Hands
Wear gloves to protect your hands from sharp edges. Gloves provide a better grip on tools. Choose gloves that fit well and are comfortable.
Ensure Stable Footing
Stand on a stable surface to avoid slipping. Use a step stool if needed for height. Make sure the stool is steady before climbing.
Inspect Shower Head Components
Check for loose parts before starting. Tighten any screws that seem loose. Inspect the area around the shower head for any debris.
Follow Manufacturer’s Instructions
Read the manufacturer’s instructions carefully. These provide specific guidance for your model. Following them ensures a safe and successful process.
Locating The Shower Head Components
Opening a Jolie shower head requires understanding its components. Knowing the parts helps you disassemble and reassemble with ease. Let’s explore how to locate these crucial elements.
1. Identifying The Main Shower Head
The main shower head is the largest part. It’s where water sprays out. Look for the part attached to the shower arm. This is the main piece you need to open.
2. Locating The Shower Arm
The shower arm connects the main head to the plumbing. It’s the curved or straight pipe extending from the wall. Make sure you find this before proceeding.
3. Finding The Nozzle
The nozzle is where water exits the shower head. It’s usually visible at the front. Inspect it closely for any screws or fittings.
4. Spotting The Filter
Some Jolie shower heads include a filter. It purifies water before it reaches the nozzle. Check behind the nozzle or inside the head for its location.
5. Recognizing The Screws
Screws hold the shower head together. Look for them around the nozzle or the back. These are crucial for disassembling the head.
6. Examining The Gasket
The gasket prevents leaks. It’s a rubber ring inside the shower head. Find it between the head and arm to ensure a tight seal.
7. Inspecting The Connector
The connector links the shower head and arm. It’s often threaded for easy attachment. Locate this part to open the head safely.
Understanding these components helps you maintain your shower head. It ensures smooth operation and enhances your shower experience.
Credit: www.tiktok.com
Removing The Shower Head
Removing the shower head is a task that might seem daunting at first, but with the right approach, it’s straightforward. Whether you’re upgrading to a Jolie Shower Head for its sleek design or just need to clean your current one, this guide will help you navigate the process effortlessly. Let’s dive into the steps to take your bathroom experience to the next level.
Ensuring Safety First
Before you start, ensure your safety by turning off the water supply. This prevents unexpected leaks and keeps your workspace dry. Use a towel on the floor to catch any residual drips.
Gathering Your Tools
No need for a toolbox full of gadgets. A simple adjustable wrench and a soft cloth are your best friends for this task. The wrench helps loosen the shower head without damaging it, and the cloth protects the finish.
Loosening The Shower Head
Place the cloth around the base of the shower head. This prevents scratches during removal. Use the wrench to gently turn the shower head counterclockwise. If it’s stuck, apply a little extra pressure but be careful not to overdo it.
Dealing With Stubborn Shower Heads
Sometimes, shower heads refuse to budge. Try using a few drops of penetrating oil around the threads. Wait a few minutes for the oil to seep in, then try loosening it again. If you’ve faced this problem, you’ll know how frustrating it can be.
Checking For Damages
Once removed, inspect the shower head and the pipe threads. Check for any rust or wear that might need attention. This step ensures a smooth reinstallation and helps you avoid future leaks.
Preparing For New Installation
Before installing your new Jolie Shower Head, clean the pipe threads thoroughly. A clean surface ensures a tight seal, preventing leaks. You’d be surprised how a simple wipe can make all the difference.
Removing a shower head is a practical skill worth mastering. Do you think you’re ready to tackle this task? With the right preparation and tools, it’s a breeze. Now, go ahead and give your shower the upgrade it deserves!
Detaching The Faceplate
Gently detach the faceplate to open your Jolie Shower Head. Twist it counterclockwise until it loosens. Ensure the shower is off to avoid spills.
Detaching the faceplate of your Jolie Shower Head can seem daunting at first, but with a few simple steps, you’ll find it’s easier than you think. This process is essential for cleaning or replacing parts, ensuring your shower head maintains optimal performance. Don’t worry if you’re not a DIY expert; you’ll be surprised how straightforward this task is.
Understanding The Components
First, familiarize yourself with the basic parts of the shower head. The faceplate is the front part where the water sprays out. Knowing this helps you visualize what needs to be removed and how it fits into the overall design.
Gathering Your Tools
You won’t need a toolbox, just a few items. A wrench or pliers can be handy, but sometimes your hands are enough. Be sure to have a soft cloth or towel to protect the finish while working.
Turning Off The Water Supply
Before starting, ensure the water is turned off. This prevents any surprise showers while you work. It’s a simple step but often overlooked. Imagine the chaos if you forget! Twist the shower head counterclockwise. If it’s stubborn, use your wrench, but be gentle. Applying too much force can damage the threads or the finish. Use a towel between the wrench and the shower head for extra protection. Once the shower head is off, locate the screws or clips holding the faceplate. These are usually visible and accessible. Use a screwdriver to gently remove them. Keep the screws safe; you’ll need them for reassembly.
Cleaning Or Replacing Parts
With the faceplate off, you can clean any mineral deposits or replace the inner components. Regular cleaning keeps your shower head performing at its best. A clean faceplate means a better shower experience.
Reattaching The Faceplate
After maintenance, align the faceplate back in place. Secure it with the screws or clips. Make sure it’s snug but don’t overtighten. This ensures a proper seal without risking damage.
Final Check
Reinstall the shower head and turn the water back on. Check for leaks or uneven water flow. A quick test ensures everything is in perfect working order. Have you ever wondered how such a simple task can improve your shower experience? Taking the time to detach and clean the faceplate can make a noticeable difference. Now, you’re ready to enjoy the refreshing stream of your Jolie Shower Head again!
Credit: www.tiktok.com
Inspecting For Damage
Discover how to open a Jolie shower head by inspecting for damage. Start by gently unscrewing the head, checking for cracks or broken seals. Ensure all parts are clean and intact for optimal performance.
When you’re about to open your Jolie shower head, the first step is to inspect it for any damage. This is crucial to ensure a smooth process and prevent any surprises down the line. A damaged shower head can lead to leaks or poor water flow, which can ruin your shower experience. So, let’s dive into how you can effectively inspect your shower head for damage.
Check For Visible Cracks
Begin by examining the exterior of your shower head. Look closely for any visible cracks or chips on the surface. These can compromise the integrity of the shower head and may cause leaks. If you notice any, consider if a replacement is necessary.
Inspect The Nozzle
The nozzle is where water flows out, so it’s vital to ensure it’s intact. Check for any blockages or mineral buildup that might have accumulated. A simple cleaning might be all it needs, but if the nozzle appears damaged, it might be time for a new one.
Examine The Threads
Inspect the threads where the shower head connects to the pipe. Are they worn or stripped? Damaged threads can make it difficult to secure the shower head properly, leading to leaks. Ensure they are in good condition for a snug fit.
Test The Swivel Joint
If your shower head has a swivel joint, give it a gentle twist. It should move smoothly without resistance. If it’s stiff or makes a grinding noise, it may need lubrication or replacement.
Look For Rust
Rust is a sign of wear and can weaken the shower head. Look for any rust spots, especially around the joints and nozzles. Removing rust early can prolong the life of your shower head.
Feel For Loose Parts
Gently shake the shower head to see if there are any loose parts inside. Loose components can lead to rattling noises and uneven water flow. If you find any, it might be worth disassembling further to investigate. Inspecting your Jolie shower head for damage might seem like a small step, but it can save you time and trouble later. Have you ever skipped this step and regretted it? Taking a few minutes now could prevent a frustrating shower experience later.
Cleaning And Maintenance Tips
Discovering how to open a Jolie shower head is simple. Gently twist the shower head to the left. This reveals the inner components for easy cleaning and maintenance. Regular care ensures a refreshing shower experience.
Keeping your Jolie shower head clean and well-maintained can significantly enhance your shower experience. Regular cleaning not only ensures a steady flow of water but also prolongs the life of your shower head. In this section, you’ll discover practical tips and insights on how to effectively clean and maintain your Jolie shower head.
How To Remove Mineral Deposits
Mineral deposits can accumulate over time, affecting water flow. To tackle this, fill a plastic bag with white vinegar and secure it around the shower head with a rubber band. Leave it to soak overnight. This simple trick dissolves the minerals, making your shower head as good as new.
Regular Cleaning Schedule
Consistency is key to keeping your shower head in prime condition. Aim to clean it every month. This routine helps prevent buildup and ensures optimal water pressure. I once neglected this and noticed a significant drop in water flow, which was quickly resolved with a quick cleaning.
Checking For Clogs
Clogs can be sneaky. If your shower stream seems off, unscrew the shower head and check for blockages. Use a toothpick or needle to clear any obstructions. Keeping an eye out for clogs can save you from unexpected shower issues.
Inspecting For Wear And Tear
Your Jolie shower head is built to last, but it’s wise to inspect it for any signs of wear. Check for cracks or leaks. Early detection can prevent more serious issues down the line. A small crack I found early saved me from a larger replacement cost later.
Using Gentle Cleaning Agents
Avoid harsh chemicals which can damage your shower head. Opt for mild soap and water for routine cleaning. A soft cloth or sponge can do wonders without scratching the surface. Have you ever noticed how a gentle approach often yields the best results? After cleaning, ensure all parts are reassembled correctly. This includes aligning seals and screwing the head back in place snugly. A misaligned part can lead to leaks, so take your time. It’s the little details that make a big difference. Regular maintenance of your Jolie shower head can transform your daily shower into a refreshing experience. By taking these simple steps, you ensure that your shower head remains in top-notch condition. Have you checked your shower head lately? It’s time to give it some much-needed attention.
Reassembling The Shower Head
Reassembling the Jolie shower head is the final step. The process is straightforward yet essential for optimal performance. Follow these steps carefully to ensure a successful reassembly. This guide helps you understand each part’s role in the shower head.
Aligning The Components
Ensure all parts are clean. Align the inner components correctly. This helps avoid leaks and ensures proper water flow. Take your time to position each piece accurately.
Securing The Nozzle
Place the nozzle back into its spot. Make sure it fits snugly. Tighten it gently, avoiding any damage. This ensures water sprays evenly when the shower is on.
Attaching The Outer Shell
Align the outer shell with the inner components. Carefully fit it over the nozzle. Secure it with screws or clips provided. Check that it is tightly fitted to prevent water escape.
Testing The Assembly
Turn on the water to test the shower head. Check for leaks around the edges. Ensure water sprays evenly. Adjust if necessary, tightening any loose components.
Testing For Functionality
Testing for functionality is crucial after installing the Jolie Shower Head. Ensuring everything works well prevents future issues. In this section, we explore steps to confirm operational efficiency.
Checking Water Flow
Turn on the shower and observe the water flow. Ensure it’s consistent and strong. Weak or uneven flow may indicate an installation issue.
Inspecting Spray Patterns
Look at the spray pattern. It should match the settings you selected. Adjust the shower head if the pattern seems off or irregular.
Listening For Unusual Sounds
Listen for any strange noises like whistling. These sounds can suggest a problem with water pressure or alignment.
Verifying Temperature Control
Test the temperature control. It should respond accurately to your adjustments. Ensure the water heats or cools as expected.
Ensuring Leak-free Installation
Check for leaks around the shower head and connections. A leak can lead to water waste and damage. Tighten any loose fittings if leaks are present.
Frequently Asked Questions
How Do I Remove Jolie Shower Head?
To remove a Jolie shower head, first turn off the water supply. Use a wrench to gently unscrew the shower head from the arm. Ensure you hold the shower head securely to prevent dropping it. If it’s stuck, apply a bit of lubricant to loosen it.
What Tools Are Needed For Opening Jolie Shower Head?
You’ll need a wrench or pliers to open a Jolie shower head. A towel can help protect the finish from scratches. Lubricant might be necessary if the shower head is stuck. These tools will help you safely remove and open the shower head.
Can I Clean Jolie Shower Head Without Removing It?
Yes, you can clean a Jolie shower head without removing it. Mix equal parts vinegar and water in a plastic bag. Secure it around the shower head with a rubber band. Let it soak for a few hours to dissolve mineral deposits, then rinse thoroughly.
Why Is My Jolie Shower Head Leaking?
Leaking in a Jolie shower head might be due to worn-out washers or seals. Check the shower head’s connections for any cracks or damages. Replacing faulty parts or tightening connections can resolve the issue. Regular maintenance can prevent leaks and ensure optimal performance.
Conclusion
Opening a Jolie shower head is simple with the right steps. Follow the guide carefully. Tools are minimal. No need for complex equipment. Remember to turn off the water first. This prevents leaks and mess. Patience is key. Each step matters.
You gain confidence with practice. A well-maintained shower head lasts longer. Clean and open it regularly. Enjoy better water flow and a refreshing shower experience. Simple maintenance enhances functionality. Troubleshooting becomes easier. No more stress with shower repairs. Explore our guide for other home tips.
Keep your Jolie shower head in top shape.

Home Improvement Specialist & Writer at HomeFixio
Caden Rutherford is a seasoned home improvement specialist with extensive hands-on experience in residential construction, renovations, and design. With a keen eye for detail and a passion for transforming spaces, Caden shares practical advice and expert solutions to enhance the functionality and beauty of homes. As a writer for HomeFixio, Caden combines technical knowledge with creative flair, providing readers with informative guides on everything from structural improvements to aesthetic upgrades, empowering homeowners to achieve their ideal living spaces.