How to Carve a Wooden Spoon: Master the Art Effortlessly
Have you ever admired the rustic charm of a handmade wooden spoon and thought, “I wish I could make one of those”? Good news—you can!
Carving a wooden spoon is not just a rewarding hobby; it’s a soothing escape from the hustle and bustle of everyday life. Picture this: the smell of fresh wood, the sound of your carving tool gently scraping away, and the satisfaction of creating something both beautiful and useful with your own hands.
You might think it’s a task for only the most skilled artisans, but with a bit of guidance, you can carve your own wooden spoon, step by step. By the end of this article, you’ll have all the tips and tricks to transform a simple block of wood into your own masterpiece. So, are you ready to unleash your inner craftsman? Let’s get started!
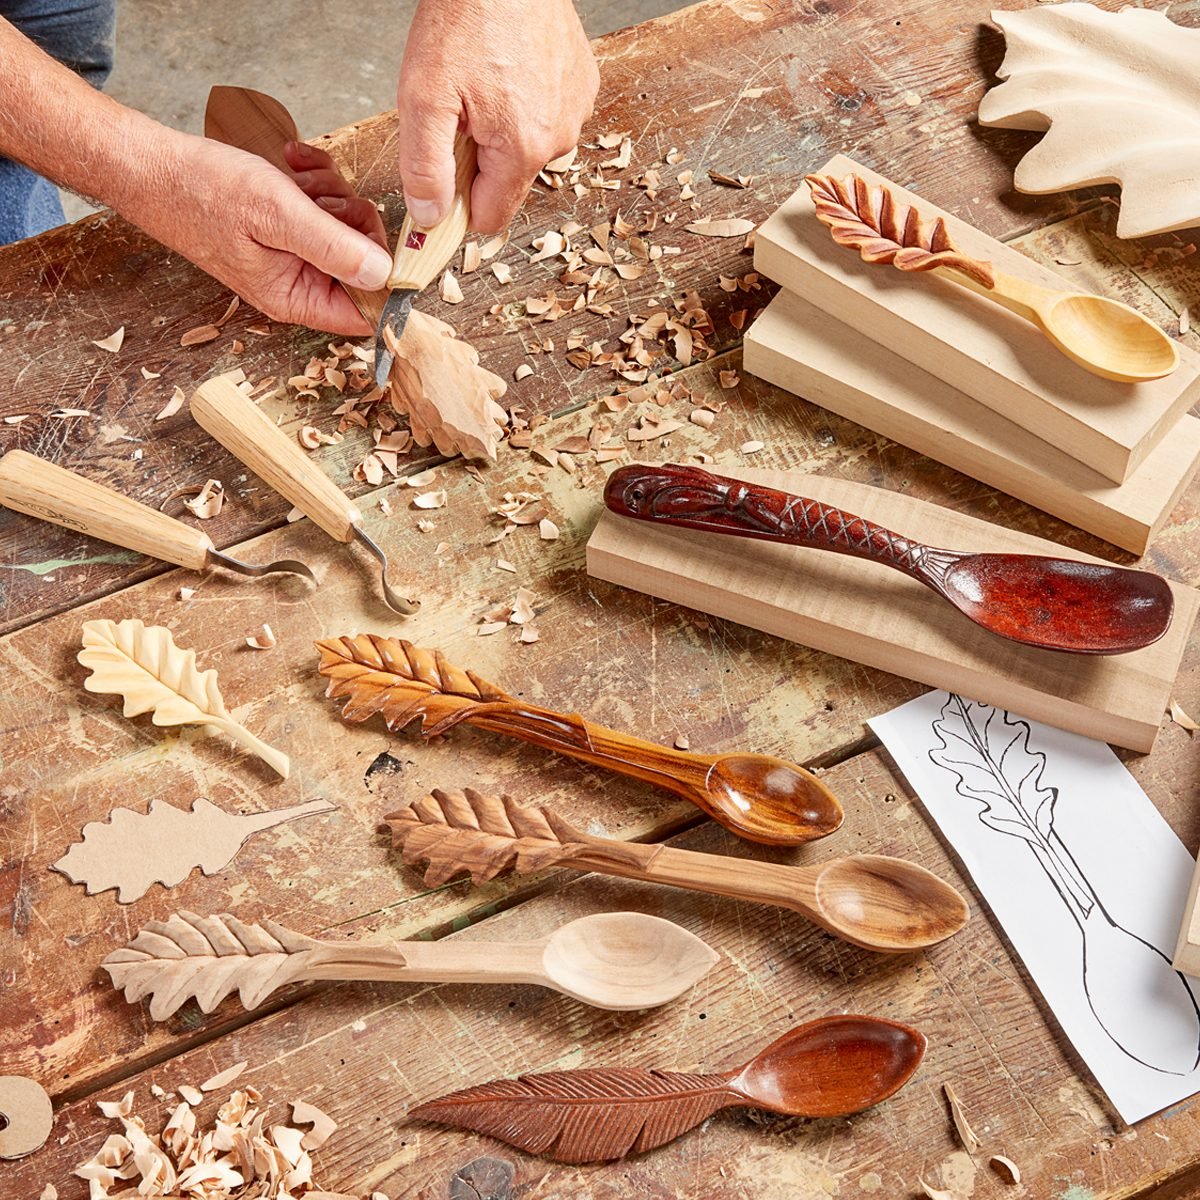
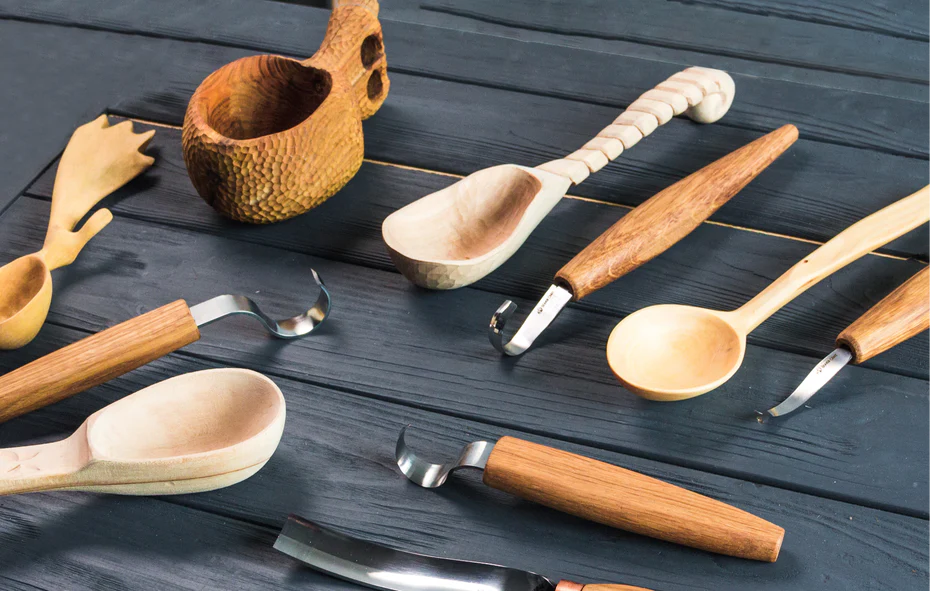
Credit: www.familyhandyman.com
Choosing The Right Wood
Selecting suitable wood is crucial for carving a wooden spoon. Soft woods like basswood or birch are ideal choices. They are easy to carve and shape, making them perfect for beginners. Hard woods can be challenging and may require more effort and skill.
Choosing the right wood is crucial for carving a wooden spoon. The wood affects the spoon’s durability, appearance, and ease of carving. Selecting the right type ensures your spoon will last and look great. It’s important to consider both the wood’s characteristics and how sustainable your choice is.Types Of Wood For Spoon Carving
Hardwoods are popular for spoon carving. They offer strength and beauty. Common choices include cherry, walnut, and maple. Cherry wood is smooth and easy to carve. It has a rich color that deepens over time. Walnut is darker and elegant. It’s sturdy and polishes well. Maple is light and strong. It has a fine grain that makes carving smooth. Each wood type has unique qualities. Choose one that matches your style and skill level.Sustainability And Sourcing
Sustainability matters in wood carving. Responsible sourcing helps protect the environment. Look for wood from certified sustainable forests. This ensures trees are replanted and habitats preserved. Local sources reduce transportation impact. Check for reclaimed wood options. This reduces waste and gives a second life to materials. Ethical choices support both nature and artisanship. Consider these factors when selecting wood for your spoon.Gathering Essential Tools
Carving a wooden spoon is a delightful and rewarding craft. You need the right tools to start this journey. Having essential tools ensures you carve efficiently and safely.
Basic Carving Tools
Begin with a good-quality carving knife. It should be sharp and comfortable. A straight knife is perfect for rough shaping. For intricate details, use a hook knife. It helps create the bowl of the spoon. A gouge is useful for scooping wood. Lastly, sandpaper smooths the spoon’s surface. Choose various grits for best results.
Safety Equipment
Safety is crucial in carving. Always wear safety gloves. They protect your hands from cuts. Choose gloves that fit snugly. Use safety goggles too. They shield your eyes from wood splinters. A sturdy apron keeps your clothes clean. It also adds an extra layer of protection. Always carve in a well-lit area. This helps prevent accidents.
Designing Your Spoon
Crafting a wooden spoon combines creativity and skill. Start by selecting a suitable piece of wood. Use carving tools to shape and smooth the design. Personalize it with unique touches, making it truly yours. Enjoy the satisfying process as your spoon takes form.
Each step adds to its charm.
Designing your wooden spoon is an exciting part of the crafting process. It’s where your creativity meets practicality, allowing you to create a piece that’s both functional and beautiful. Whether you’re envisioning a rustic kitchen tool or an elegant serving piece, the design phase sets the stage for the carving adventure ahead. Let’s dive into the essential elements of spoon design and ensure your creation is both unique and useful.Understanding Spoon Anatomy
To design a spoon, you need to understand its anatomy. Every spoon consists of three main parts: the bowl, the neck, and the handle. The bowl is the part that scoops and holds food. You want it deep enough to be functional but not so deep that it’s hard to carve. The neck connects the bowl to the handle. This area should be smooth and slightly curved for comfort and aesthetics. Finally, the handle is where design flair often shines. Consider how it feels in your hand and whether it complements the bowl and neck.Creating A Template
Creating a template helps turn your vision into reality. It acts as your guide during carving, ensuring consistency and precision. Start by sketching your design on paper. Decide the size and shape based on how you’ll use the spoon. Once satisfied with the sketch, transfer it onto a piece of cardboard. Cut it out and test the template against your wood. Does it look right? Is the bowl size appropriate for your needs? Adjust as necessary, knowing this template will lead your carving efforts. As you design, think about how you’ll use this spoon. Will it be for stirring soups or serving side dishes? Your answers will guide your choices in design, ensuring your spoon is both a joy to carve and a pleasure to use. What special features would make your spoon uniquely yours?Preparing The Wood
Preparing the wood is essential for carving a wooden spoon. This step ensures the spoon is durable and beautiful. Choosing the right wood is vital. Soft woods like pine make carving easier. Hardwoods like cherry offer a smooth finish. Both types have unique qualities.
Cutting The Blank
Start by selecting a piece of wood. The wood should be free from knots. Measure the length and width for the spoon. Use a saw to cut the blank. Make sure the cut is straight. This helps in shaping the spoon evenly.
Marking The Design
Draw the outline of the spoon on the wood. Use a pencil for clarity. Start with the bowl shape. Then draw the handle. Keep the design simple. This makes carving easier. Ensure the lines are visible. Adjust the design if needed. It helps in achieving a perfect spoon.
Carving Techniques
Creating a wooden spoon involves selecting soft wood, sketching the design, and carefully carving with a sharp knife. Smooth edges with sandpaper ensure a comfortable grip and a functional spoon. Patience and attention to detail are key in achieving a beautifully crafted piece.
Carving Techniques are the heart and soul of spoon crafting. They can transform a simple block of wood into a beautiful, functional piece of art. Whether you’re a beginner or have a few projects under your belt, refining your techniques can make all the difference. Imagine the satisfaction of holding a spoon that you’ve shaped with your own hands. Let’s dive into the essential carving techniques that will guide you through this rewarding process.Roughing Out The Shape
Starting with the rough shape is crucial. Begin by sketching your spoon’s outline on the wood block. This gives you a visual guide. Use a saw to cut away excess wood, following the outline closely. A coping saw works well for intricate curves. Remember, it’s all about removing the bulk. The finer details will come later. Don’t worry if it looks crude; refinement is next.Refining The Bowl And Handle
Once the rough shape is ready, shift focus to the bowl and handle. Use a gouge to hollow out the bowl. It’s like scooping out ice cream; be gentle but firm. Refining the handle requires patience. Smooth out the edges with a carving knife. Aim for a comfortable grip. Check the balance between the bowl and handle. Does it feel right in your hand? Adjust until it does. Carving a wooden spoon is a journey. Each cut and curve is a step forward. Are you ready to take the plunge and see where your creativity leads?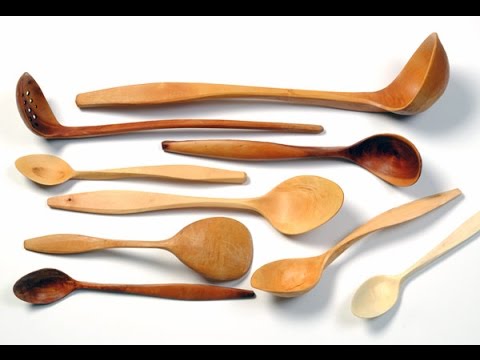
Credit: www.youtube.com
Smoothing And Finishing
Crafting a wooden spoon involves careful smoothing and finishing. Sand the spoon with fine-grit sandpaper. This helps remove rough spots. Finish by applying food-safe oil. This enhances the wood’s natural beauty and protects it from moisture.
Smoothing and finishing your wooden spoon is where the magic happens. This stage transforms your rough carving into a polished piece of art. It requires patience and attention to detail, but the results are incredibly rewarding. Imagine the satisfaction of running your fingers over a smooth, finished spoon that you crafted with your own hands. Are you ready to give your wooden spoon that final touch of perfection?Sanding Techniques
Start with a coarse grit sandpaper, around 80 to 120 grit. This helps remove the rough edges left from carving. Wrap the sandpaper around a small block of wood for better control and even pressure. Move in the direction of the wood grain to avoid scratches. As you progress, switch to a finer grit sandpaper, such as 220 or 320. This smooths out any remaining imperfections and prepares the wood for finishing. Consider wetting the wood slightly between sanding stages. This raises the grain, allowing for a smoother finish after the final sanding. It’s a small step that makes a big difference.Applying Finishes
Choose a finish that suits your spoon’s intended use. Food-safe oils like mineral oil or walnut oil are excellent options. They penetrate the wood, enhancing its natural beauty and providing protection. Apply the oil generously with a clean cloth. Let it soak in for several minutes before wiping off the excess. Repeat this process until you achieve the desired sheen. For a more durable finish, consider a beeswax and oil blend. This combination adds a protective layer while maintaining the spoon’s natural feel. Have you ever used a wax finish? It creates a smooth, buttery surface that feels great in the hand. Remember, the finish isn’t just about appearance; it’s about preserving your hard work. Regular maintenance, like reapplying oil, keeps your spoon in top condition. What finish will you choose to make your spoon truly yours?Decorative Touches
Carving a wooden spoon can be more than just a functional craft. Adding decorative touches makes your spoon unique and showcases your creativity. These details transform a simple spoon into a piece of art. Let’s explore some ways to enhance your wooden spoon.
Adding Carved Details
Start with simple lines or patterns. They add elegance without overwhelming the design. Consider geometric shapes or abstract designs. Use a small chisel for precision. This helps in creating clean and crisp lines. Adding initials or a date personalizes the spoon. It makes for a great gift. Remember, practice makes perfect. So, take your time.
Incorporating Paint Or Stains
Paint can brighten your wooden spoon. Choose non-toxic, food-safe paints. Add color to the handle or the spoon’s back. Use patterns or solid colors. Experiment with shades for a unique look. Stains offer a more subtle touch. They enhance the wood’s natural beauty. Apply evenly for a smooth finish. Let each layer dry before adding more. This ensures a lasting result.
Caring For Your Wooden Spoon
Carving a wooden spoon involves shaping wood with care and precision. Start by selecting a suitable wood type, ensuring it’s easy to carve. Use sharp tools to gradually form the spoon’s bowl and handle, paying attention to smooth finishes. Proper carving techniques enhance durability, allowing for long-lasting use in the kitchen.
Caring for your wooden spoon is essential to ensure its longevity and functionality. After investing time and effort into carving your spoon, maintaining it becomes a rewarding part of your culinary journey. Imagine the satisfaction of using a tool you crafted yourself, knowing that it will serve you well for years. But how do you keep it in tip-top shape? Let’s dive into the simple yet effective ways to care for your wooden spoon.Cleaning And Maintenance
Cleaning your wooden spoon is straightforward yet crucial. Start by rinsing it under warm water immediately after use. This prevents food particles from sticking and staining the wood. Avoid soaking your spoon in water for long periods. Excessive moisture can cause the wood to warp or crack. Instead, gently scrub it with a mild dish soap and a soft sponge. Once cleaned, dry your spoon thoroughly with a towel. Leaving it wet can lead to unpleasant odors or mold. Consider applying a light coat of food-safe mineral oil to keep the wood nourished and prevent drying out.Repairing Damage
Even with the best care, your wooden spoon might encounter occasional damage. Chips or cracks can happen, especially if the wood wasn’t properly dried before carving. Don’t fret if you notice any damage. Sanding down the affected area with fine-grit sandpaper can smooth out small chips or rough patches. This restores the spoon’s functionality and maintains its aesthetic appeal. For deeper cracks, consider using wood glue to bond the split sections. Clamp the spoon gently to ensure a secure fit while the glue dries. If you feel uncertain about repairs, seek advice from experienced woodworkers or online communities dedicated to woodcraft. Have you ever wondered how long your spoon will last? With proper care, your wooden spoon can become a cherished kitchen companion, enduring countless recipes and memories.Common Mistakes To Avoid
Avoid rushing through the carving process; patience ensures precision. Choose the right wood, as softer types are easier to carve. Keep tools sharp and well-maintained to prevent accidents.
Carving a wooden spoon can be a rewarding and creative hobby. Yet, like any craft, it’s easy to make mistakes that can lead to frustration. Understanding these common pitfalls can help you create a beautiful and functional spoon with ease. Let’s dive into some common mistakes to avoid on your spoon-carving journey.Using The Wrong Wood
Choosing the wrong type of wood is a frequent mistake. Softwoods like pine are easier to carve but may not hold up well over time. Opt for hardwoods such as maple or cherry for a durable spoon. They might be more challenging to carve, but they produce a more satisfying result.Ignoring Grain Direction
Carving against the grain can lead to chipping and splitting. Always observe the wood’s grain and carve in the direction it naturally flows. This not only preserves the wood but also makes carving smoother and more enjoyable.Skipping The Design Phase
Jumping straight into carving without a plan can lead to a misshapen spoon. Sketch your design on paper or directly on the wood before you start. This approach saves time and reduces errors. It’s much easier to erase a pencil mark than to fix a carving mistake.Using Dull Tools
Dull tools require more force and increase the risk of injury. Keep your knives and chisels sharp to ensure clean cuts and control. Regularly sharpen your tools and test them on scrap wood to maintain their edge.Over-carving
It’s tempting to keep carving until the spoon is perfect, but this can lead to a spoon that’s too thin or fragile. Know when to stop. Aim for a balanced thickness that feels sturdy yet comfortable in your hand.Neglecting Safety Measures
Carving can be dangerous if you don’t follow safety precautions. Always carve away from your body and wear protective gloves. Consider using a carving clamp to secure the wood and prevent slips. Safety should always be your top priority.Rushing The Finishing Touches
Once your spoon is carved, it’s crucial not to rush through the sanding and finishing process. Take your time to sand it smooth and apply a food-safe finish. This not only enhances the spoon’s appearance but also prolongs its life. Have you made any of these mistakes before? How did you overcome them? Share your experiences in the comments and help others on their carving journey. Remember, every craftsman was once a beginner, and each mistake is a step towards mastery.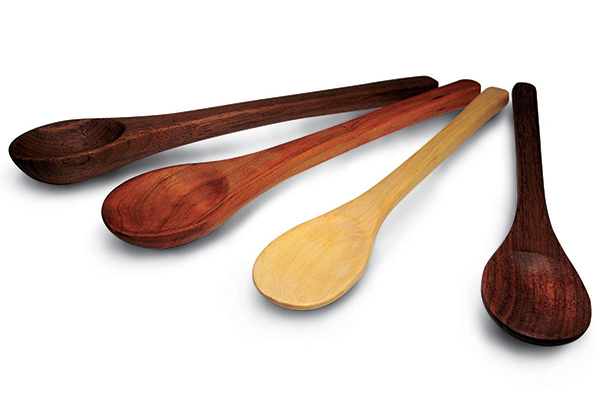
Credit: www.woodworkersjournal.com
Resources For Further Learning
Carving a wooden spoon is a rewarding hobby. It connects you to nature and creativity. Many enthusiasts seek more resources to refine their skills. Learning more can deepen your understanding and improve your techniques. Explore books, online courses, and videos. These resources can guide you through the process.
Books To Enhance Your Skills
Books are excellent for learning about spoon carving. They offer detailed instructions and illustrations. “The Art of Spoon Carving” is a popular choice. It covers tools, techniques, and design ideas. Another useful book is “Carve Your Own Spoon.” It provides step-by-step guidance for beginners. Reading such books can inspire your creativity.
Online Courses For Spoon Carving
Online courses offer interactive learning experiences. They are convenient and flexible. Websites like Craftsy and Udemy have courses on spoon carving. These courses include video tutorials and expert tips. You can learn at your own pace. Engaging with online courses can boost your confidence.
Video Tutorials On Spoon Carving
Video tutorials are visual and easy to follow. YouTube has a wealth of spoon carving videos. Channels like “Woodworking with Womack” offer practical lessons. Watching experts carve can enhance your understanding. You can see real-time techniques and tricks. Video tutorials are perfect for visual learners.
Community Forums And Workshops
Joining forums can connect you with other carvers. Communities like Reddit’s spoon carving group are active. Members share tips, advice, and experiences. Workshops offer hands-on learning with experienced instructors. They provide opportunities to ask questions and practice. Engaging with a community can enrich your learning journey.
Frequently Asked Questions
What Tools Are Needed To Carve A Wooden Spoon?
To carve a wooden spoon, you’ll need a few basic tools. These include a carving knife, a hook knife, and a saw. A gouge or chisel can also be helpful for shaping. Choose sharp, high-quality tools for the best results.
Safety gear, like gloves and goggles, is recommended.
How Do You Select The Right Wood?
Selecting the right wood is crucial for spoon carving. Choose hardwoods like cherry, maple, or walnut for durability. These woods are dense and have fine grains, making them ideal. Avoid softwoods like pine, as they can splinter easily. Ensure the wood is free from knots and cracks.
What Are The Basic Steps To Carve A Spoon?
Start by selecting your wood and drawing your spoon design. Use a saw to cut the rough shape. Carve the handle and bowl with a carving knife and hook knife. Sand the spoon smoothly to remove any rough edges. Finally, finish with food-safe oil for protection.
How Long Does It Take To Carve A Spoon?
Carving a wooden spoon can take anywhere from a few hours to a day. The time depends on your skill level and the complexity of the design. Beginners might take longer as they learn techniques. With practice, the process becomes quicker and more efficient.
Conclusion
Carving a wooden spoon is a simple, rewarding craft. With patience and practice, anyone can shape wood into a useful tool. Remember to choose the right wood. It makes the carving smoother. Keep your tools sharp for cleaner cuts. Take your time with each step.
Enjoy the process and the unique spoon you create. Crafting with wood connects you to nature and tradition. Share your creations with friends and family. Your handmade spoon will be a cherished item in any kitchen. Happy carving!

Home Improvement Expert & Senior Writer at HomeFixio
Eliot Granger is a seasoned home improvement expert with years of experience transforming living spaces. Specializing in everything from kitchen renovations to bathroom upgrades, Eliot shares his knowledge through practical, insightful articles. His passion for creating functional, beautiful homes drives him to offer expert tips and solutions for every corner of your house. As a trusted writer for HomeFixio, Eliot is dedicated to helping homeowners make informed decisions and achieve precision in their projects.


