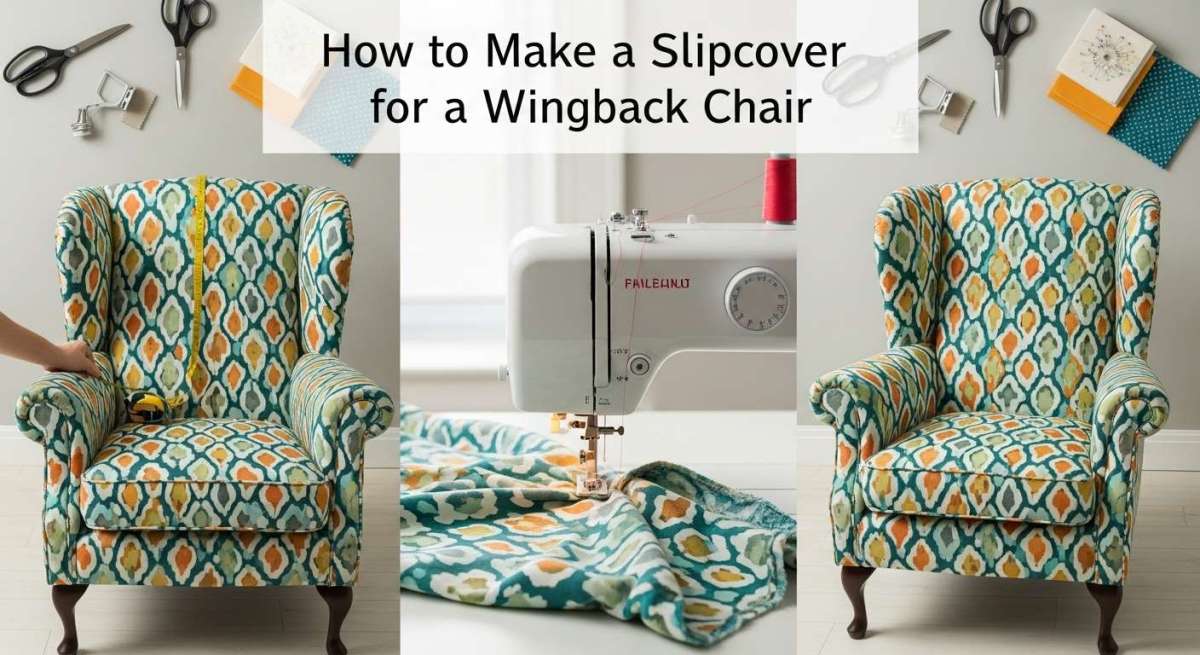
How to Make a Slipcover for a Wingback Chair: DIY Guide
Have you ever looked at your wingback chair and thought it could use a fresh look? Perhaps it’s showing signs of wear, or maybe you just want to change up your decor.
Whatever the reason, making a slipcover for your wingback chair can be an incredibly satisfying and cost-effective solution. Imagine transforming your space without the hassle or expense of buying new furniture. With a little creativity and some basic sewing skills, you can create a custom slipcover that not only protects your chair but also breathes new life into your living room.
This guide will walk you through each step, ensuring that by the end, you’ll have a beautiful slipcover to be proud of. Ready to give your favorite chair a stylish makeover? Let’s dive in!

Credit: www.amazon.com
Materials Needed
Gather fabric, scissors, and pins. A measuring tape and sewing machine are essential. Consider upholstery thread for strength.
Creating a slipcover for a wingback chair can transform its look. It’s a great way to give old furniture a fresh style. Start by gathering all necessary materials. With the right tools, the process becomes easier and more enjoyable.
Fabric Selection
Choose durable fabric for your slipcover. Cotton or polyester blends work well. Consider patterns or solid colors that match your room’s decor.
Measuring Tape
A measuring tape helps accurately measure your chair. You’ll need precise dimensions to cut your fabric correctly.
Sewing Machine
A sewing machine speeds up the process. It’s essential for sewing seams and hems neatly.
Thread
Select thread that matches your fabric color. This ensures your stitches blend seamlessly.
Pins And Needles
Use pins to hold fabric pieces together. Needles are necessary for hand-sewing areas the machine can’t reach.
Scissors
Sharp scissors are crucial for cutting fabric. Ensure they’re suitable for cutting thick materials.
Pattern Paper
Pattern paper helps create templates. This makes cutting fabric pieces easier and more precise.
Marker Or Chalk
Use a marker or chalk to trace patterns. These tools help mark fabric without damaging it.
Elastic Bands Or Velcro
These are useful for securing the slipcover. They ensure a snug fit around the chair. Gathering these materials is the first step. It sets the foundation for creating a beautiful slipcover.
Measuring The Chair
Accurate measurements ensure a perfect fit for your slipcover. Begin by measuring the chair’s height, width, and depth. Note dimensions for the arms, seat, and back separately.
Measuring the chair is the first step in crafting a perfect slipcover for your wingback chair. Accurate measurements ensure a snug fit, capturing the chair’s unique features. This step is crucial to avoid wasted materials and time. You’ll need a flexible tape measure, a notebook, and patience.
Taking Accurate Measurements
Start by measuring the height from the floor to the top of the chair. Write this number down. Measure the width from one armrest to the other. Include the widest part of the chair’s back. Note the depth from the front edge to the back. These measurements form the basic outline of your slipcover. Next, measure the seat’s length and width. These dimensions help to tailor the fit. Don’t forget the chair’s height from the seat to the top. This is essential for creating a tailored back. Use small increments for accuracy. Double-check each number.
Noting Key Features
Wingback chairs often have unique features. Identify the chair’s curves and angles. Note any buttons or tufting on the backrest. Consider the shape of the armrests. These details influence the slipcover’s design. Measure any additional elements like legs or decorative trims. If the chair has a skirt, include its height. Write down any distinctive features that need special attention. A well-fitted slipcover enhances the chair’s beauty. It also adds style to your room.
Choosing Fabric
Selecting the right fabric is key to creating a slipcover for a wingback chair. Opt for durable and washable materials, ensuring they complement your room’s décor. Consider patterns and textures that enhance the chair’s shape and provide comfort.
Choosing the right fabric for your wingback chair slipcover is both an art and a science. It’s the foundation of your project, setting the tone for style and durability. Select wisely, and your slipcover will not only look stunning but will also stand the test of time.
Types Of Fabrics
Your fabric choice impacts both the look and feel of your slipcover. Natural fibers like cotton and linen are breathable and soft, making them perfect for a relaxed vibe. But if your chair is in a high-traffic area, consider synthetic blends for their durability and stain resistance. Think about maintenance. Fabrics like denim and canvas are hard-wearing and can be machine washed, which is a big plus for families with kids or pets. If you’re aiming for elegance, consider velvet or chenille, but be mindful of their upkeep.
Color And Pattern Selection
The color and pattern of your fabric can transform the entire room. Bold patterns like florals or geometrics can turn your chair into a statement piece. Alternatively, solid colors can blend seamlessly with existing decor, offering a timeless appeal. Consider the mood you want to create. Light colors can make a room feel airy and expansive, while darker shades add warmth and coziness. Remember to think about the future; will you love that bright red pattern in a year? Fabric swatches are your best friend. Test them in different lighting and against other elements in the room. This step can save you from costly mistakes and ensure you’re delighted with the final look. What will your fabric choice say about your style?

Credit: www.facebook.com
Creating A Pattern
Creating a pattern for a wingback chair slipcover involves measuring the chair carefully. Use those measurements to cut fabric pieces that fit snugly. Pin and sew the pieces together, ensuring they follow the chair’s shape.
Creating a Pattern Embarking on the journey of making a slipcover for your wingback chair begins with creating a pattern. This step is crucial as it forms the blueprint for your fabric masterpiece. Whether you’re a seasoned DIYer or trying this for the first time, understanding the pattern-making process is key to ensuring a snug and stylish fit.
Drafting The Slipcover Pattern
Begin by gathering your materials: a roll of craft paper, scissors, tape, and a pencil. Craft paper provides a sturdy base for tracing the contours of your chair. Start by laying the paper over different sections of your chair, such as the arms, back, and seat. Trace each section carefully, allowing some extra inches around the edges for seams and adjustments. Label each piece as you go. This step saves time and confusion later. Imagine trying to piece together a puzzle without knowing which piece goes where!
Adjusting For Fit
Once you’ve drafted your pattern, it’s time to refine it for a perfect fit. Adjustments are crucial, as they ensure the slipcover hugs the chair snugly without wrinkles or sags. Pin the paper pattern pieces onto your chair to check how they fit. If there are areas that seem too tight or too loose, mark these spots and adjust your pattern accordingly. Consider how the slipcover will be used. Will it need to withstand regular use, or is it for occasional decoration? This will influence how snugly it should fit and the type of fabric you might choose. Remember, the goal is a slipcover that looks tailor-made. Taking the time to adjust and refine your pattern now will save you frustration later on.
Cutting The Fabric
Begin by laying your fabric on a flat surface. Carefully measure and mark the fabric for accurate cuts. Use sharp scissors to ensure clean edges, which are crucial for a neat slipcover fit.
Cutting the fabric for a slipcover is a crucial step. It sets the foundation for a well-fitted cover. Proper cutting ensures the fabric fits the chair snugly. Pay attention to details for a perfect finish.
Laying Out The Pattern
Begin by placing the fabric on a flat surface. Ensure it’s wrinkle-free. Use the wingback chair as a guide. Lay the fabric around it to measure. Mark the fabric with chalk or pins. This will guide your cutting lines. Consider the fabric’s pattern direction. Align it properly for a seamless look.
Cutting Techniques
Use sharp fabric scissors for precision. Start by cutting larger pieces first. This prevents fabric waste. Follow the marked lines carefully. Cut slowly to avoid mistakes. For curves, cut in small sections. This ensures smoother edges. Keep the scissors steady while cutting. Maintain a firm grip for straight lines.

Credit: www.amazon.com
Sewing The Slipcover
Sewing a slipcover for a wingback chair involves careful measuring and cutting. Choose durable fabric that complements your decor. Stitch pieces together, ensuring snug fits around curves and edges for a polished look.
Sewing the slipcover for your wingback chair can be a rewarding endeavor, allowing you to add a personal touch to your furniture. This process involves carefully stitching together the fabric pieces, creating a custom-fit cover that renews the chair’s appearance. Whether you’re an experienced sewer or a beginner, diving into this project can be both a creative outlet and a practical solution for refreshing your home decor.
Stitching Basics
Before you begin, ensure you have the right tools at hand. A good quality sewing machine, sharp scissors, and matching thread are essential. Remember, patience is key. Start by sewing the seams of each fabric piece with a straight stitch. Take your time to ensure each line is even and straight. Consider using pins to hold the fabric in place as you stitch. This helps prevent the fabric from shifting, ensuring precise and neat seams. You might find it helpful to practice on scrap fabric first, allowing you to perfect your technique without worry.
Joining Sections
Once you’ve mastered the basic stitches, it’s time to join the sections. Begin by laying out all your pieces to visualize how they will come together. This step is crucial for ensuring you don’t accidentally sew the wrong pieces together. Pin the sections that need joining, aligning the edges carefully. Sew these together using a sturdy backstitch at the start and end of each seam to prevent unraveling. This reinforces the seams, ensuring your slipcover is durable and long-lasting. Have you ever noticed how a simple change can transform a space? By creating your own slipcover, you’re doing just that—adding a fresh new look to your wingback chair with your personal touch.
Fitting The Slipcover
Tailor the slipcover to fit snugly over the wingback chair. Ensure the fabric stretches smoothly across the back and arms. Secure the cover tightly around edges to prevent shifting.
Fitting the slipcover onto your wingback chair can feel like the moment of truth. You’ve measured, cut, and sewn with precision, but now it’s time to see if everything aligns as planned. It’s the stage where your hard work comes together, and you get to see the transformation of your chair. You’ll need a keen eye and a few tricks to ensure the slipcover fits snugly and looks professionally tailored.
Testing The Fit
Begin by draping the slipcover over the chair. Ensure that the seams align with the edges of the chair for a crisp, tailored look. Adjust and tuck the fabric around the arms and back, smoothing out any wrinkles. This is your first chance to see if the measurements hold up. If you find that some areas are too tight or too loose, don’t worry. Testing the fit gives you a great opportunity to identify where adjustments are needed.
Making Adjustments
Start by identifying the areas that need tweaking. Is the slipcover bunching around the arms? Or perhaps it’s too loose at the back? Use pins to mark areas that require tightening or loosening. This will guide you during the sewing adjustments. Consider using Velcro strips or ties for areas that need more flexibility. They can offer a custom fit that adapts to the shape of your chair. Does your slipcover look like it belongs in a showroom, or does it need a bit more attention?
Adding Finishing Touches
Secure the fabric neatly around the chair for a polished look. Tuck in loose edges and straighten seams. Ensure the slipcover fits snugly and complements the chair’s style.
Adding the final touches to your slipcover makes a big difference. These details elevate the look from simple to stunning. Focus on hems and seams, and decorative details. Each aspect plays a vital role in the finished product.
Hems And Seams
Start by securing the hems. They give the slipcover a neat finish. Use a straight stitch for a clean look. Consider using a double hem for extra durability. It helps the fabric last longer. Pay attention to the seams too. Ensure they align perfectly with the chair’s lines. This creates a tailored appearance. Press the seams flat with an iron. This step ensures a crisp look.
Decorative Details
Decorative details add personality to your slipcover. Think about adding piping around the edges. It gives a professional touch. Choose a contrasting color for a bold statement. You can also add buttons or ties. These details enhance functionality and aesthetics. Consider using fabric with patterns. Stripes or florals add visual interest. Ensure the pattern aligns at the seams. This attention to detail creates a cohesive look.
Care And Maintenance
Regular cleaning and gentle handling ensure your slipcover stays fresh and durable. Wash with mild detergent and avoid bleach. Air-drying keeps the fabric in good condition.
Making a slipcover for a wingback chair is a creative project that not only refreshes your furniture but also protects it from everyday wear and tear. To ensure your slipcover remains in pristine condition, regular care and maintenance are crucial. By dedicating a little time and effort, you can prolong the life of your slipcover and keep it looking as good as new. Here are some practical tips on how to care for your slipcover.
Cleaning Tips
Regular cleaning is essential to maintain the appearance of your slipcover. Always check the fabric label for washing instructions before you begin. Most slipcovers can be machine washed on a gentle cycle with mild detergent. If your slipcover is not machine washable, spot cleaning can be effective. Gently dab the stained area with a clean cloth and a solution of water and mild soap. Avoid scrubbing, as it may damage the fabric. For a deeper clean, consider dry cleaning if the fabric allows. This is particularly useful for delicate or brightly colored fabrics that might bleed. Remember to vacuum your slipcover regularly to remove dust and dirt, which can lead to wear over time.
Repairing Wear And Tear
Over time, even the most well-maintained slipcover may show signs of wear and tear. Address small issues promptly to prevent them from becoming larger problems. For small tears, a needle and thread can work wonders. Choose a thread that matches your slipcover and carefully stitch the tear from the inside to keep the repair invisible. If a seam starts to come apart, reinforce it by stitching over the existing seam with a matching thread. This quick fix can extend the life of your slipcover significantly. Buttons and zippers may also need occasional attention. Replace missing buttons or repair broken zippers to ensure your slipcover stays securely in place. By keeping an eye on these small details, you can maintain the functionality and appearance of your slipcover for years to come.
Frequently Asked Questions
How Do I Measure For A Slipcover?
To measure for a slipcover, start by measuring the chair’s height, width, and depth. Measure armrests and back, too. Ensure to account for any unique design elements. Accurate measurements are crucial for a well-fitting slipcover. Always double-check your measurements to prevent any fitting issues.
What Materials Work Best For Slipcovers?
Cotton, linen, and polyester are popular slipcover materials. Cotton is breathable and comfortable, while linen offers elegance and durability. Polyester is affordable and easy to clean. Choose a fabric that suits your chair’s style and intended use. Consider the ease of maintenance and desired look.
Can I Make A Slipcover Without Sewing?
Yes, you can make a slipcover without sewing using fabric glue or velcro. These alternatives allow quick adjustments and easy fitting. Use fabric glue for a permanent solution or velcro for removable options. Follow instructions carefully to ensure a neat and secure finish.
How Do I Choose Slipcover Color?
Choose a slipcover color that complements your room’s decor. Neutral colors are versatile and timeless. Bold colors can add a striking focal point. Consider the existing color scheme and lighting conditions. Test fabric samples in different lighting before making a decision.
Conclusion
Creating a slipcover for your wingback chair is a rewarding task. It refreshes the look of your furniture with a personal touch. You can save money and customize the design to match your space. The process involves measuring, cutting, and sewing.
Each step is straightforward when taken slowly. A slipcover adds comfort and style, making your chair inviting. Don’t rush, enjoy the creative journey. By following the steps, your wingback chair will look stunning with its new cover. Ready to start crafting?
Your beautiful slipcover awaits.

Home Improvement Expert & Senior Writer at HomeFixio
Reed Atwood is a seasoned home improvement expert with a passion for transforming everyday living spaces into functional and stylish havens. With years of experience in DIY projects, renovations, and home upgrades, Reed brings a wealth of knowledge to HomeFixio. As a senior writer, he provides readers with practical, easy-to-follow guides, expert tips, and innovative solutions for every room in the house. His goal is to empower homeowners to tackle their projects with confidence, ensuring both quality results and a rewarding experience.