How Do You Remove a Bathroom Vanity: Step-by-Step Guide
Are you planning to give your bathroom a fresh new look? Removing an old bathroom vanity might seem like a daunting task, but it’s a lot simpler than you might think.
Imagine the satisfaction of transforming your space all by yourself, without the need to hire costly professionals. Not only can you save money, but you can also tailor your bathroom exactly to your liking. By the end of this article, you will feel empowered with the knowledge and confidence to tackle this project head-on.
Dive in to discover the step-by-step process that will make removing your bathroom vanity a breeze. Your perfect bathroom is just a few simple steps away!
:max_bytes(150000):strip_icc()/7_remove-vanity-top-56a4a26d3df78cf772835b2d.jpg)
Credit: www.thespruce.com
Preparation And Tools
Preparation is crucial before removing a bathroom vanity. Knowing the right tools and precautions is key. This makes the task safer and more efficient. With proper planning, the process becomes simpler.
Gather Necessary Tools
Start by collecting the essential tools. A screwdriver is needed for removing screws. Pliers help with water connections. A wrench can loosen bolts. Use a utility knife for caulking. A bucket is useful for catching water. Keep a towel handy for drying surfaces.
Safety Precautions
Safety is vital during any home project. First, turn off the water supply. This prevents leaks and flooding. Disconnect power sources if there are any. Wear gloves to protect your hands. Safety goggles shield your eyes from debris. Clear the area of obstacles. This reduces the risk of tripping. Ensure good lighting in the workspace.
Shutting Off Water Supply
Removing a bathroom vanity can seem daunting. The first step is crucial: shutting off the water supply. This step ensures no flooding or water damage occurs. It’s straightforward but requires attention to detail. Let’s dive into the steps to safely shut off the water supply.
Locate Water Valves
Begin by finding the water valves. They are usually under the sink. Look for two valves, one for hot water, one for cold. Turn both valves clockwise to shut them off. This stops water from flowing to the faucet. If your valves are stuck, use a wrench carefully. Do not apply too much force, as this could cause damage.
Drain Remaining Water
After shutting off the valves, water may remain in the pipes. Turn on the faucet to drain this leftover water. Let it run until no more water comes out. This step prevents spills during vanity removal. Have a small container ready to catch any drips.
Double-check the valves to ensure they’re tightly shut. This guarantees no water escapes during the next steps. With the water supply off, you’re ready to proceed with the vanity removal.
Disconnecting Plumbing
Removing a bathroom vanity starts with disconnecting plumbing. This step is crucial to avoid any water damage. It also ensures a smooth removal process. Before starting, gather the necessary tools. You might need a wrench, pliers, and a bucket. Remember to turn off the water supply. This prevents leaks and keeps your workspace dry.
Remove Water Supply Lines
Start by locating the water supply lines. They are usually found beneath the sink. Use a wrench to loosen the nuts holding the lines. Carefully unscrew them from the faucet. Have a bucket ready to catch any water. Sometimes, water may still be in the lines. Once detached, set the lines aside safely. Ensure no water drips from the connections.
Detach Drain Pipe
Now, focus on the drain pipe. First, locate the P-trap under the sink. This is the curved section of the pipe. Use pliers to loosen the slip nuts. Twist them counterclockwise to release the pipe. Gently pull the pipe away from the sink. Check for any remaining water. Use a towel to wipe any spills. Store the pipe in a safe place for later use.
Credit: m.youtube.com
Removing Vanity Top
Removing a bathroom vanity top involves disconnecting plumbing and loosening screws securing the countertop. Carefully lift and remove the top, ensuring no damage to surrounding fixtures. Proper tools and safety precautions are essential for a smooth removal process.
Removing a bathroom vanity top can seem daunting, but with the right steps, it’s manageable. Whether you’re renovating your bathroom or replacing an old countertop, knowing how to remove the vanity top safely is crucial. You’ll want to ensure a smooth transition without damaging any surrounding materials or fixtures. Plus, isn’t it exciting to think about the fresh look your bathroom will have once the new vanity is installed?Loosen Adhesive
Start by inspecting the edges of the vanity top. Most countertops are secured using adhesive or caulk, which can be stubborn to remove. A putty knife is your best friend here. Carefully insert it between the countertop and the vanity base to break the seal. If you find resistance, try applying a bit of heat using a hairdryer to soften the adhesive. This trick can make the process easier without exerting too much force. Remember, patience is key—rushing can lead to damage.Lift Off Countertop
Once the adhesive is loosened, it’s time to lift off the countertop. Depending on its size and weight, you might need a second pair of hands. Grasp each side of the top and gently lift it away from the vanity base. It’s an ideal moment to reflect on how simple actions can lead to significant changes in your home. Have you ever noticed how much satisfaction you get from tackling a DIY project yourself? Place the countertop in a safe area where it won’t be scratched or broken. This way, you can repurpose or recycle it later if it’s still in good condition. What’s your plan for the old countertop?Detaching Vanity From Wall
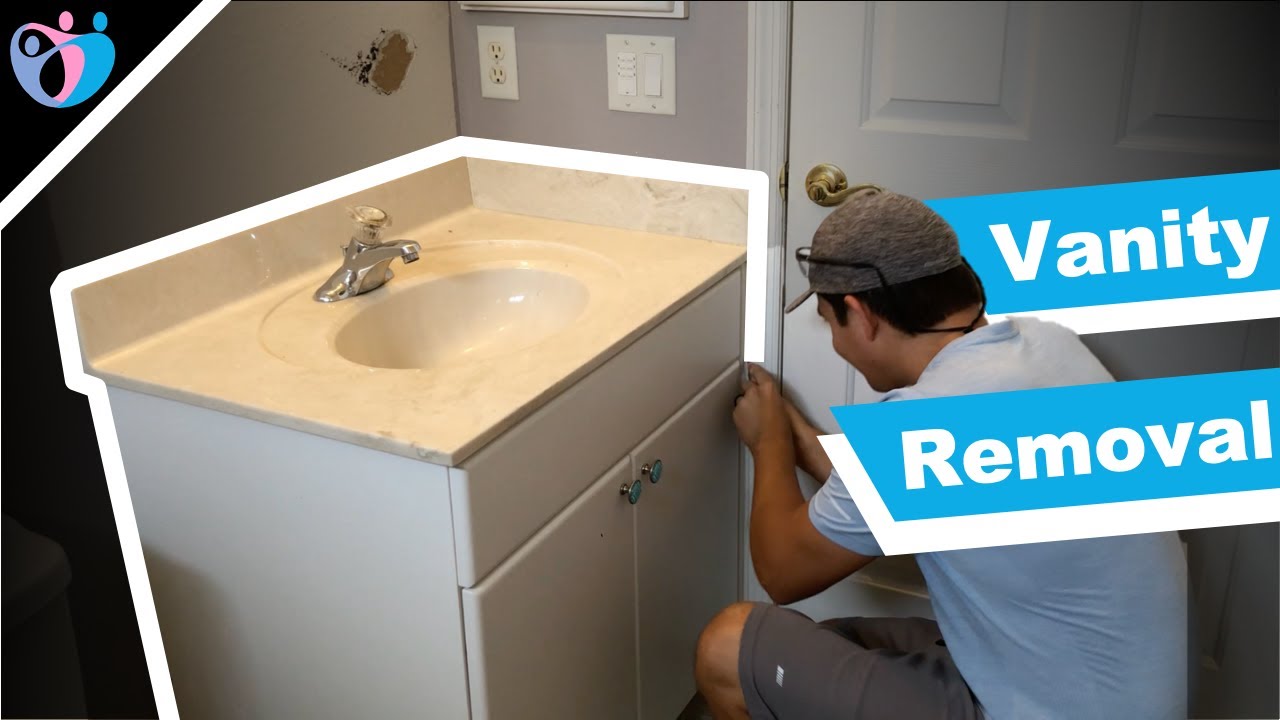
Removing a bathroom vanity involves several steps, but detaching it from the wall is crucial. This process requires careful attention to ensure no damage to the surrounding area. Whether you’re replacing or simply removing it, knowing how to safely detach it is essential.
Unscrew Mounting Brackets
Locate the mounting brackets that secure the vanity to the wall. These brackets are usually found underneath the countertop or at the back of the vanity. Using a screwdriver, gently unscrew each bracket. Make sure to keep the screws in a safe place for future use. This step loosens the vanity from the wall, making it easier to remove.
Check For Hidden Fasteners
Hidden fasteners might be securing the vanity to the wall. Look around the edges and underside for any additional screws or nails. Sometimes, fasteners are concealed behind caulking or paint. Carefully remove any caulking to expose them. Use a flashlight to inspect any dark areas where fasteners might be hiding. Once identified, unscrew or remove these fasteners to ensure the vanity is completely detached.
Lifting And Moving Vanity
Removing a bathroom vanity involves more than just unscrewing bolts. Lifting and moving the vanity requires care. This prevents damage to the vanity and your home. It can also help avoid personal injury. Proper technique ensures a smooth removal process. Below are key steps for lifting and moving your bathroom vanity safely.
Secure Assistance If Needed
Some vanities are heavy and awkward to move alone. Consider having a helper. They can provide the extra muscle you need. This reduces the risk of accidents. A friend or family member can make the job easier. Ensure they understand the task at hand.
Transport Safely
Use furniture sliders or a dolly for easy movement. These tools help move the vanity without scratching floors. Keep your path clear of obstacles. This prevents tripping and damage. Always lift with your legs, not your back. This prevents injury and ensures safety.
Cleaning And Preparing Space
Start by turning off water supply and disconnecting plumbing fixtures. Carefully loosen screws and detach the vanity from the wall. Lift and remove the vanity, ensuring you clear the area for a new installation.
When removing a bathroom vanity, cleaning and preparing the space is a crucial step. This stage ensures that your new vanity installation will go smoothly and helps you avoid unexpected issues. Plus, a clean space is easier and more pleasant to work in. Picture yourself working in a dust-free, organized area, and how much more efficient and enjoyable that can make the process.Inspect For Damage
Start by closely examining the area where the vanity used to be. Look for any signs of water damage, mold, or structural issues. These problems need to be addressed before you install anything new. Check the plumbing connections. Are there any leaks or corrosion? Ensure everything is in good condition to prevent future problems. Use this opportunity to repair any holes or cracks in the wall. A smooth, solid surface will make the new vanity installation more secure.Prepare For New Installation
Begin by thoroughly cleaning the entire area. Remove any dust, debris, or adhesive residues left behind. This ensures that the new vanity will fit properly and adhere securely. Consider painting the exposed wall areas if needed. This freshens up the look and protects the wall. Measure the space accurately for your new vanity. Double-check your dimensions to avoid any surprises during installation. Do you have all the tools and materials needed for the new vanity? Gather everything in advance to streamline the process. This is a great moment to upgrade any outdated fixtures or plumbing if needed. Small changes can make a big difference in functionality and style. Remember, a well-prepared space sets the foundation for a hassle-free vanity installation. Have you encountered any unexpected challenges while preparing your space? Sharing your experiences and solutions could be helpful to others facing similar tasks.
Credit: m.youtube.com
Frequently Asked Questions
How Do You Disconnect Plumbing From Vanity?
Begin by shutting off water supply valves beneath the sink. Use a wrench to disconnect water lines. Remove the drain pipe and trap using pliers. Ensure you have a bucket handy for any water spills. Follow safety measures during the disconnection process to prevent leaks or damage.
What Tools Are Needed For Vanity Removal?
You’ll need a wrench, screwdriver, pliers, and utility knife. A bucket is essential for catching water spills. Prepare safety gear like gloves and goggles. These tools will help you efficiently remove the vanity without causing damage to the surrounding area.
Can I Remove Vanity Without Professional Help?
Yes, you can remove a vanity yourself with the right tools and preparation. Follow step-by-step instructions for safety. Ensure all plumbing is disconnected before removal. With patience and care, DIY removal can be a straightforward task.
How Do You Detach Vanity From The Wall?
Locate and remove screws or brackets securing the vanity to the wall. Use a screwdriver for this task. Carefully pull the vanity away from the wall. Ensure all plumbing connections are detached beforehand. Handle the vanity with care to avoid damage during removal.
Conclusion
Removing a bathroom vanity can be straightforward with the right steps. First, gather necessary tools. Next, turn off the water supply. Disconnect plumbing carefully. Unscrew the vanity from the wall. Lift it away with caution. Always ensure safety throughout the process.
A bit of patience makes the task easier. You might even enjoy the DIY experience. Once complete, consider your bathroom’s new look. Maybe a fresh design or updated space. Enjoy the satisfaction of doing it yourself. Remember, each step is important.
Now, you’re ready for your next home project. Happy renovating!

Home Improvement Specialist & Writer at HomeFixio
Caden Rutherford is a seasoned home improvement specialist with extensive hands-on experience in residential construction, renovations, and design. With a keen eye for detail and a passion for transforming spaces, Caden shares practical advice and expert solutions to enhance the functionality and beauty of homes. As a writer for HomeFixio, Caden combines technical knowledge with creative flair, providing readers with informative guides on everything from structural improvements to aesthetic upgrades, empowering homeowners to achieve their ideal living spaces.