How to Repaint a Bathroom Vanity: Step-by-Step Guide
Are you tired of looking at your worn-out bathroom vanity every morning? That faded, chipped paint can make your entire bathroom feel outdated and dull.
But don’t worry—transforming your vanity doesn’t require a complete renovation. You can breathe new life into your bathroom with just a fresh coat of paint. Imagine walking into a space that feels fresh and vibrant, reflecting your personal style. Whether you’re aiming for a chic modern look or a cozy rustic feel, repainting your bathroom vanity is a budget-friendly way to make a big impact.
Curious about how to get started? Stick around, and you’ll discover the simple steps to revitalize your space, leaving you with a bathroom you’ll love to show off.
Preparation And Planning
Planning is key when repainting a bathroom vanity. Start by gathering supplies like paint, brushes, and sandpaper. Measure and tape off areas to ensure clean edges.
Transforming your bathroom vanity with a fresh coat of paint can breathe new life into your space. However, before you grab your brush, it’s essential to prepare and plan meticulously. This phase is pivotal in ensuring your finished project looks professional and lasts for years. Let’s dive into the nitty-gritty of preparation and planning, making sure you have everything in place for a stunning makeover.Assessing The Vanity Condition
Before you start, take a closer look at your vanity. Is it showing signs of wear like chips or peeling? These imperfections need attention before painting. Sanding can smooth out rough edges, while wood filler can repair deeper gouges. Also, think about the material of your vanity. Is it wood, laminate, or metal? Each requires a slightly different approach. Wood tends to absorb paint well but may need a primer first. Laminate and metal need a special type of paint that adheres properly. Remember, the better the prep work, the better the outcome. A thorough assessment can save you from headaches down the road.Choosing The Right Paint
Paint selection is crucial. The wrong choice can lead to peeling or fading. Go for a paint specifically designed for bathrooms, as it handles moisture better. Consider the finish too. Semi-gloss is a popular choice for vanities due to its durability and ease of cleaning. If you’re feeling adventurous, explore bold colors to add personality to your space. Have you ever picked a paint color that looked perfect in the store but not so much at home? Test a small patch first to see how it looks in different lighting. This step can prevent costly mistakes and ensure you love the final color. Preparation and planning aren’t just about gathering materials. It’s about setting yourself up for success. What steps will you take to ensure your vanity looks its best?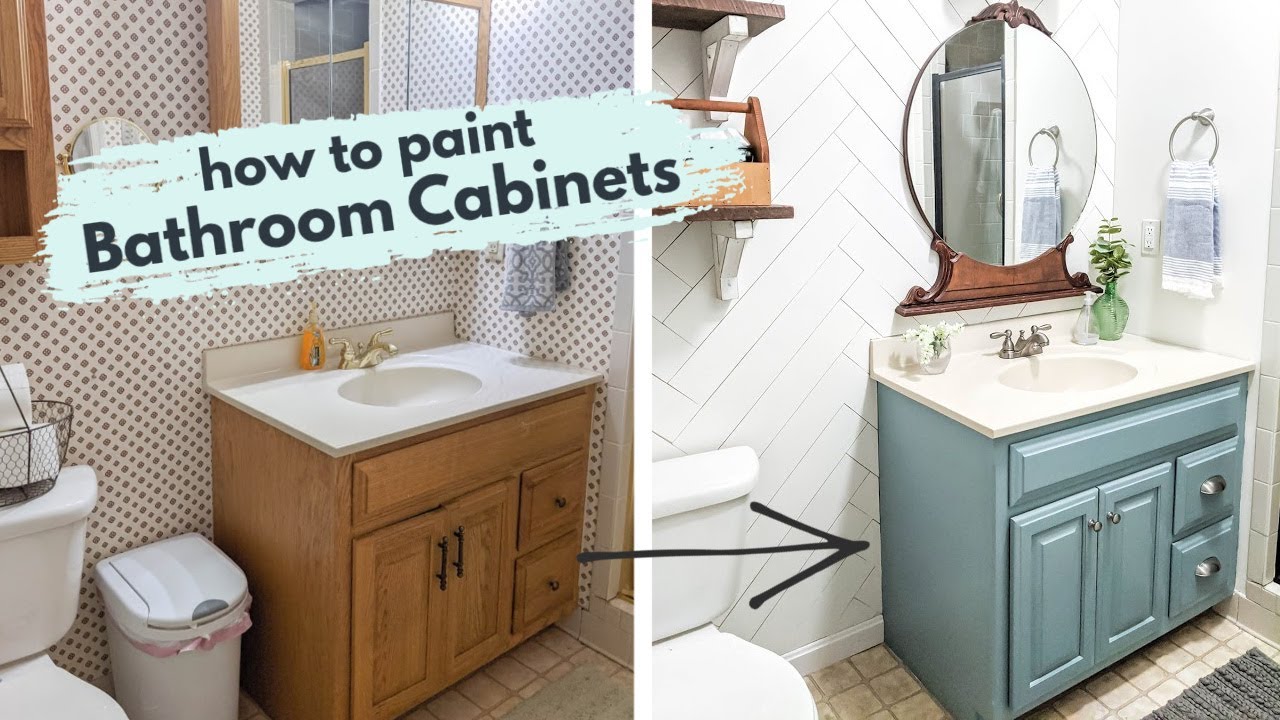
Credit: www.youtube.com
Gathering Necessary Supplies
Gather paint, brushes, sandpaper, and primer. Ensure you have a drop cloth to protect the floor. A screwdriver and cleaner are essential for prepping the surface.
Gathering the right supplies before starting your bathroom vanity repainting project can make the entire process smoother and more enjoyable. Imagine not having to pause mid-project because you forgot a crucial item. The right tools and safety gear ensure not only a polished finish but also a safe working environment. Have you ever started a DIY project only to realize halfway through that you’re missing something essential? Let’s avoid that.Tools And Materials Checklist
Creating a complete list of tools and materials is your first step. You will need sandpaper in varying grits to smooth out the surface of your vanity. A quality primer is essential for ensuring the paint adheres well to the surface. You’ll also need your chosen paint, preferably a durable type suited for high-moisture environments like a bathroom. Gathering a few paintbrushes and a roller can make application easier, especially for those hard-to-reach corners. A drop cloth is essential to protect your floors, and painter’s tape will help you achieve clean edges. Consider using a small screwdriver to remove any hardware, such as knobs or handles.Safety Gear Requirements
Safety should never be an afterthought. Always wear safety goggles to protect your eyes from dust and paint splatters. A mask or respirator is vital to prevent inhaling harmful fumes and dust particles. Have you thought about how important good ventilation is when working with paint? Wear gloves to protect your skin, especially if you have sensitive skin or allergies. It may seem simple, but wearing old clothes or a protective apron can save your favorite outfit from accidental paint spills. Taking these precautions not only protects you but also enhances your DIY experience. Now that you’re equipped with this knowledge, are you ready to transform your bathroom vanity into a stunning masterpiece?Removing Hardware And Fixtures
Refreshing the look of your bathroom vanity starts with removing hardware and fixtures. This step is crucial for a smooth repainting process. Begin by detaching all handles, knobs, doors, and drawers. Proper removal prevents paint smudges and ensures a neat finish.
Detaching Handles And Knobs
First, grab a screwdriver to loosen screws on handles and knobs. Turn screws counterclockwise for easy removal. Place all screws and hardware in a labeled bag. This keeps everything organized for reinstallation later. Check handles and knobs for any wear or damage. Consider replacing them if necessary for a fresh look.
Taking Off Doors And Drawers
Open each drawer and door fully. Locate hinges and use a screwdriver to remove screws. Lift doors carefully to avoid scratching the surface. Pull out drawers smoothly, ensuring no parts are left behind. Keep each door and drawer in a safe spot, away from the painting area. This prevents accidental damage during the repainting process.
Surface Cleaning And Sanding
Preparing a bathroom vanity for repainting involves careful surface cleaning and sanding. First, remove dirt and grime with a gentle cleaner. Next, sand the surface to ensure paint adheres properly.
Repainting your bathroom vanity can be a rewarding DIY project that transforms your space without breaking the bank. The key to a flawless finish lies in the preparation, specifically surface cleaning and sanding. These steps are crucial as they set the stage for a smooth, long-lasting coat of paint. Whether you’re tackling this task for the first time or you’re a seasoned DIYer, understanding the nuances of cleaning and sanding will make all the difference. Ready to roll up your sleeves and dive in?Cleaning Techniques
Start with a thorough cleaning of your vanity’s surface. Dust, grime, and old residue can compromise your paint job if not removed properly. Use a mild detergent mixed with warm water for effective cleaning. Scrub gently with a soft sponge to avoid damaging the wood. Pay special attention to corners and crevices where dirt tends to accumulate. Once cleaned, rinse with clean water and dry with a lint-free cloth. Have you ever tried cleaning with vinegar? It’s a surprisingly effective solution for stubborn stains. Just mix equal parts vinegar and water and use it as a natural cleaner.Sanding For Smoothness
Once your vanity is clean, it’s time to sand. Sanding helps create a smooth surface that paint can adhere to. Use medium-grit sandpaper to remove the existing finish or any rough patches. Sand in the direction of the wood grain to avoid scratches. After sanding, wipe away the dust with a damp cloth. You wouldn’t want dust particles ruining your fresh coat of paint, would you? Consider using a sanding block for better control and even pressure distribution. Have you ever felt the difference a smooth surface makes when painting? It’s remarkable how much smoother the paint goes on. As you sand, think about your desired finish—do you want a sleek modern look or a rustic charm? The choice of sandpaper grit can influence the final result.Priming The Vanity
Transform your bathroom with a fresh coat of paint on the vanity. Start by sanding and cleaning the surface. Apply primer to ensure a smooth finish, then paint with your chosen color. Enjoy a refreshed look!
Priming the vanity is crucial for a smooth finish. It prepares the surface for paint, ensuring durability. Without primer, paint may peel or chip. Proper priming leads to a professional look.Selecting The Right Primer
Choosing the right primer is vital. It creates a strong base for paint. Oil-based primers are great for wood surfaces. They seal the wood and prevent stains. Acrylic primers are perfect for laminate and other materials. They dry fast and are easy to clean.Application Tips
Start with a clean surface. Remove dust and grease. Use a brush for corners and edges. Rollers are best for large areas. Apply a thin, even coat of primer. Let it dry completely before painting. Check the primer instructions for drying time. Sand lightly between coats for a smooth finish.
Credit: lizpacini.com
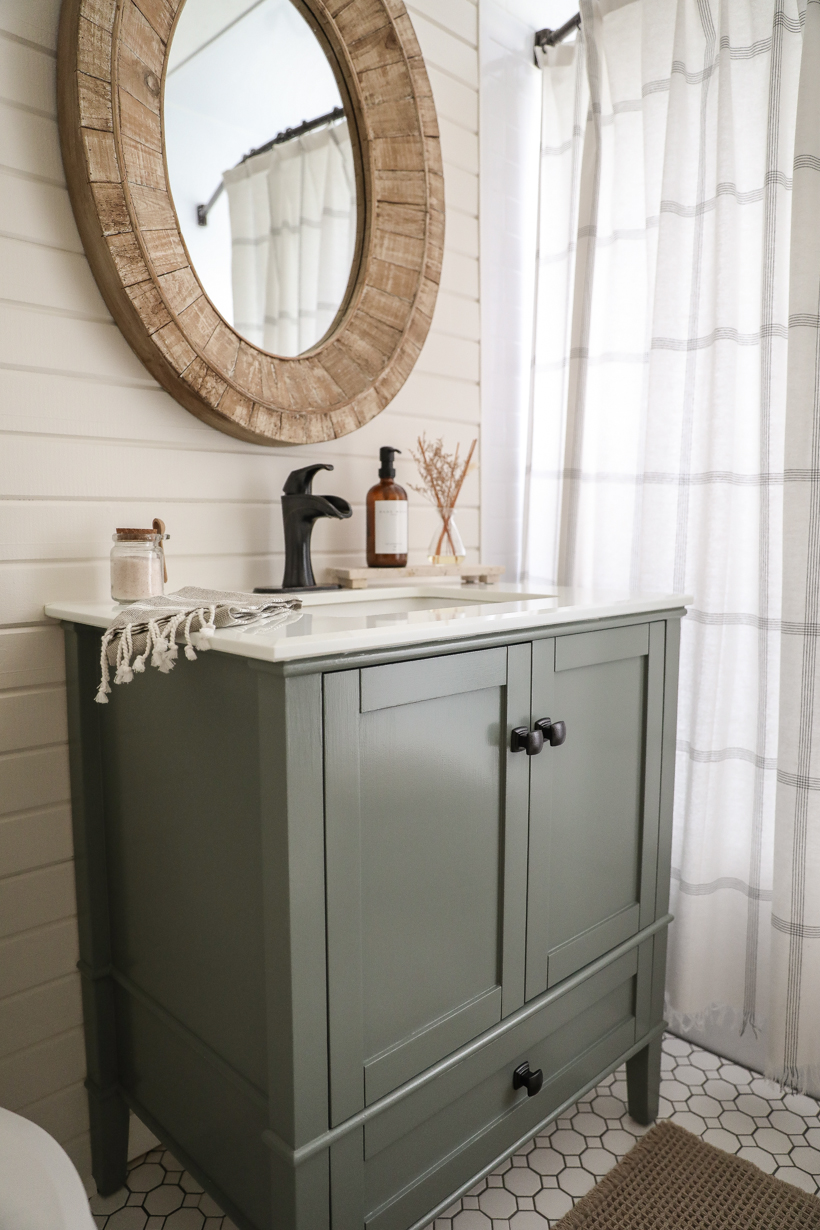
Painting The Vanity
Repainting a bathroom vanity can breathe new life into your space. It’s an affordable way to revamp your bathroom. The process requires a bit of patience and attention to detail. Start by preparing your vanity. Clean the surface and remove any hardware. After sanding, it’s time to paint. This step is crucial. It ensures a smooth and lasting finish. Let’s explore how to paint your vanity effectively.
Choosing Brushes Or Rollers
Decide between brushes and rollers. Both have their benefits. Brushes are great for detailed work. They help in reaching tight corners. Use them for intricate designs and edges. Rollers cover large areas quickly. They provide a smooth finish. Choose the right size for your surface. Test both tools to see what works best for you.
Layering And Drying Times
Apply thin layers of paint. Thick layers may lead to drips. Allow each coat to dry completely. Check the paint label for drying times. Patience ensures a beautiful finish. Typically, two to three coats are sufficient. Ensure proper ventilation during drying. This helps the paint cure well. Avoid rushing the drying process.
Reattaching Hardware
Repainting a bathroom vanity can breathe new life into your space. Once the paint has dried, it’s time to reattach the hardware. This step completes the transformation and ensures functionality. Properly reattaching knobs, handles, doors, and drawers is crucial. It enhances both the look and usability of your vanity. Let’s delve into the details of securing each component.
Securing Knobs And Handles
Begin with the knobs and handles. They are the finishing touches on your vanity. Align each knob with its original hole. Make sure it sits flush against the surface. Tighten screws using a screwdriver. Avoid overtightening, which can damage the paint. Check the alignment once more for even spacing.
Reinstalling Doors And Drawers
Next, focus on the doors and drawers. Start with the doors. Position each door on its hinges. Insert and tighten the screws. Ensure doors swing smoothly without resistance. Move on to the drawers. Slide each drawer back into its track. Listen for a click, which indicates proper placement. Open and close them a few times. This ensures they operate smoothly.
Credit: lovegrowswild.com
Final Touches And Clean Up
Final touches ensure a polished look for your bathroom vanity. Clean up any paint drips and remove tape. Wipe surfaces to reveal a fresh, vibrant finish.
Repainting a bathroom vanity can transform the space. Once the paint is dry, pay attention to final touches and clean up. These steps ensure a polished look and a tidy workspace.Inspecting For Touch-ups
Start by examining every inch of the vanity. Look for uneven paint areas or missed spots. If you find any, use a small brush for touch-ups. Focus on corners and edges. These areas often need extra care. Ensure the paint is smooth and even. This enhances the overall appearance.Cleaning The Workspace
Gather your painting supplies and clean them. Dispose of any used painter’s tape and drop cloths. Wipe down the surrounding area. Remove dust and paint splatters. This keeps the bathroom tidy. A clean workspace brings peace of mind. Finish by storing tools properly. This makes future projects easier.Frequently Asked Questions
How Do I Prepare A Vanity For Repainting?
Start by removing hardware and cleaning the surface thoroughly. Sand it lightly to remove the gloss and apply a primer. Ensure the area is dry before painting. Proper preparation ensures a smooth finish and enhances paint adhesion, prolonging the vanity’s new look.
What Type Of Paint Is Best For Vanities?
Use high-quality, durable paint, preferably semi-gloss or satin finish. These types are moisture-resistant and easy to clean, perfect for bathroom environments. Avoid flat paints as they don’t hold up well to moisture. Choose a color that complements your bathroom’s decor.
Can I Repaint My Vanity Without Sanding?
Yes, you can use a deglosser or liquid sandpaper instead of traditional sanding. These products effectively remove gloss and prepare surfaces for painting. Ensure you clean the vanity thoroughly before applying. This method saves time and minimizes dust, making it a convenient option.
How Long Does It Take To Repaint A Vanity?
Repainting a vanity typically takes about one to two days. This includes drying time between primer and paint coats. Allow 24 hours for the paint to cure fully before use. Plan your project to accommodate this timeline for best results.
Conclusion
Repainting a bathroom vanity refreshes your space. It’s a simple project with big impact. Start by gathering materials. Clean the surface thoroughly. Sand it down for smoothness. Choose a color that suits your style. Apply primer for better paint adhesion.
Paint evenly and let it dry. Finish with a protective topcoat. This DIY task saves money and adds charm. Enjoy your renewed, stylish bathroom. Remember, patience and careful steps lead to great results. Happy painting!

Home Improvement Specialist & Writer at HomeFixio
Caden Rutherford is a seasoned home improvement specialist with extensive hands-on experience in residential construction, renovations, and design. With a keen eye for detail and a passion for transforming spaces, Caden shares practical advice and expert solutions to enhance the functionality and beauty of homes. As a writer for HomeFixio, Caden combines technical knowledge with creative flair, providing readers with informative guides on everything from structural improvements to aesthetic upgrades, empowering homeowners to achieve their ideal living spaces.