How to Replace a Can Light With a Pendant Light: Step-by-Step Guide
Are you tired of the same old look in your living space? Swapping out a can light for a chic pendant light might be just the change you need to elevate your home’s ambiance.
Imagine transforming a dull ceiling into a stylish focal point that not only enhances your room’s aesthetic but also showcases your unique taste. You don’t need to be an expert electrician to make this switch; with the right guidance, you can do it yourself.
In this guide, we’ll walk you through each step of replacing a can light with a pendant light, ensuring you achieve a stunning result with confidence and ease. Keep reading to discover how you can light up your room and spark a new sense of style.
Safety Precautions
Before starting, turn off the power at the circuit breaker. Use a sturdy ladder to access the fixture safely. Always wear protective gloves and eyewear to guard against electrical hazards and falling debris.
Replacing a can light with a pendant light can enhance your space. But safety should be your top priority. Always take precautions to prevent accidents and ensure a smooth process. Below, we cover essential safety measures to follow.Turn Off Power
Before starting, switch off the power at the circuit breaker. This step is crucial to avoid electric shocks. Confirm the power is off by testing the light switch. Use a voltage tester to double-check. Safety first, always.Use Proper Tools
Gather the right tools for the job. You’ll need a screwdriver, wire stripper, and voltage tester. Ensure your tools are in good condition. Using the right tools makes the process safer. It also makes the task easier.Check Local Regulations
Research local electrical codes and regulations. Some areas have specific rules for electrical work. Ensure your changes comply with these regulations. This prevents legal issues and ensures safety. Always follow the guidelines for a worry-free installation.
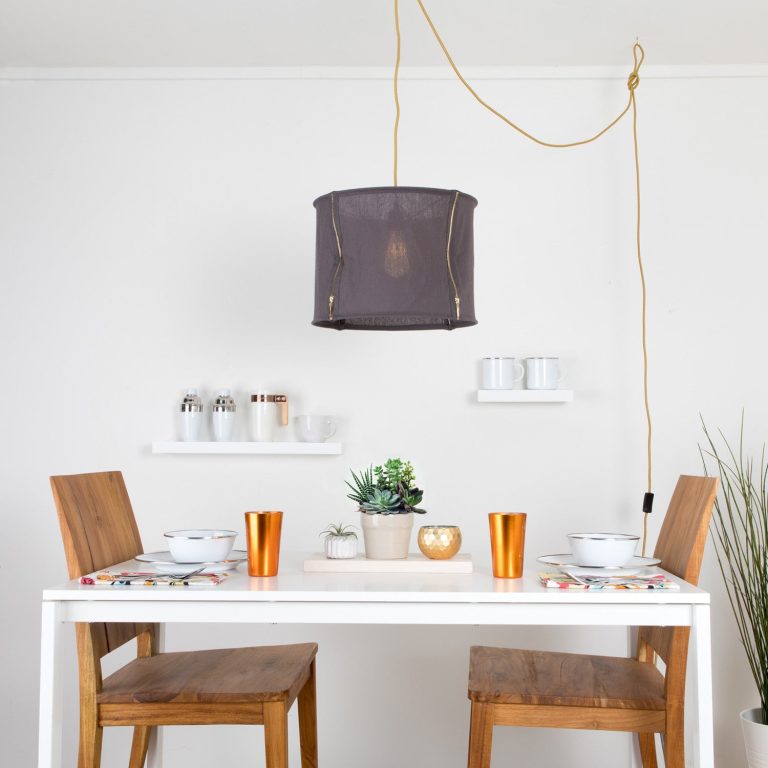
Credit: www.thestonybrookhouse.com
Gather Necessary Tools And Materials
Replacing a can light with a pendant light can refresh your space. It’s a simple project that requires some preparation. Gathering the right tools and materials ensures a smooth process. Let’s explore what you’ll need.
Tools Required
- Screwdriver
- Wire cutters
- Voltage tester
- Drill
- Measuring tape
- Ladder
A screwdriver will help remove the old fixture. Wire cutters are essential for cutting and stripping wires. Use a voltage tester to ensure safety by checking for live wires. A drill may be needed for securing the new fixture. Measuring tape ensures precise placement. A sturdy ladder is crucial for reaching the ceiling safely.
Materials Needed
- Pendant light fixture
- Wire connectors
- Mounting bracket
- Light bulbs
- Ceiling cap
Choose a pendant light fixture that suits your style. Wire connectors will secure the electrical connections. A mounting bracket supports the pendant light. Select light bulbs compatible with your fixture. A ceiling cap covers the electrical box for a clean look.
Having these tools and materials ready simplifies the installation process. With preparation, you can transform your lighting effortlessly.
Remove The Existing Can Light
Switching a can light to a pendant light starts with removing the existing fixture. Carefully detach the trim and housing from the ceiling. Ensure power is off before disconnecting wires to prepare for the new installation.
Replacing a can light with a pendant light gives your space a fresh look. Removing the existing can light is the first step. This process involves detaching the trim, disconnecting the wiring, and removing the housing. Each step requires attention for a smooth transition.Detach The Trim
Start by removing the trim from the can light. Use a screwdriver to loosen the screws holding it in place. If there are clips, gently pull them to release the trim. Keep the screws safe; you might need them later.Disconnect Wiring
Before disconnecting the wiring, ensure the power is off. Use a voltage tester to check. Once confirmed, remove the wire nuts connecting the wires. Carefully separate the wires, noting their configuration for later.Remove The Housing
To remove the housing, locate the clips or screws securing it. Unscrew or unclip them with care. Gently pull the housing down from the ceiling. If it’s stuck, wiggle it to loosen. Make sure the area is clear for the pendant light installation.Install The Pendant Light Fixture
Transform your space by replacing a can light with a stylish pendant light. First, disconnect electricity for safety. Next, remove the old fixture carefully, then install the pendant light by following the manufacturer’s instructions. Enjoy the enhanced ambiance and modern look in your room.
Replacing a can light with a pendant light can transform the ambiance of your room, adding a touch of elegance and style. The installation process may seem daunting, but breaking it down into manageable steps can make it surprisingly simple. As someone who has tackled this project, I can assure you that with patience and focus, you can achieve a stunning result. Let’s dive into how to install the pendant light fixture in your space.Prepare The Mounting Bracket
Start by turning off the power to the light fixture at the circuit breaker. Safety first! Once the power is off, remove the can light housing from the ceiling. You might need a screwdriver to loosen the screws. With the housing removed, you’ll have access to the junction box. Secure the pendant light’s mounting bracket to this box. Ensure it’s firmly attached, as it will support the weight of the pendant light.Attach The Pendant Light
Before you attach the pendant light, take a moment to visualize how it will hang. Adjust the length of the pendant cord to match your desired look. Once you’ve decided on the length, thread the cord through the mounting bracket. Secure the pendant light to the bracket, ensuring it’s stable. A wobbly fixture can be distracting and unsafe.Connect The Wiring
Now comes the crucial part—connecting the wiring. Make sure the power is still off. Match the wires from the pendant light to those in the junction box. Usually, black to black, white to white, and green or bare wire to the ground. Twist the wires together and secure them with wire nuts. Double-check your connections to prevent future issues. — Congratulations! You’ve just installed a pendant light fixture, enhancing your room’s aesthetic. Does it feel like your space has a new personality now? The beauty of DIY is not just in saving money but also in the satisfaction of creating something that reflects your style. Would you consider tackling another lighting project soon?Adjust And Secure The Pendant Light
Switching a can light to a pendant light adds style to any room. First, adjust the pendant light’s height. Then, secure it firmly to ensure safety and stability. Enjoy your new lighting!
To create a stunning focal point in your room, replacing a can light with a pendant light is a brilliant choice. The elegance of a pendant light can transform the ambiance. Adjusting and securing the pendant light ensures both safety and aesthetic appeal. Follow these steps to perfect your pendant light installation.Adjust Height
Determine the ideal height for your pendant light. Consider the room’s dimensions and usage. For dining areas, hang the light around 30-36 inches above the table. In entryways, ensure it clears the headspace comfortably. To adjust, use the fixture’s chain or cord. Make incremental changes until achieving the perfect look.Secure The Fixture
Once the height is set, secure the fixture firmly. Double-check the mounting bracket for stability. Tighten screws to prevent any wobble. A stable fixture minimizes accidents. Use a screwdriver to ensure all parts are snug. Confirm that the electrical connections are intact. Proper securing enhances safety and longevity.Ensure Stability
Stability is crucial for your pendant light. After securing, gently test the fixture’s sturdiness. A slight shake should reveal no loose parts. If it wobbles, re-tighten the screws. Ensure the pendant is centered and balanced. A stable light not only looks great but lasts longer. Regular checks maintain its optimal performance.
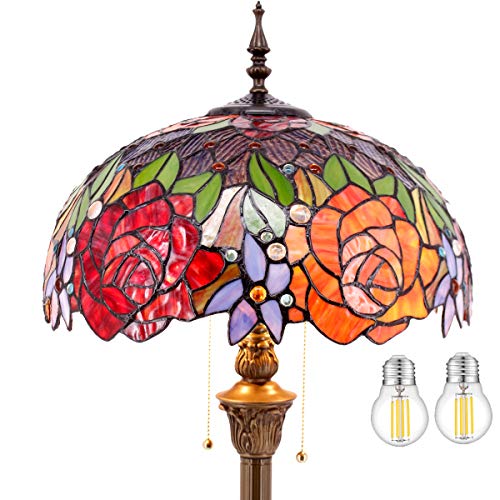
Credit: www.anikasdiylife.com
Test The Installation
Check the new pendant light by turning it on. Ensure the light works smoothly without flickering.
Testing the installation of your new pendant light is a crucial step to ensure both its functionality and safety. After spending time and effort replacing the old can light, the last thing you want is to encounter issues when you flip the switch. A well-tested installation not only guarantees peace of mind but also adds a touch of professionalism to your DIY project. Let’s dive into the steps needed to ensure everything works perfectly.Restore Power
Before testing, you need to restore power to the circuit where your new pendant light is installed. Head over to your electrical panel and switch on the circuit breaker that you turned off before starting the installation. Once done, return to the room and get ready for the moment of truth. Safety first—make sure no one is touching the light or any wires when you restore the power. A personal tip: I always keep a flashlight handy, just in case I need to quickly turn the power off again. It’s a small step but makes the process safer and smoother.Check Functionality
With power restored, it’s time to test if your new pendant light works. Flip the switch and observe if the light turns on. A functioning light means you’ve successfully completed the installation! If the light doesn’t turn on, don’t panic. Check if the bulb is correctly screwed in and ensure the switch is in the “on” position. Sometimes, the simplest solutions are the most effective—like making sure you haven’t used a burnt-out bulb.Troubleshoot Issues
If the pendant light fails to illuminate, it’s time to troubleshoot. Start by turning off the power again for safety. Recheck all wire connections to ensure they are secure and correctly matched—black to black, white to white, and ground to ground. Consider this: Have you encountered any unusual sounds or smells when you flipped the switch? These might be signs of an electrical issue. In such cases, consulting a professional electrician is wise to prevent any potential hazards. Remember, the aim is to enhance your space safely and efficiently. Taking the time to thoroughly test your pendant light installation ensures that your effort pays off with a beautifully lit room.Finishing Touches
Transform your room by swapping a can light with a pendant light. Start by removing the old fixture and installing the new pendant. Ensure all electrical connections are secure for a stylish and functional upgrade.
Finishing touches can transform your lighting project from good to great. You’ve already made the big change by swapping out that can light for a stylish pendant. Now, it’s time to focus on the small details that bring everything together seamlessly. These final steps will ensure your new light fixture isn’t just functional but also adds a sense of style and ambiance to your space.Choose The Right Bulb
The bulb you choose can dramatically affect the mood of your room. Consider how much light you need and the warmth or coolness of the bulb. LED bulbs are energy-efficient and come in a variety of brightness levels and temperatures. When I replaced my kitchen lights, opting for a warm LED bulb made the space cozier and more inviting. Think about how this choice can reflect your personal style and functional needs.Install A Dimmer Switch
Imagine having the power to change your room’s atmosphere with just a slide of your finger. Installing a dimmer switch allows you to control the brightness of your pendant light. This is perfect for creating a relaxed setting during dinner or a brighter space for meal prep. It’s a small change with a big impact, and it’s surprisingly easy to do. Have you considered the flexibility a dimmer could bring to your daily routines?Enhance Aesthetics
Beyond functionality, your pendant light should be a centerpiece. Think about adding decorative elements like a stylish canopy or a unique cord cover. These details can elevate the overall look and make your light fixture a conversation starter. In my living room, a simple cord cover complemented the pendant’s design, tying the entire room together. Small tweaks like this can enhance your space’s character without breaking the bank. How will you personalize your lighting to better reflect your taste? The finishing touches are about making your pendant light not just a source of illumination but a part of your home’s story.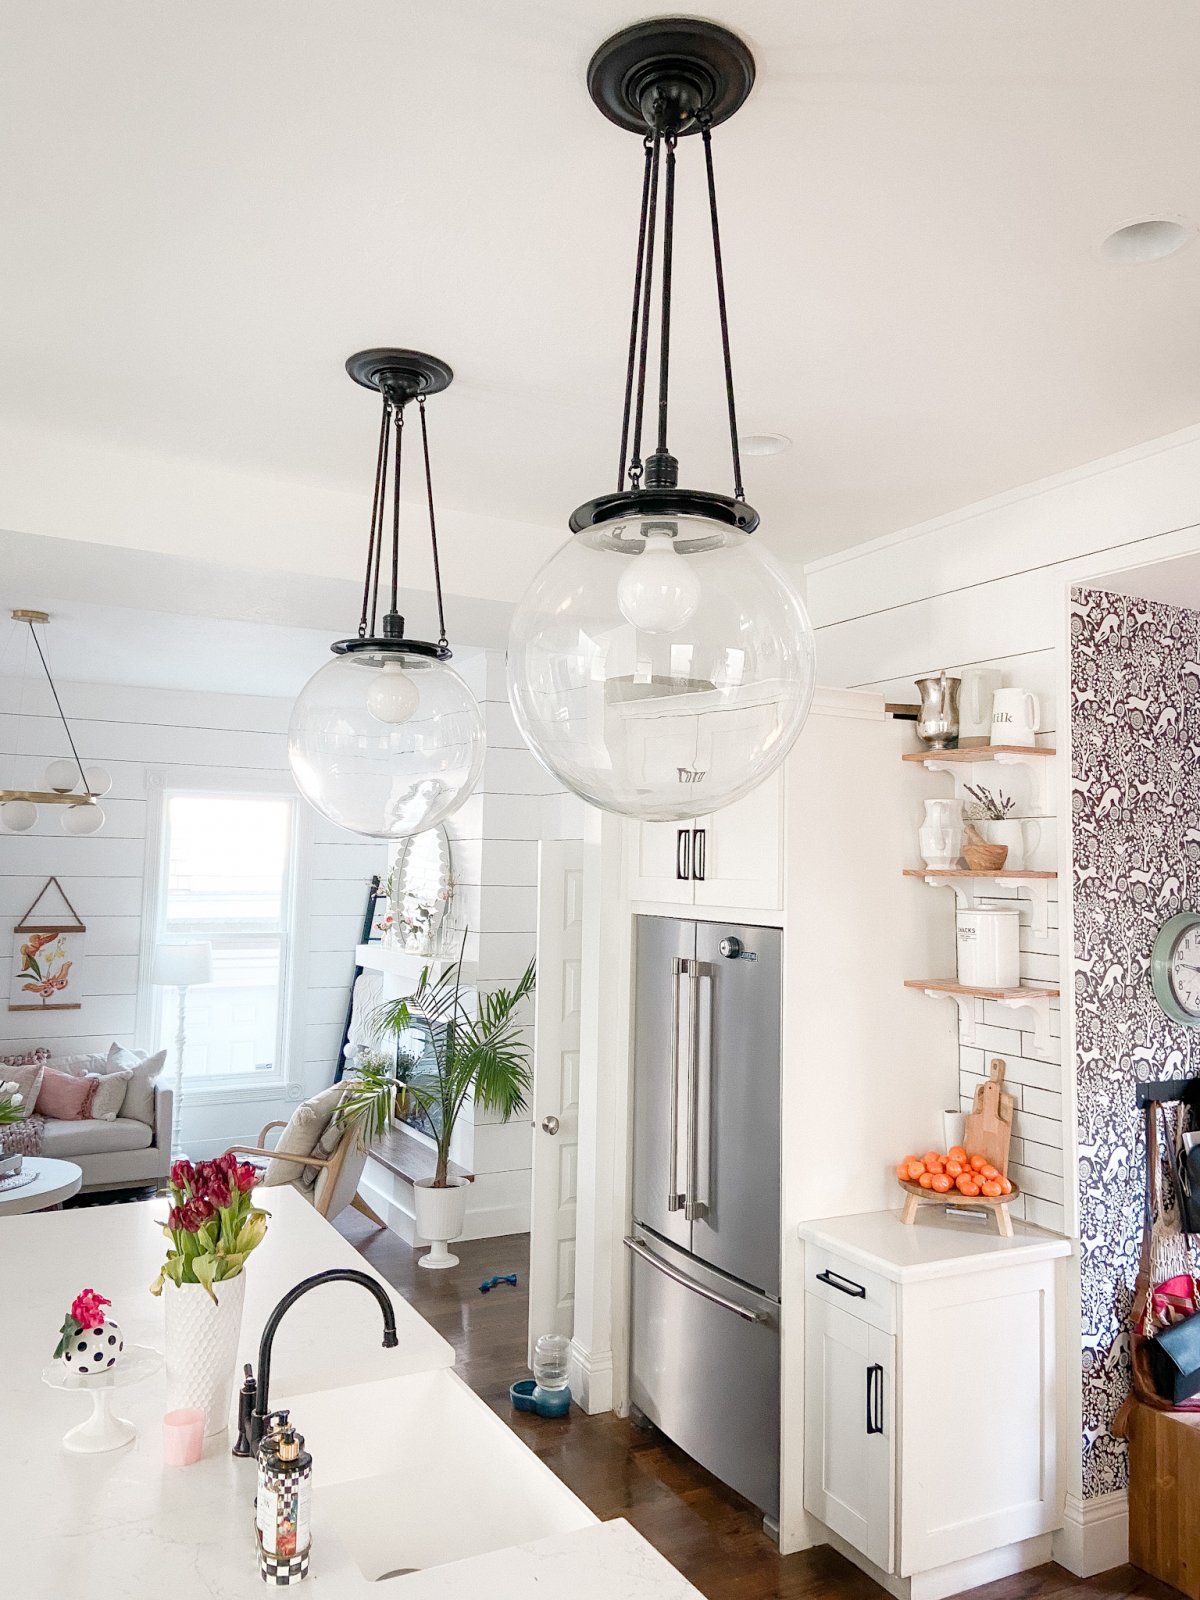
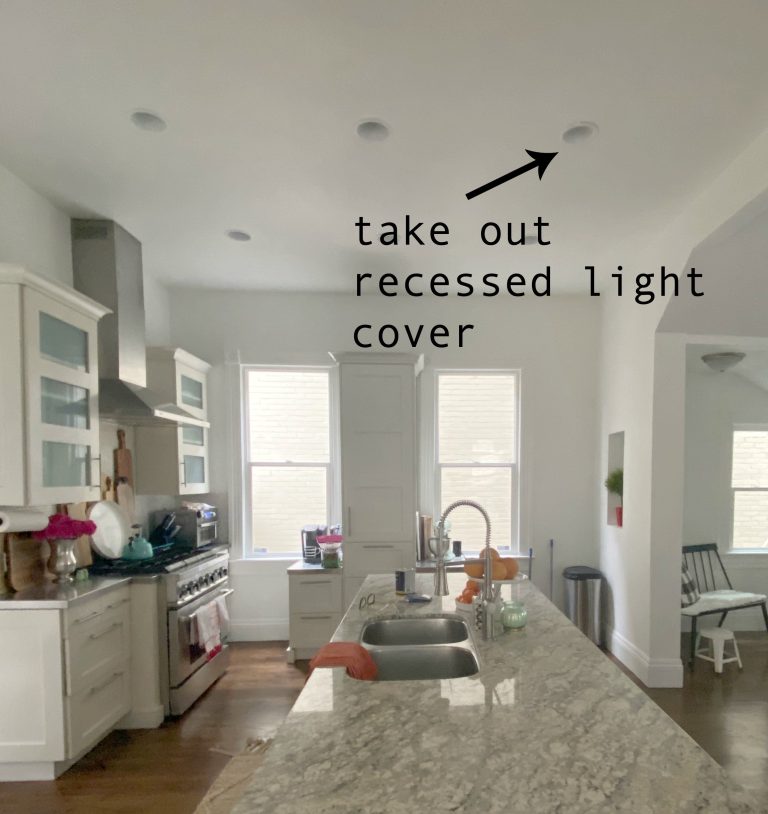
Credit: tatertotsandjello.com
Frequently Asked Questions
How To Safely Remove A Can Light Fixture?
To safely remove a can light, first turn off the power. Use a voltage tester to ensure no electricity. Remove the trim and bulb. Unscrew the can light housing and disconnect wires. Keep all parts organized for easy replacement with a pendant light.
What Tools Are Needed For Pendant Light Installation?
For pendant light installation, you’ll need a screwdriver, voltage tester, wire stripper, and pliers. A ladder is essential for reaching high ceilings. Ensure you have the new pendant light fixture and compatible bulbs. Always prioritize safety and follow manufacturer instructions for best results.
Can I Install A Pendant Light By Myself?
Yes, you can install a pendant light by yourself. Ensure you have basic electrical knowledge and necessary tools. Follow safety precautions, like turning off the power. If you’re unsure, consult a professional electrician. Proper installation enhances your room’s aesthetics and lighting efficiency.
What Are The Benefits Of Pendant Lights?
Pendant lights provide focused lighting, ideal for task areas like kitchen islands. They add a stylish element to your space. Pendant lights come in various designs and finishes, matching any décor. They are energy-efficient, especially with LED bulbs, and can be height-adjusted for versatility.
Conclusion
Switching a can light for a pendant light adds style. It’s a simple way to refresh a room’s look. Follow the steps carefully for safety. Choose a pendant that matches your decor. Consider the size and height for the best effect.
Enjoy the new ambiance in your space. A pendant light can transform how a room feels. Brighten up your home with this easy change. Remember, a little effort can make a big difference. Your room deserves a fresh and modern touch.

Home Improvement Specialist & Writer at HomeFixio
Caden Rutherford is a seasoned home improvement specialist with extensive hands-on experience in residential construction, renovations, and design. With a keen eye for detail and a passion for transforming spaces, Caden shares practical advice and expert solutions to enhance the functionality and beauty of homes. As a writer for HomeFixio, Caden combines technical knowledge with creative flair, providing readers with informative guides on everything from structural improvements to aesthetic upgrades, empowering homeowners to achieve their ideal living spaces.