How to Make a Slipcover: Transform Your Furniture Fast
Imagine transforming your worn-out furniture into something fresh and stylish without spending a fortune. A slipcover is your secret weapon to breathe new life into your living space.
It’s a simple, cost-effective way to update your decor, protect your furniture, and express your personal style. You’ll discover that making a slipcover isn’t as daunting as it seems. With the right guidance, you can create a custom fit that looks professionally tailored.
As you read on, you’ll unlock tips and tricks that will make this project enjoyable and rewarding, ensuring your furniture stands out and looks fabulous. Get ready to dive into a world of creativity and practicality, where your old couch becomes a canvas for your imagination. Let’s get started!

Choosing The Right Fabric
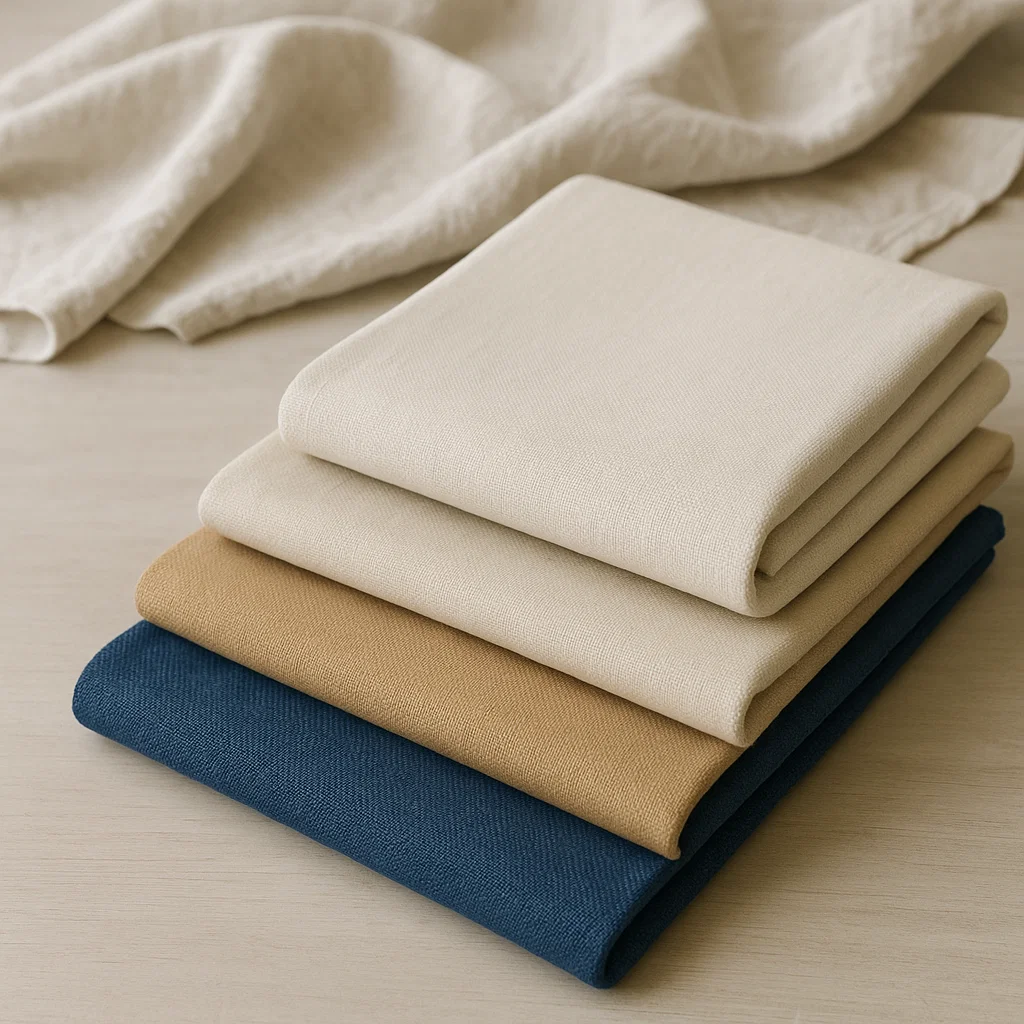
Choosing the Right Fabric Select durable, washable fabric for your slipcover to ensure longevity and easy cleaning. Consider colors and patterns that complement your space for a cohesive look.
Choosing the right fabric for your slipcover can make all the difference in transforming your furniture. It’s not just about covering up; it’s about enhancing your space with style and practicality. The fabric you choose will influence the durability, comfort, and aesthetic appeal of your slipcover.
Durability And Style
When selecting fabric, consider how much use the furniture receives. In a bustling household with kids and pets, durability is key. Opt for heavy-duty fabrics like denim or canvas, which can withstand daily wear and tear. On the other hand, if style is your priority and the furniture is more decorative, you might choose a luxurious fabric like velvet. Always check the fabric’s rub count, which indicates its durability. A higher rub count means better resistance to abrasion.
Color And Pattern Selection
Color can change the mood of a room instantly. Choose a color that complements your existing decor. Neutrals are versatile, while bold colors can make a statement. Patterns add a unique touch and can disguise stains or wear better than solid colors. Stripes, florals, or geometric patterns can enhance the visual interest of a piece. Consider how the pattern will look on a large scale; a small swatch might differ when applied to a whole sofa. Mixing and matching patterns can be fun, but ensure they don’t clash. Balance is crucial, so if the room already has a lot of patterns, a solid slipcover might be best. Ultimately, your choice of fabric should reflect your lifestyle and personality. What will bring you joy every time you walk into the room?
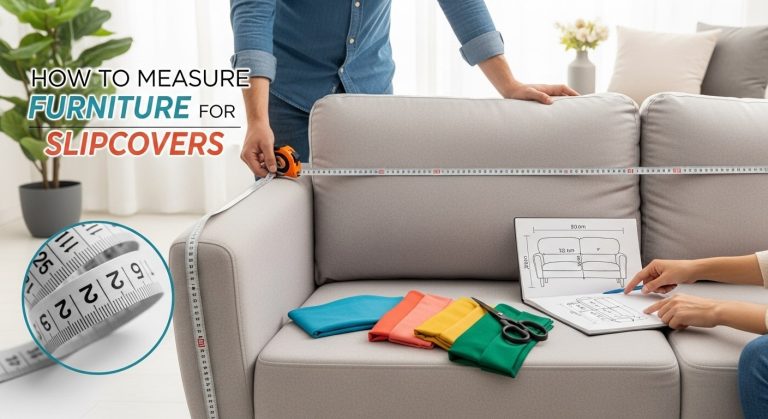
Measuring Your Furniture
Measuring your furniture accurately ensures a perfect slipcover fit. Use a tape measure to get precise dimensions. Note the width, height, and depth of each part.
Measuring your furniture is the first step in creating a perfect slipcover. Accurate measurements ensure a snug fit and a polished look. This process requires patience and attention to detail. Start by gathering the right tools.
Tools Needed For Measurements
Having the correct tools makes this task easier. You will need:
- Flexible measuring tape
- Notepad and pencil
- Calculator
- Masking tape
A flexible measuring tape is essential for measuring curves. Use a notepad to jot down dimensions. A calculator helps with complex calculations. Masking tape marks sections you’ve measured.
Recording Accurate Dimensions
Begin by measuring the height, width, and depth of your furniture. Measure from the floor to the top for height. For width, measure from one side to the other. Depth is the distance from the front to the back. Take measurements twice to ensure accuracy. Write each dimension clearly in your notepad. Use masking tape to mark areas that might be confusing. This prevents mistakes and saves time later. Consider any curves or unique shapes. Measure these separately. Note any unusual features. This ensures a tailored fit for your slipcover. Keep your notes organized for easy reference during cutting.
Cutting The Fabric
Start by measuring the furniture dimensions carefully. Cut the fabric with precision, ensuring enough material for seams. Keep edges smooth to avoid fraying when sewing.
Cutting the fabric is a crucial step in making a slipcover. It sets the foundation for a perfect fit. Choose fabric wisely. Measure carefully. A small error here can lead to a big issue later. Precision and patience are key.
Creating A Cutting Plan
Start with a clear plan. Measure your furniture accurately. Draw a simple sketch. Include all parts that need covering. This ensures you know how much fabric you need. Use these measurements to make a cutting list. It helps keep track of each piece.
Using Patterns For Precision
Patterns guide you in cutting fabric accurately. They ensure each piece is the right size. Use paper to create patterns. Lay them on the fabric. Pin them down securely. Then, cut along the edges of the pattern. This method reduces mistakes. It also saves time in adjustments later.
Credit: aquaintlife.com
Sewing Techniques
Creating a slipcover can be a rewarding project. With the right sewing techniques, you can craft a beautiful cover. This section explores essential sewing methods. Let’s dive into basic stitching and attaching zippers.
Basic Stitching Methods
Stitching forms the foundation of your slipcover. Begin with straight stitches. They’re simple and strong. Use them for seams and hems. Zigzag stitches come next. They help prevent fabric fraying. Ideal for edges and curves. Practice these on scrap fabric first. It builds confidence and skill.
Attaching Zippers And Fasteners
Zippers add functionality to slipcovers. They allow easy removal and washing. Choose a zipper length matching your slipcover opening. Sew it with a zipper foot for precision. Align the zipper teeth with fabric edges. Stitch slowly to maintain straight lines. Consider adding hook and loop fasteners. They offer a snug fit and are easy to attach. Position them at corners or edges for extra hold. This ensures a neat and tidy slipcover.
Fitting The Slipcover
Ensure the slipcover fits snugly over the furniture. Adjust seams for a smooth look without wrinkles. Secure ties or fasteners to keep it in place.
Fitting the slipcover is an essential step to transform your furniture into a stylish and refreshed piece. Ensuring a snug fit not only enhances the aesthetic appeal but also prolongs the life of your slipcover. This process can be surprisingly satisfying as you watch your old sofa or chair get a new lease on life. Let’s dive into the details of achieving that perfect fit.
Adjusting For A Snug Fit
Begin by draping the slipcover over your furniture, making sure it’s centered. Use your hands to smooth out any wrinkles or creases. This creates a more polished look and prevents the cover from shifting. Tuck the excess fabric into the crevices between the cushions and the backrest. This method works wonders for a tailored appearance. Do you notice any sagging areas? Adjust by pulling the fabric tighter and tucking it further into the crevices. If your slipcover has ties or straps, use them to your advantage. They help in pulling the fabric tighter and securing the cover snugly around the frame.
Securing The Slipcover In Place
Once you’re happy with the fit, it’s time to secure the slipcover. Foam inserts can be very helpful here. Placing these inserts in the gaps between cushions can prevent the slipcover from slipping off. Velcro strips are another excellent tool. Attach one side of the Velcro to the slipcover and the other to the furniture. This ensures the cover stays in place even with frequent use. Finally, stand back and admire your handiwork. Notice how each adjustment transforms the look and feel of your furniture. Does it make your living space feel more inviting? Consider sharing these handy tips with friends who might be on the verge of giving up on their old furniture.
Credit: www.aosom.com
Adding Decorative Touches
Adding decorative touches to your slipcover can transform a simple piece of furniture into a statement piece. Whether you’re aiming for elegance, whimsy, or a bold look, the right embellishments can bring your vision to life. The details you choose will not only reflect your personal style but also breathe new life into your living space. Let’s explore some ways to enhance your slipcover with creative flair.
Incorporating Trims And Tassels
Trims and tassels are like the jewelry of your slipcover. They can add a touch of luxury or a playful vibe, depending on your choice. Think about the overall look you want to achieve. Are you going for a classic feel? A simple braided trim might be just what you need.
For a more eclectic or bohemian aesthetic, tassels can be a fun addition. They come in various colors and styles, allowing you to match them with your existing decor. Consider adding them to the edges or corners for a playful touch. Would you prefer a subtle or bold statement?
Personalizing With Embellishments
Embellishments offer endless possibilities for personalization. Buttons, patches, or even fabric paint can help you express your unique style. Have you ever thought about using vintage buttons to create a charming, retro look?
Fabric paint is another versatile tool. You can create patterns or even stenciled designs that reflect your personality or the theme of your room. If you’re feeling adventurous, try combining different embellishments. This mix can lead to unexpected and delightful results.
These decorative touches not only enhance the visual appeal but also make the slipcover uniquely yours. So, what’s stopping you from getting creative with your slipcover today?
Maintenance And Care
Slipcovers provide a fresh look to your furniture. They protect against spills and stains. Proper maintenance and care extend their lifespan. This ensures they remain vibrant and durable.
Cleaning Tips For Longevity
Regular cleaning keeps your slipcovers looking new. Check the care label for washing instructions. Use mild detergent and cold water for machine washing. Avoid bleach, as it can damage the fabric. For tough stains, treat them immediately. Dab, don’t rub, to avoid spreading. Air dry or use a low heat setting in the dryer. Iron on low if needed to remove wrinkles.
Storing Slipcovers Properly
Proper storage is key to maintaining slipcovers. Fold them neatly to prevent creases. Store in a cool, dry place away from sunlight. Use breathable fabric bags for protection. Avoid plastic bags that trap moisture. Check occasionally for any signs of mold or pests. Proper storage ensures they are ready for use when needed.

Credit: www.youtube.com
Frequently Asked Questions
What Fabric Is Best For Slipcovers?
Cotton, linen, and polyester are popular choices for slipcovers. Cotton is breathable and durable, while linen offers a sophisticated look. Polyester is stain-resistant and easy to maintain. Choose a fabric that suits your style and durability needs.
Can I Make Slipcovers Without Sewing?
Yes, you can make slipcovers without sewing. Use fabric glue or iron-on adhesive for edges. These methods are simple and effective for quick projects. Ensure the adhesive is strong enough to hold fabric pieces together.
How Do I Measure For Slipcovers?
Measure your furniture carefully before making slipcovers. Take dimensions of the height, width, and depth. It’s important to include armrests and cushions. Accurate measurements ensure a perfect fit and a professional look.
Are Slipcovers Machine Washable?
Most slipcovers are machine washable, especially those made from cotton or polyester. Check the care label for washing instructions. Use gentle cycles and mild detergents to maintain the fabric quality and prevent damage.
Conclusion
Creating a slipcover transforms your furniture and refreshes your space. It’s a simple way to protect your favorite pieces from wear and tear. With a few materials and basic sewing skills, you can craft a custom cover. Measure carefully and choose fabric that matches your decor.
Enjoy the process, and take pride in your handiwork. Soon, your furniture will look like new, and you’ll have saved money. Slipcovers are a practical and creative solution. They offer style and functionality. Now, embrace your creativity and start your slipcover project today!

Home Improvement Expert & Senior Writer at HomeFixio
Reed Atwood is a seasoned home improvement expert with a passion for transforming everyday living spaces into functional and stylish havens. With years of experience in DIY projects, renovations, and home upgrades, Reed brings a wealth of knowledge to HomeFixio. As a senior writer, he provides readers with practical, easy-to-follow guides, expert tips, and innovative solutions for every room in the house. His goal is to empower homeowners to tackle their projects with confidence, ensuring both quality results and a rewarding experience.