How to Fix Candle Tunneling Without Foil: Easy Tips
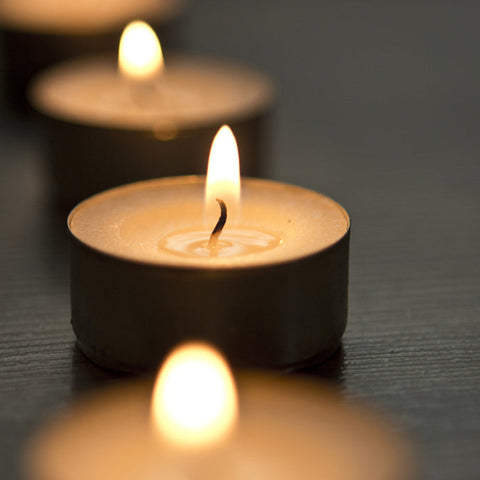
Have you ever lit your favorite candle, only to find a narrow tunnel burned down the middle, leaving wax on the sides untouched? Candle tunneling can be frustrating because it wastes wax and shortens your candle’s life.
But don’t worry—you don’t need foil or special tools to fix it. You’ll discover simple, effective ways to stop tunneling and enjoy every last drop of your candle. Keep reading, and you’ll learn how to make your candles burn evenly, brighter, and longer.
Credit: www.lemon8-app.com
What Causes Candle Tunneling
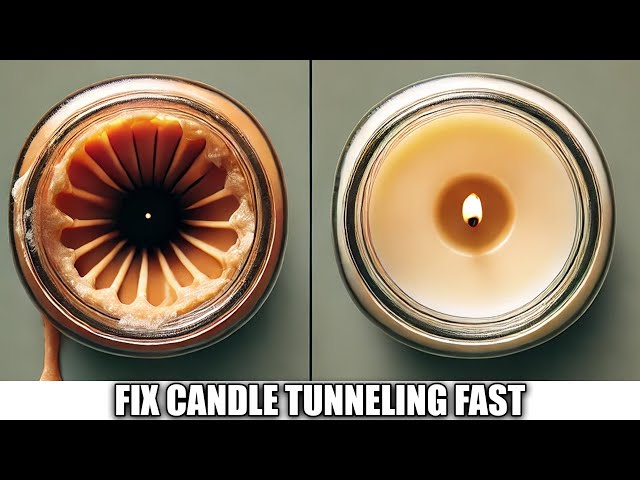
Candle tunneling happens when the wax burns down the center of the candle, leaving a thick ring of unmelted wax around the edges. This uneven burning wastes wax and shortens your candle’s life. Understanding what causes tunneling can help you fix it without resorting to foil tricks.
Uneven Wax Melting
When your candle’s wick is too small or too short for the candle’s diameter, the flame doesn’t produce enough heat to melt the wax all the way to the edges. This leaves the outer wax solid while the center burns down. Have you noticed how some candles melt evenly while others leave a deep hole in the middle?
Wick Size And Placement
The wick plays a crucial role in how your candle burns. If the wick is off-center or too thin, it causes uneven burning and tunneling. Even a slight wick misalignment can create a tunnel instead of a smooth melt pool.
Burning Time And Initial Burn
Not letting your candle burn long enough the first time leads to tunneling. The wax needs to melt evenly across the entire surface during the initial burn, which can take an hour or more depending on the candle size. Are you rushing to blow out your candle before the edges melt?
Environmental Factors
Drafts and airflow affect how your candle burns. A steady breeze can cause the flame to flicker and burn unevenly, promoting tunneling. Think about where you place your candle—near windows or vents might be causing trouble.
Wax Type And Temperature
Different waxes melt at different rates and temperatures. Some waxes are harder and don’t melt as easily, making tunneling more likely if the wick can’t generate enough heat. Have you checked what type of wax your candle uses?
Simple Tricks To Even Out Wax
Fixing candle tunneling doesn’t have to be complicated or require special tools like foil. Sometimes, simple tricks you can do at home help even out the wax and restore your candle’s full burn surface. These easy methods soften the hardened edges and encourage the wax to melt evenly, giving you more light and less waste.
Using Hot Water Method
This method uses hot water to gently melt the wax edges and even out the surface. Start by boiling some water and pouring it into a heatproof container that can hold your candle jar.
Place your candle in the container so that the hot water reaches just below the wax line. Let it sit for about 10-15 minutes. The warmth softens the hardened wax edges without overheating the candle.
After removing the candle, use a butter knife or a spoon to carefully push the softened wax toward the center. This simple trick helps fill the tunnel and create a smooth top layer. Have you tried using water to warm your candles before? It’s surprising how effective this gentle approach can be.
Melting Wax With A Hairdryer
A hairdryer can be a handy tool to fix tunneling quickly. Set it to medium heat and hold it a few inches above the candle surface.
Move the hairdryer slowly in circular motions over the wax edges. This direct heat melts the wax evenly, helping the hardened sides blend into the rest of the candle.
Once the wax softens, tilt the candle slightly to let the melted wax flow into the tunnel. Be careful not to hold the hairdryer too close, or the wax may overheat and become messy. Do you have a hairdryer handy right now? It’s a quick fix that can save your candle without any fuss.
How To Soften Wax For Smoother Burn
Softening candle wax is key to fixing tunneling and getting a smooth, even burn. When wax hardens unevenly, it creates those annoying tunnels that waste your candle and shorten burn time. By gently warming the wax, you allow it to melt evenly across the surface, helping the candle burn cleaner and last longer.
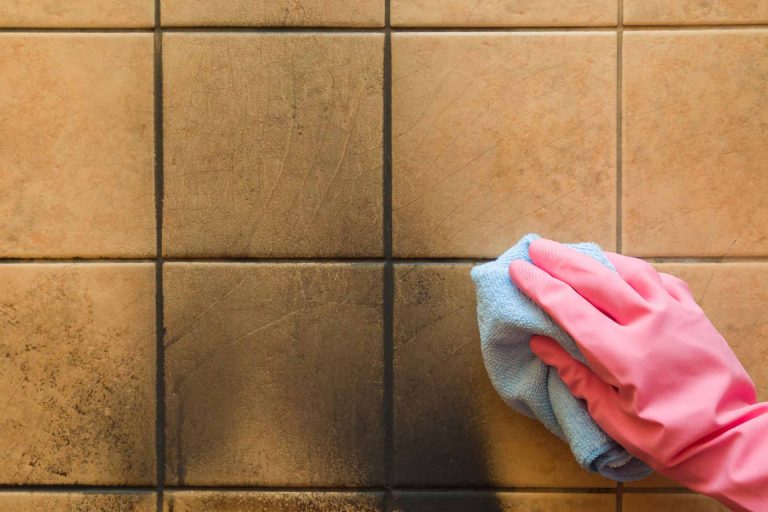
Applying Warm Towels
Wrap a warm, damp towel around the candle jar for a few minutes. The gentle heat will soften the wax just enough to even out the surface without melting it completely.
This method is easy and safe, especially if you don’t want to risk overheating the wax. Try to keep the towel warm but not dripping wet to avoid water getting into the candle.
Have you noticed how this simple trick often brings your candle back to life quickly? It’s a subtle way to fix tunneling without extra tools or fuss.
Microwaving The Candle
If you want faster results, microwaving can soften the wax effectively. Remove the candle lid and place the candle in the microwave on medium power for 10–15 seconds.
Check the wax and repeat in short bursts until the surface softens evenly. Be careful not to overheat—it’s better to warm gradually than melt the entire candle.
This technique works well for small candles in microwave-safe containers. Have you tried this before and found your candle burning smoothly afterward?

Credit: kalamazoocandle.com
Wick Care To Prevent Tunneling
Proper wick care plays a key role in preventing candle tunneling. A well-maintained wick ensures the candle burns evenly and fully. Neglecting wick care often leads to a narrow, deep burn pool, causing wasted wax and less light.
Focus on wick trimming and positioning to keep the flame steady and balanced. These simple habits help the candle melt across its entire surface, avoiding tunneling.
Trimming The Wick Properly
Trim the wick before each burn. Keep it about 1/4 inch long for a clean flame. A wick that is too long causes flickering and soot. Too short a wick can struggle to stay lit. Use scissors or a wick trimmer for a neat cut.
Regular trimming avoids a tall, uneven flame. This helps the candle melt evenly and prevents wax from building up on the sides.
Re-centering The Wick
Check the wick’s position after lighting the candle. A wick that leans to one side causes uneven burning. Gently push the wick back to the center with a tool or skewer while the wax is soft. This keeps the flame balanced and helps the candle burn straight down.
Centered wicks reduce the chance of tunneling and make the candle last longer. It also ensures the heat spreads evenly across the wax surface.
Alternative Tools Instead Of Foil
If you’re tired of using foil to fix candle tunneling, there are other handy tools that can help you even out the wax without the mess. These alternatives offer more control and can be safer for your candle’s appearance. Let’s look at a couple of practical options you might already have at home.
Using A Candle Snuffer
A candle snuffer isn’t just for safely putting out flames—it can also help fix tunneling. After lighting your candle, gently press the snuffer’s edge against the sides of the wax pool to warm and soften the wax evenly.
This method allows you to control the heat precisely, avoiding the risk of overheating or burning the wick. Have you noticed how soft, melted wax spreads more smoothly when warmed gently? The snuffer helps you achieve that without the need for foil.
Employing A Heat Gun
A heat gun gives you direct heat that can melt the wax evenly across the surface. Hold it a few inches above the candle and move it slowly in a circular motion to warm the wax without burning it.
This tool is particularly useful if you want to fix deep tunnels quickly. Just be cautious not to overheat the wax—it’s easy to melt too much if you stay in one spot. How close do you think you can safely hold the heat gun before the wax starts to bubble? Experimenting carefully will help you find the perfect distance.
Credit: medium.com
Tips For Future Candle Use
Preventing candle tunneling starts before you even light your candle. Paying attention to how you use your candle can save you from frustration and wasted wax. Here are some tips to keep your candle burning evenly and beautifully every time.
First Burn Rules
Make sure the first burn lasts long enough to melt the wax all the way to the edges of the container. This can take anywhere from 1 to 4 hours depending on the candle size. If you stop too soon, the wax will harden in the center only, causing tunneling.
Try lighting your candle in a draft-free area to avoid uneven melting. Also, never burn your candle for less than an hour on the first use. Have you noticed how some candles seem to burn unevenly right from the start? That’s usually because they weren’t given a full melt pool on the first burn.
Choosing The Right Candle Size
Selecting the right size candle for your space makes a big difference. Larger rooms benefit from bigger candles that create a full melt pool quickly, preventing tunneling. Smaller candles in large rooms might burn unevenly because the heat doesn’t distribute properly.
Think about where you want to place your candle before buying. Do you want a small candle for your desk or a large one for the living room? If your candle is too small for the area, it may not burn evenly, and you’ll face tunneling issues again.
Frequently Asked Questions
What Causes Candle Tunneling Without Foil?
Candle tunneling happens when the wax melts unevenly. The center burns down while the edges stay solid. This leads to a narrow tunnel and wasted wax.
How Can I Fix Candle Tunneling Naturally?
Light the candle for a longer time initially. Let the wax pool reach the edges. This melts the wax evenly, preventing tunnels without using foil.
Does Trimming The Wick Help Candle Tunneling?
Yes, trimming the wick to ¼ inch helps. It ensures a steady flame that melts wax evenly. Avoid a wick that’s too long or short.
Can Using A Heat Gun Fix Candle Tunneling?
Yes, a heat gun gently melts the wax edges. This helps level the wax surface and fix tunneling. Use low heat to avoid damaging the candle.
Conclusion
Fixing candle tunneling without foil is simple and effective. Let the candle burn long enough to melt the wax evenly. Trim the wick before each use to avoid uneven burning. Avoid drafts to keep the flame steady and strong. These small steps save your candle and help it last longer.
Enjoy a full, clean burn every time. Your favorite candle will shine brightly without wasting wax. Give it a try and see the difference yourself.

Home Improvement Expert & Senior Writer at HomeFixio
Reed Atwood is a seasoned home improvement expert with a passion for transforming everyday living spaces into functional and stylish havens. With years of experience in DIY projects, renovations, and home upgrades, Reed brings a wealth of knowledge to HomeFixio. As a senior writer, he provides readers with practical, easy-to-follow guides, expert tips, and innovative solutions for every room in the house. His goal is to empower homeowners to tackle their projects with confidence, ensuring both quality results and a rewarding experience.