How to Hang a Sconce on a Wall: Step-by-Step Guide
Are you looking to transform your living space with a touch of elegance? Hanging a sconce on your wall can do just that.
A well-placed sconce not only enhances the ambiance of your room but also adds a personal touch to your decor. The right sconce can turn a dull wall into a stunning focal point, capturing the attention of anyone who enters.
But before you grab a hammer and nails, there are a few things you should know. How do you ensure the sconce is at the perfect height? What tools do you need? And how do you avoid common mistakes that can damage your wall? By the end of this guide, you’ll have the confidence and knowledge to hang your sconce like a pro. So, if you’re ready to illuminate your home and impress your guests, keep reading. Your walls are about to get a stylish upgrade!
Choosing The Right Sconce
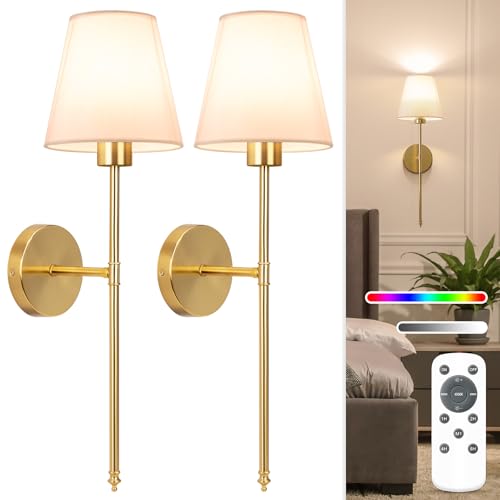
Sconces come in many stylesand materials. Popular types include candle sconces, which use real or faux candles. Electric sconcesare common and easy to use. Some are plug-inwhile others need hardwiring. Wall washersspread light evenly. They are perfect for creating ambiance. Swing arm sconcesoffer flexibility. Move them closer when you need light. Choose based on your room’s styleand function.
Placement affects how a room feels. Sconces should be at eye level. This helps in reading or relaxing. Place them to avoid shadows. Think about the room’s layout. Consider furniture and windows. Keep sconces away from moving doors. They might get hit. Spacingis key. Keep them evenly spaced. This balances the room. Measuretwice before hanging. This ensures even placement.
:strip_icc()/installing-box-wall-sconce-f811a056-b291f0391da74ea598c7f151b6b64ac5.jpg)
Credit: www.bhg.com
Gathering Necessary Tools
Hanging a sconce needs the right tools. Start with a drill. It makes holes in the wall. You also need screws. They hold the sconce in place. A screwdriver is key to turn screws. Have a level handy. It keeps the sconce straight. A measuring tape helps find the right spot. Keep a pencil for marking spots. You need a wall anchor if the wall is weak.
Safety is important. Wear safety goggles. They protect your eyes. Use gloves to protect your hands. They keep you safe from sharp edges. Have a dust mask. It keeps dust away from your lungs. Safety first!
Preparing The Wall
First, find the right place for your sconce. Use a pencil to mark the spot. Make sure it is at the right height. It should not be too high or too low. Use a measuring tape for accuracy.
Walls can be different. Some are made of wood. Others are made of concrete. Check your wall typewith a small nail. If it goes in easily, it’s wood. If not, it might be concrete. This is important for choosing the right tools. Wood needs screws. Concrete needs special anchors.
Credit: schoolhouse.com
Installing The Electrical Box
Find the perfect spot for your sconce. Use a pencil to mark the area. Ensure it’s near an electrical source. Take your drill and attach a hole saw. Start cutting the marked area. Be careful while cutting. Avoid cutting too deep into the wall. Check your work often. Make sure the hole is the right size. It should fit the electrical box snugly.
Place the electrical box in the hole. Make sure it’s aligned properly. Use screws to secure the box. Tighten each screw firmly. Ensure the box doesn’t move. Double-check its stability. The box should be flush with the wall. It should not stick out. If needed, adjust the screws. Keep the box firm. This ensures safety.
Wiring The Sconce
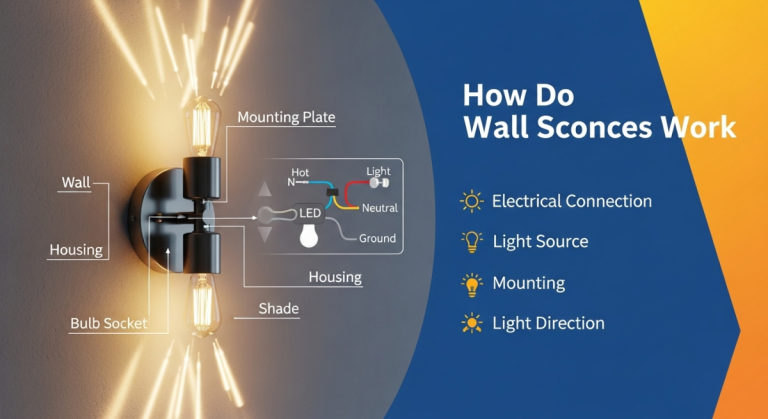
Connecting wiresis a key step. Make sure the power is off. Use a screwdriver to open the sconce plate. Find the wires. Usually, there are two or three. Match colors. Black connects to black, white to white. Sometimes, there’s a green wire. This is for ground. Use wire connectors to join them. Twist them tight. Push the wires back into the wall. This keeps them safe.
Ensuring safetyis very important. Always turn off electricity. Check with a voltage tester. This tool tells if the power is off. Wear gloves for safety. Use a ladder if needed. Make sure it’s stable. Keep tools close. This helps you work without reaching far. Never touch live wires. Ask someone to help if unsure. Safety first in every step.
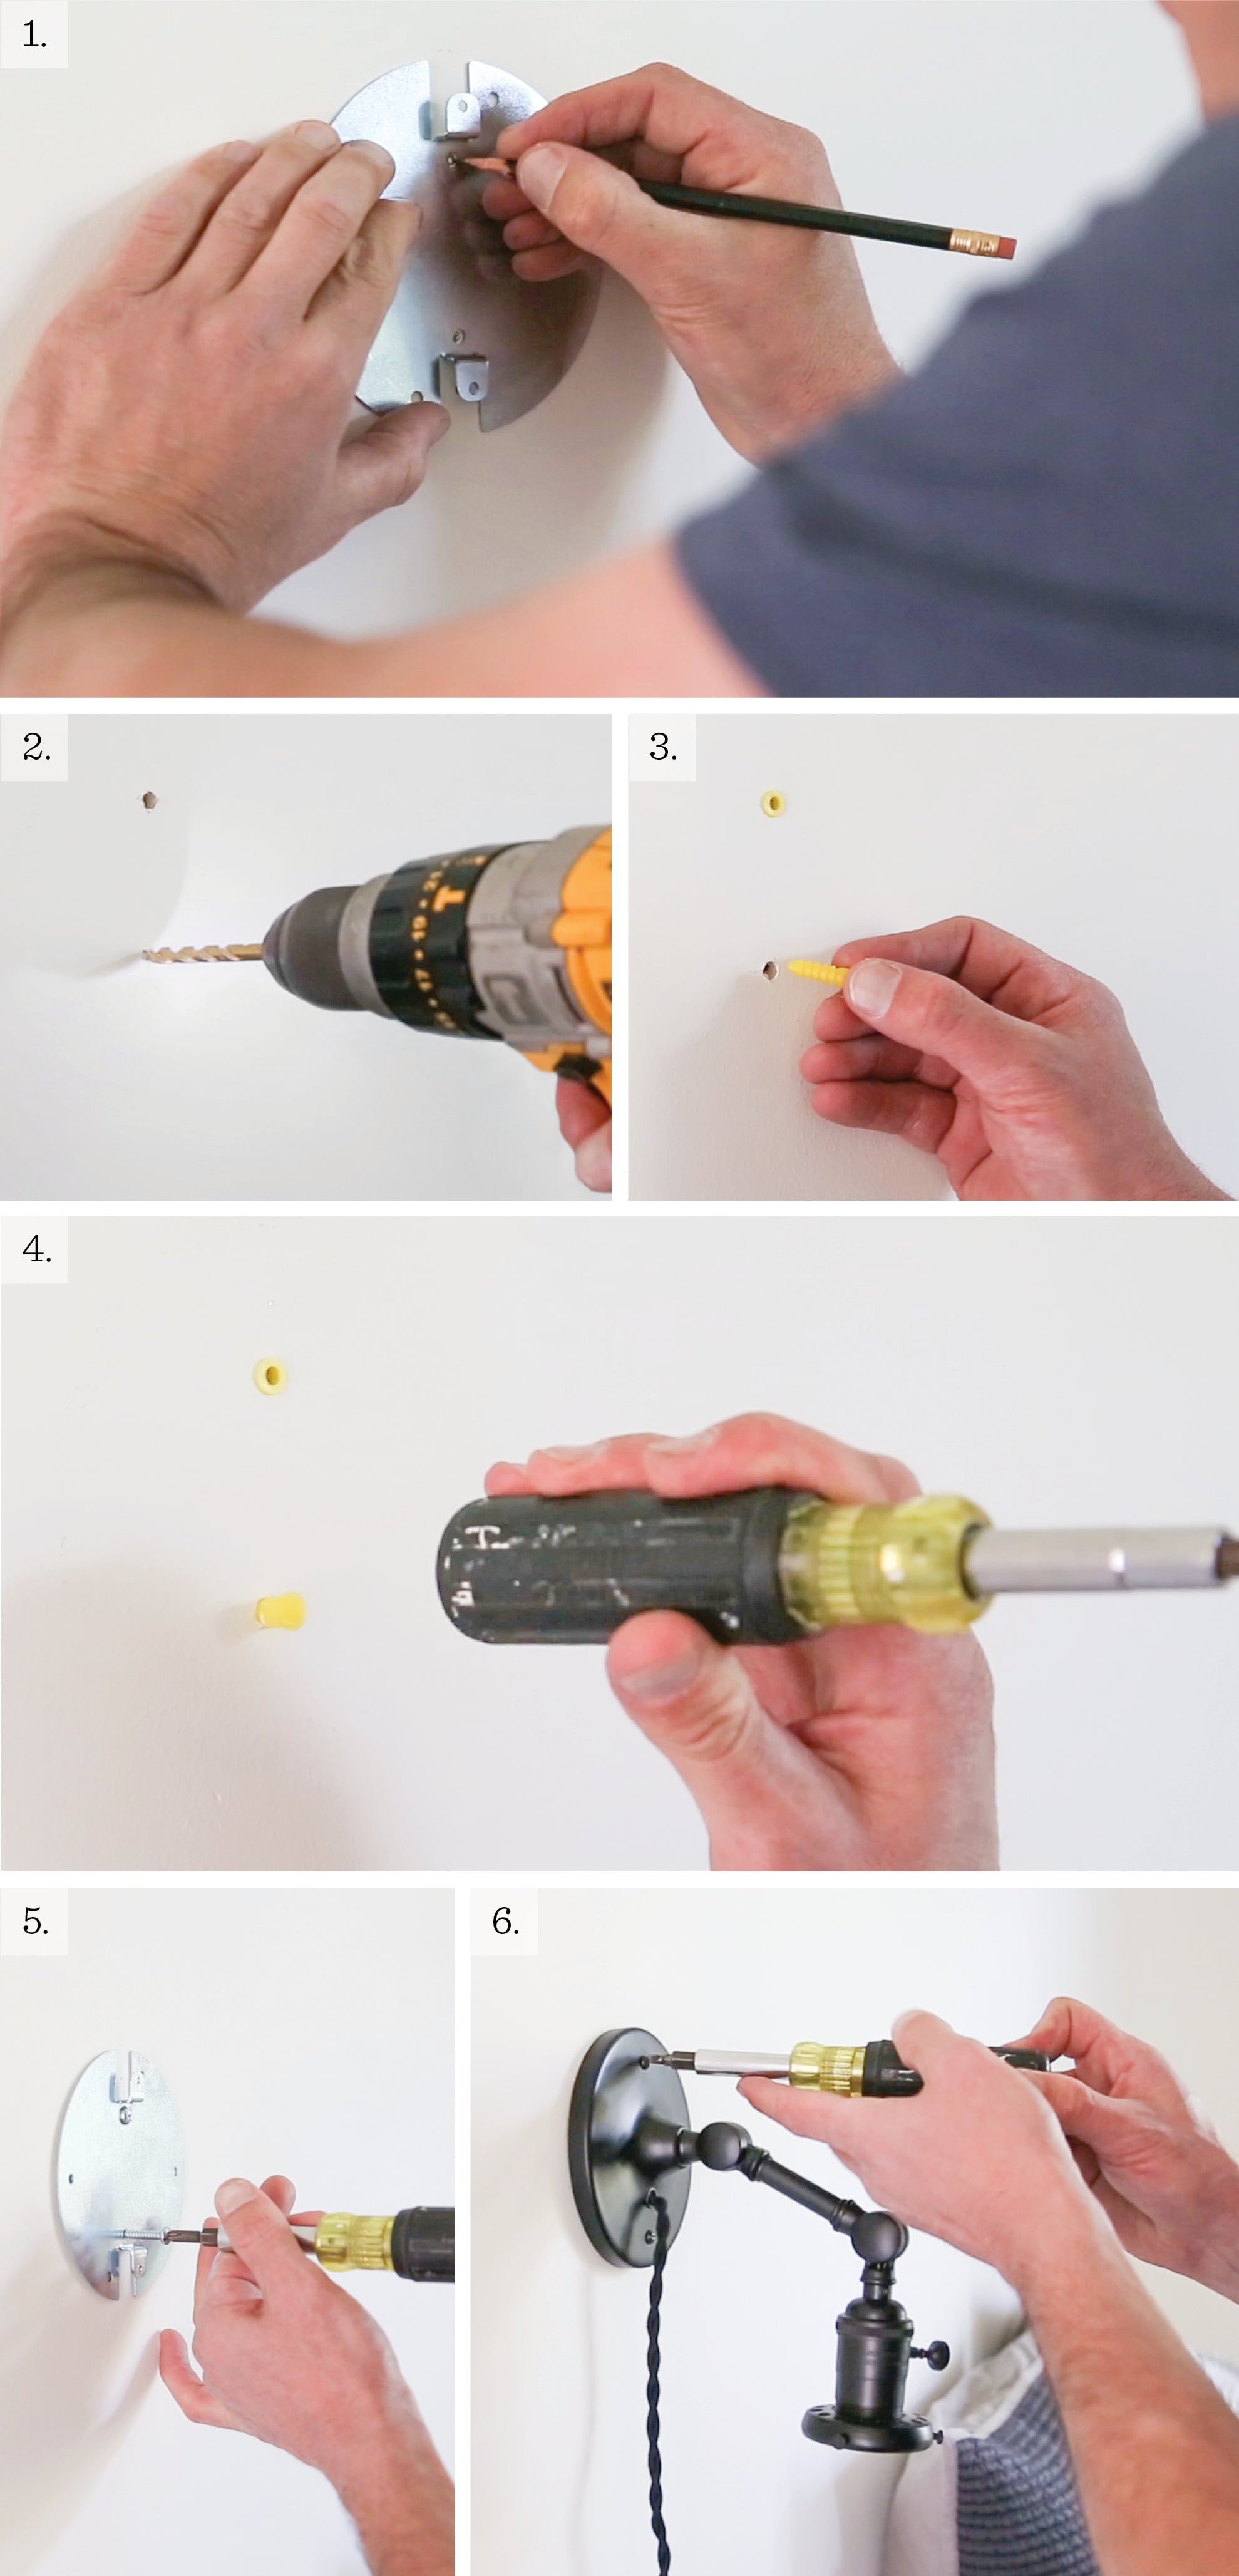
Mounting The Sconce
Start by finding the perfect spot on your wall. Make sure it’s free of wires. Use a pencilto mark the spot. Hold the sconce base in place. Drill holes where you marked. Put in the wall anchors. This makes sure it’s secure. Align the base with the anchors. Screw it in tightly. The base should not wobble.
Attach the fixture to the base. Use the screws provided. Ensure it fits snugly. Tighten the screws with a screwdriver. Check if it wobbles. Adjust if needed. Ensure it’s safe and secure. Now, your sconce is ready to light up the room!
Final Adjustments
Final adjustments ensure a secure and straight sconce installation. Align the fixture, tighten screws, and check stability. Make sure the sconce is level for the best appearance and performance.
Testing The Light
Turn on the sconce to see how it lights the room. Check if the light is bright enough. Look for any flickering or dimming. Make sure the switch works properly. If there are problems, check the bulb or wiring.
Positioning The Shade
Place the shade over the bulb. Adjust it so it sits straight. Make sure it’s not tilted. Look at the light’s spread. It should cover the area well. If not, move the shade a bit. Ensure the shade is not too close to the bulb. This keeps it safe from heat.
:max_bytes(150000):strip_icc()/SPR-how-to-install-wall-sconce-5221961-hero_30492-12c22a89fdd24daca4008e9ae2219d59.jpg)
Credit: www.thespruce.com
Troubleshooting Common Issues
Struggling to hang a sconce? Ensure you have the right tools. Locate the wall studs for secure installation. Check the wiring connections to avoid electrical issues.
Fixing Loose Fixtures
Loose fixtures can cause problems. Check if screws are tight. Use a screwdriver to fix them. If screws are missing, replace them. Sometimes, the wall may be uneven. Use spacers to balance the fixture. Ensure the fixture is level. This prevents wobbling and falling.
Resolving Electrical Problems
Electrical problems can be dangerous. Check the wires first. Make sure they are connected. If wires are frayed, replace them. Turn off power before working. Use a voltage tester for safety. Check the light bulb. If it’s burnt, replace it. Always ensure safety when fixing electrical parts.
Frequently Asked Questions
How Do I Choose The Right Sconce Height?
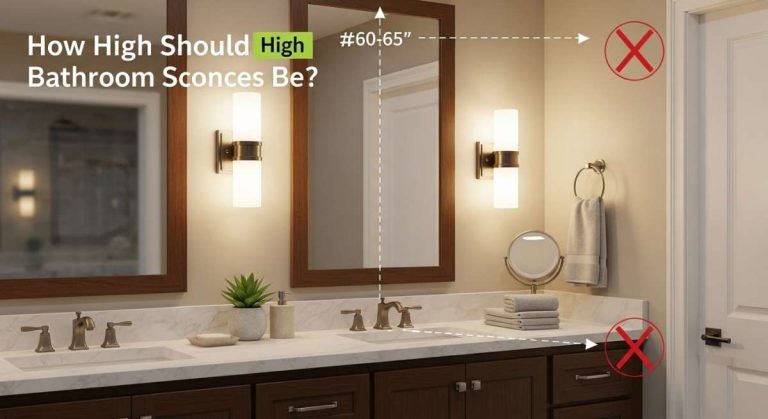
When choosing the height for your sconce, consider the room and purpose. Typically, place sconces 60-66 inches from the floor. Ensure it complements other lighting and doesn’t cause glare. Adjust height based on the sconce’s design and room’s functionality for optimal lighting.
What Tools Are Needed To Hang A Sconce?
To hang a sconce, you’ll need a drill, screws, a screwdriver, and a level. Additionally, use wall anchors if mounting on drywall. Ensure you have a stud finder to secure the sconce properly. Always follow the manufacturer’s instructions for best results.
Can I Hang A Sconce Without Wiring?
Yes, you can hang a sconce without wiring by using battery-operated sconces. These are ideal for spaces without electrical access. Alternatively, plug-in sconces are another option. They provide flexibility and ease of installation. Ensure the style matches your room’s decor for a cohesive look.
What Should I Consider For Sconce Placement?
When placing a sconce, consider the room’s layout and function. Balance aesthetics and functionality by avoiding glare and ensuring adequate lighting. Keep symmetry in mind, especially if installing multiple sconces. Also, consider how the sconce’s light will interact with nearby surfaces and furniture.
Conclusion
Hanging a sconce can enhance any room’s look. Follow steps carefully for best results. Start by choosing the right spot on the wall. Use tools like a level and drill. Secure the bracket tightly. Attach the sconce to the bracket.
Check the alignment. Enjoy the new light fixture’s charm. Remember, patience is key to a perfect installation. It takes time but the result is worth it. Now, your wall is more stylish and inviting. Feel proud of your DIY success!

Home Improvement Specialist & Writer at HomeFixio
Caden Rutherford is a seasoned home improvement specialist with extensive hands-on experience in residential construction, renovations, and design. With a keen eye for detail and a passion for transforming spaces, Caden shares practical advice and expert solutions to enhance the functionality and beauty of homes. As a writer for HomeFixio, Caden combines technical knowledge with creative flair, providing readers with informative guides on everything from structural improvements to aesthetic upgrades, empowering homeowners to achieve their ideal living spaces.