How to Make a Slipcover for a Chair: Easy DIY Guide
Are you looking to refresh your living space without breaking the bank? Imagine transforming that tired old chair into a stunning centerpiece with just a bit of fabric and creativity.
Slipcovers are your secret weapon, offering a budget-friendly way to revive your furniture and protect it from wear and tear. You don’t need to be a sewing expert; with a few simple steps, you can create a custom slipcover that reflects your style and fits your chair perfectly.
Dive into this guide to discover how easy and rewarding it is to make a slipcover for a chair, and watch as your room takes on a whole new life. Get ready to unlock the potential of your furniture and impress everyone with your newfound DIY skills!

Credit: www.create-enjoy.com
Choosing The Right Fabric
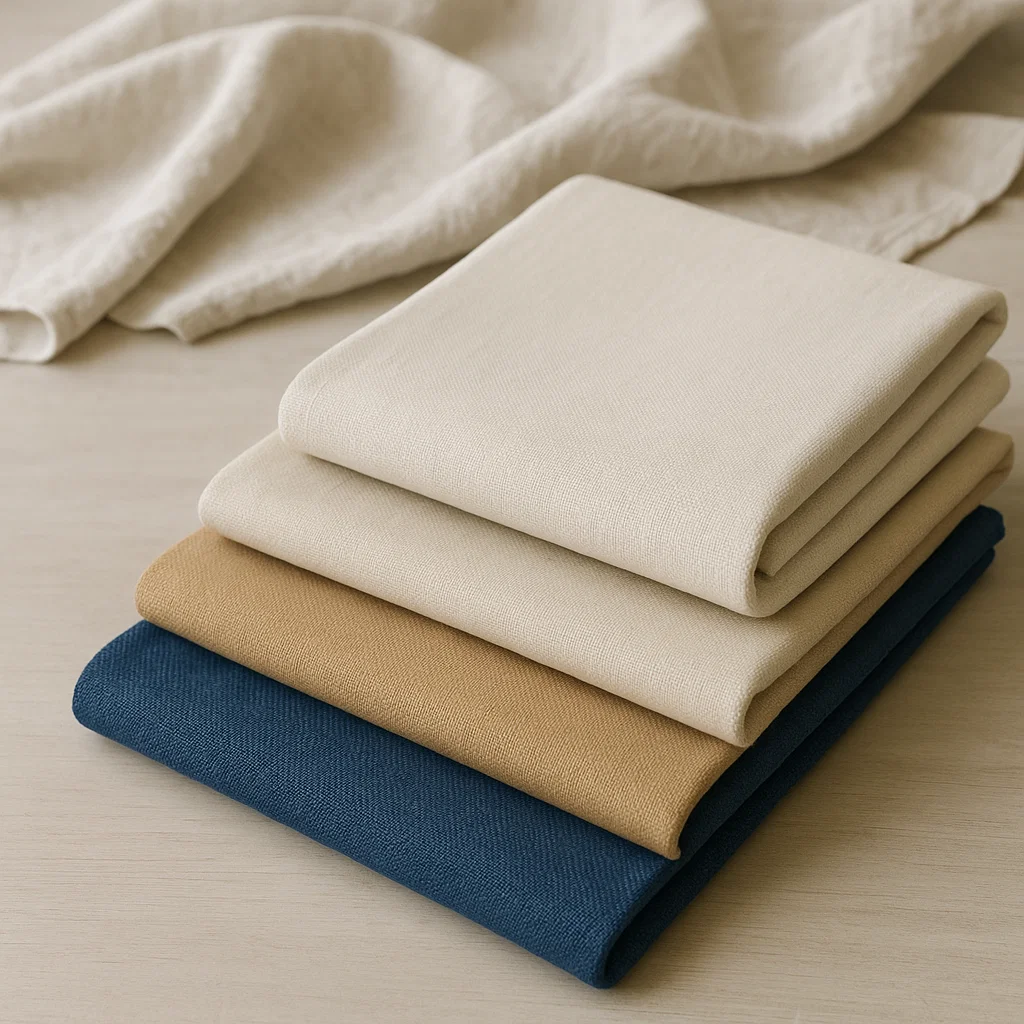
Choosing the right fabric ensures your slipcover fits well and lasts long. Opt for durable materials like cotton or twill for easy maintenance. Consider colors and patterns that match your decor for a cohesive look.
Choosing the right fabric is crucial when making a slipcover for a chair. The fabric not only affects the look but also the durability of the slipcover. Consider the environment and how often the chair is used. Select a fabric that balances aesthetics with practicality.
Fabric Durability
Choose a fabric that can withstand daily wear and tear. Consider materials like cotton, linen, or canvas. These fabrics are known for their strength. If the chair is used frequently, opt for heavier fabrics. They last longer and resist damage. Think about how easy the fabric is to clean. Stain-resistant fabrics are ideal for homes with kids or pets. Evaluate the fabric’s resistance to fading. Direct sunlight can cause colors to fade quickly.
Color And Pattern Considerations
The color and pattern of your fabric set the mood. Neutral colors offer versatility and match various decor styles. Bold colors make a statement and add personality. Patterns can hide stains better than solid colors. Consider stripes, florals, or geometric designs. Select patterns that complement the room’s theme. Ensure the color fits with existing furniture. A harmonious look enhances the room’s appeal.
Measuring Your Chair
Accurate chair measurements are crucial for creating a slipcover. Measure the height, width, and depth of the chair. Note armrest and cushion dimensions for a perfect fit.
Measuring Your Chair Creating a slipcover for your chair is an exciting project that can refresh your space with minimal cost. But before diving into the sewing part, the first step is getting accurate measurements. This ensures that your slipcover fits perfectly, giving your chair a tailored look. Let’s explore how to measure your chair correctly.
Gathering Necessary Tools
Before you begin measuring, gather all the necessary tools to make the process smooth and accurate. You’ll need a measuring tape, preferably flexible, to wrap around curves and contours effortlessly. A notebook or digital device is handy for recording your measurements. Use a pencil to make notes or sketches—erasable marks allow for corrections without a mess. Consider having a helper to hold the tape or jot down numbers as you measure. It makes the process quicker and ensures accuracy.
Recording Measurements
Start by identifying key areas of the chair that need measuring: the height, width, depth, and circumference of sections like the backrest, seat, and armrests. Begin with the backrest. Measure from the top to the bottom, noting the height. Then, measure the width from side to side. Next, move to the seat, measuring its depth from front to back, and width. Don’t forget the armrests, taking both their height and width into account. Once all measurements are noted, double-check them. Accuracy here saves time and effort later when cutting fabric. Have you ever created something custom that didn’t fit right because of a minor oversight? Recording precise measurements ensures your slipcover looks professional and feels snug.
Cutting The Fabric
Accurate fabric cutting is crucial for a perfect slipcover fit. Measure the chair carefully, noting curves and corners. Always add extra fabric for seams and adjustments.
Cutting the fabric is a crucial step in making a slipcover for your chair. This stage determines how well the finished product will fit and look. A precise cut can make all the difference between a slipcover that looks professionally tailored and one that feels like a DIY disaster. Let’s dive into the essentials of cutting the fabric with the precision needed to achieve that perfect fit.
Creating A Template
Creating a template is your first move toward success. Use old newspapers or large sheets of butcher paper to draft a rough outline of your chair’s dimensions. Lay the paper over your chair, marking areas for seams and cuts with a pen or marker. You might find it helpful to tape the paper pieces together to visualize the final shape. This method allows you to make adjustments before cutting your fabric. It’s like having a dress rehearsal before the main event. Once satisfied with the template, transfer it onto the fabric. Ensure you pin the paper securely to avoid any shifting. This step ensures that your measurements translate accurately onto the fabric.
Precision Cutting Techniques
Precision is key when cutting fabric for your slipcover. Use sharp fabric scissors or a rotary cutter for clean edges. A dull blade can cause frayed edges, which you definitely want to avoid. Consider using a cutting mat for added accuracy. This tool provides a grid that can serve as a guide for straight cuts. It’s an investment that pays off in the long run, especially if you plan on doing more DIY projects. Don’t forget about seam allowances. Add a few inches to your measurements for seams and hems. This extra fabric gives you wiggle room for adjustments and ensures a snug fit.
Have you ever tried cutting fabric and ended up with uneven edges? Double-checking your measurements and markings can save you from this headache. Remember, measure twice, cut once. As you cut each piece, lay it over the chair to confirm the fit. This proactive step helps catch any errors early. It’s much easier to fix mistakes now than after the fabric is stitched together. By focusing on these cutting techniques, you’ll set the stage for a slipcover that fits like a glove. Are you ready to see your chair transformed?
Credit: www.aosom.com
Sewing The Slipcover
Sewing the slipcover involves measuring, cutting, and stitching fabric to fit snugly over a chair. Ensure precise measurements for a tailored fit. Select durable fabric for longevity and easy maintenance.
Sewing the slipcover is where your creativity meets functionality. It’s the step where all your preparation and planning come to life. Whether you’re a seasoned seamstress or a curious beginner, the process can be as rewarding as the final result. Let’s dive into the essentials of sewing your slipcover.
Preparing Your Sewing Machine
Before you begin sewing, ensure your sewing machine is in tip-top shape. Check that the needle is suitable for the fabric you’re using—usually, a heavy-duty needle works best for upholstery materials. Clean out any lint or dust to avoid thread jams. Wind a bobbin with the same thread you’ll be using on top. This ensures consistency in your stitching. Adjust the tension settings according to your fabric type to prevent puckering or loose stitches.
Stitching Techniques
Choosing the right stitch is crucial for durability and aesthetics. A straight stitch is ideal for most seams, offering strength and a neat finish. For added security, especially on stress points like corners, consider using a zigzag stitch or a double stitch. Pin the fabric pieces together before sewing. This helps maintain accuracy and prevents slipping. As you sew, remove the pins to avoid damaging your needle. Take it slow, especially around curves and corners. This ensures you maintain control and achieve a professional finish. Have you ever tried using tailor’s chalk to mark your sewing lines? It’s a game-changer for precision!
Fitting The Slipcover
Align the slipcover fabric with the chair’s contours. Smooth out wrinkles for a neat appearance. Tuck excess material securely under the cushion.
Fitting a slipcover perfectly enhances your chair’s appearance. It brings a fresh look. Ensuring a snug fit is key. This section guides you through fitting your slipcover. Follow these steps for a neat and tidy finish.
Securing The Edges
Tuck the slipcover’s edges into the chair’s seams. Use a wooden spatula for deep tucking. This helps keep the cover in place. Secure loose corners with Velcro strips. Attach them to the fabric and chair for stability. Safety pins also help in holding the fabric tight.
Adjusting For Perfect Fit
Smooth out any wrinkles with your hands. Pull the fabric tight across the chair. Use elastic bands for extra grip. Place them around the chair’s legs. This ensures the fabric stays put. Adjust the cover until it fits snugly. Make sure no fabric hangs loose. This step creates a seamless look.
Adding Finishing Touches
Adding finishing touches elevates your slipcover project. Trim excess fabric and secure seams for a tailored look. Iron and smooth out wrinkles to enhance its appearance.
Adding the finishing touches to your homemade slipcover can transform it from a simple cover to a piece of art. It’s the stage where your creativity can shine, adding personality and flair to your chair. How you choose to finish your slipcover can make all the difference in the world.
Decorative Elements
Consider adding some decorative elements to your slipcover to make it stand out. You could sew on some contrasting piping along the seams. This not only adds a professional look but also provides a pop of color. Adding buttons or ties can be both functional and stylish. They can help keep the slipcover in place while adding a unique touch. Have you considered using fabric paint or stencils for a personalized design? This can turn a simple slipcover into a statement piece.
Final Inspections
Before you declare your slipcover complete, take a moment for a final inspection. Check for any loose threads or uneven seams. A small oversight can detract from an otherwise perfect finish. Ensure that the slipcover fits snugly and all the decorative elements are securely attached. Sit on the chair and move around to test the fit and comfort. Does it feel as good as it looks? Taking the time for these last-minute checks ensures your slipcover will be both beautiful and durable. Remember, a little attention to detail at this stage can make a significant difference in the final result.
Maintaining Your Slipcover
Maintaining your slipcover is easy with regular care. Wash it gently to keep colors fresh. Iron it lightly for a neat look.
Maintaining your slipcover keeps it looking fresh and lasting longer. Regular care ensures it remains as beautiful as the day you made it. A well-maintained slipcover adds elegance and charm to any room. Let’s explore some essential tips for keeping your slipcover in top shape.
Cleaning Tips
Dust and dirt accumulate on slipcovers over time. Regular cleaning helps maintain their appearance. Use a vacuum with an upholstery attachment to remove loose debris. Spot clean stains with a mild detergent and water. Always test on a hidden area first. For deeper cleaning, machine wash if the fabric allows. Use a gentle cycle with cold water to prevent shrinkage. Air dry your slipcover to maintain its shape and size. Iron on a low setting if needed to smooth out wrinkles.
Repairing Minor Damages
Small tears or loose threads may occur. Quick repairs prevent further damage. Use a needle and matching thread to sew small tears. Reinforce weak seams with extra stitching for added strength. For loose buttons or ties, reattach them securely. Fabric glue can mend minor frays or snags. Always keep a small repair kit handy. Regular inspections help catch issues early. This proactive approach extends your slipcover’s life.

Credit: www.youtube.com
Frequently Asked Questions
What Materials Do I Need For A Slipcover?
To make a slipcover, you’ll need fabric, measuring tape, scissors, pins, and a sewing machine. Choose durable and washable fabric for longevity. A fabric marker helps in marking measurements, and thread matching your fabric color ensures a neat finish. Make sure to buy enough fabric to cover the chair fully.
How Do I Measure My Chair For A Slipcover?
Start by measuring the height, width, and depth of the chair. Measure the backrest, seat, and arms separately. Consider any curves or unique features. Add extra inches for seam allowance and flexibility. Accurate measurements are crucial for a well-fitting slipcover.
Note these down for reference during cutting and sewing.
Can I Make A Slipcover Without Sewing?
Yes, you can make a no-sew slipcover using fabric and upholstery pins. Drape the fabric over the chair and tuck it tightly. Use pins to secure the fabric in place. This method is quick and easy, ideal for temporary updates.
Ensure the fabric is snugly fitted to avoid slipping.
How Do I Choose The Right Fabric?
Choose fabric based on durability, washability, and aesthetic appeal. Cotton and linen are popular for their comfort and ease of cleaning. Consider patterns that complement your room decor. Ensure the fabric is sturdy enough to withstand daily use. Test fabric samples to see how they look on your chair.
Conclusion
Crafting a slipcover for your chair is rewarding. It adds style and protection. You save money and personalize your space. Follow the steps carefully. Choose fabric that suits your taste. Measure accurately for a perfect fit. Use simple tools and patience.
Anyone can do it with some effort. Practice makes perfect. Transform your furniture easily. Enjoy your newly covered chair! It’s a creative project that enhances home comfort. A slipcover refreshes your room instantly. Share your results with friends. Inspire others to try it too.
Happy sewing!

Home Improvement Expert & Senior Writer at HomeFixio
Reed Atwood is a seasoned home improvement expert with a passion for transforming everyday living spaces into functional and stylish havens. With years of experience in DIY projects, renovations, and home upgrades, Reed brings a wealth of knowledge to HomeFixio. As a senior writer, he provides readers with practical, easy-to-follow guides, expert tips, and innovative solutions for every room in the house. His goal is to empower homeowners to tackle their projects with confidence, ensuring both quality results and a rewarding experience.