How to Use Kitchenaid Cheese Grater: Expert Tips
Imagine preparing a delicious homemade pizza or a fresh salad, and realizing the cheese grating process is slowing you down. If you’ve ever struggled with uneven shreds or tired arms, you’re not alone.
But with the right tool, cheese grating can become a breeze. Enter the Kitchenaid Cheese Grater—your new kitchen ally. This tool not only promises efficiency but also transforms your grating experience into something swift and effortless. Imagine the satisfaction of perfectly grated cheese, every single time.
No more struggling, no more mess, just pure culinary joy. But how exactly do you use this game-changing gadget to its fullest potential? You’re about to discover the secrets to mastering your Kitchenaid Cheese Grater. Stick around to learn tips and tricks that will make grating cheese not just a task, but a pleasure. Whether you’re a seasoned chef or a kitchen novice, this guide is designed for you. Ready to enhance your cooking adventures? Let’s dive in!
Credit: www.youtube.com
Choosing The Right Cheese Grater
Choosing the right cheese grater can enhance your cooking experience. A good grater makes cheese preparation easy and efficient. Kitchenaid offers a variety of graters for different needs. Knowing which one suits your style is essential. Let’s explore the options to find your perfect match.
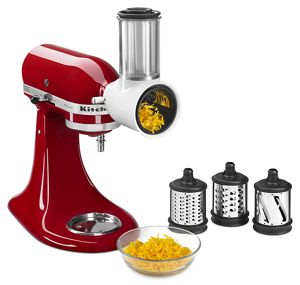
Types Of Kitchenaid Graters
Kitchenaid provides various graters designed for specific tasks. Box graters are versatile and feature multiple grating options. They work well for shredding, slicing, and even zesting. Rotary graters are excellent for quick grating. They allow you to grate cheese with minimal effort. Electric graters offer convenience for larger batches. They save time and reduce hand fatigue.
Material Considerations
The material of your cheese grater affects its performance. Stainless steel is popular for its durability and resistance to rust. Plastic graters are lightweight and easy to handle. They are also less likely to scratch non-stick surfaces. Consider your kitchen needs when choosing the material. Ensure it’s easy to clean and maintain.
Preparing Your Cheese
Using a Kitchenaid Cheese Grater can make cheese grating easy. Preparing your cheese is an important step. It ensures smooth and efficient grating. This involves choosing the right cheese and the best temperature. Let’s explore these aspects to get the most out of your grater.
Selecting The Best Cheese
Choose cheese that suits your dish’s flavor. Hard cheeses like Parmesan are great for grating. Soft cheeses can be tricky to grate. Avoid them if possible. Opt for semi-soft cheeses like Gouda. They work well with the grater. The cheese should be fresh. It enhances the taste and quality of your dish.
Optimal Cheese Temperature
Temperature plays a key role in grating cheese. Cold cheese grates smoothly. Warm cheese tends to stick and clump. Place your cheese in the fridge before grating. Leave it there for 15-20 minutes. This firms up the cheese. It makes grating easier and neater.
If cheese is too cold, let it sit for a while. It should be firm, but not frozen. Find the right balance for the best results.
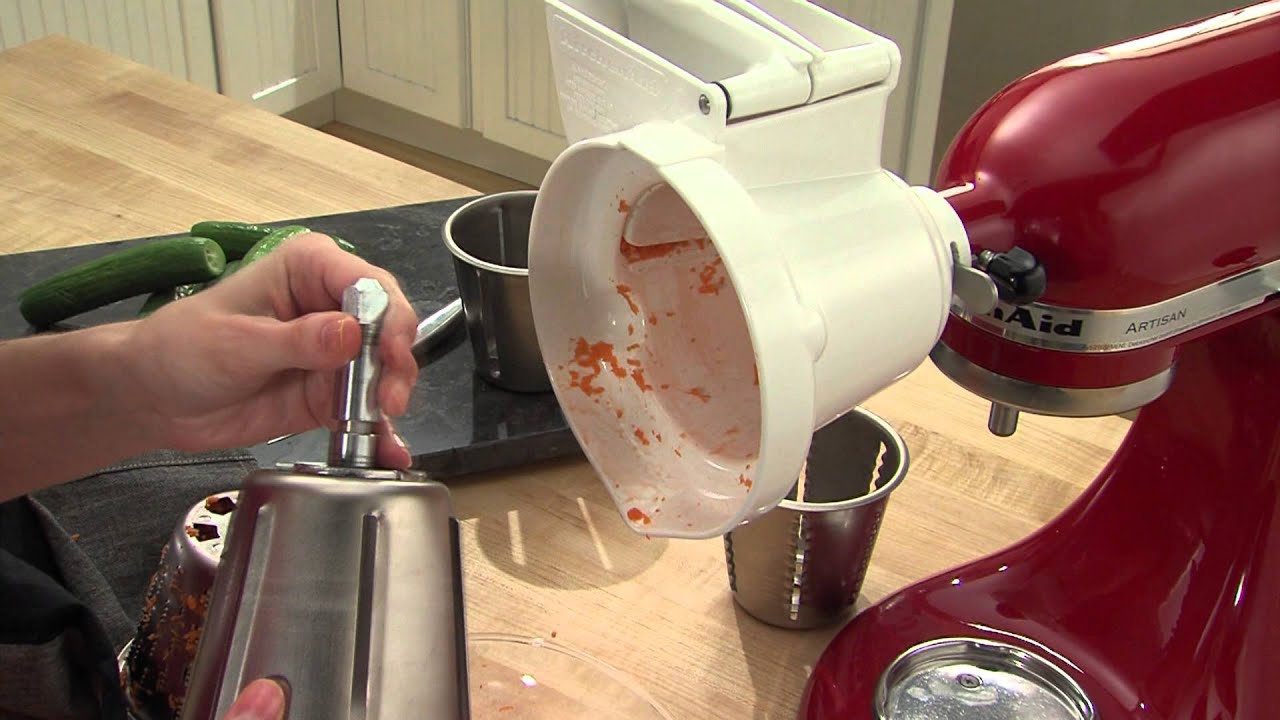
Assembling The Grater
Assemble the Kitchenaid cheese grater by securely attaching the grater blade to the stand mixer. Ensure all parts fit tightly to avoid mishaps during use. Begin grating cheese with steady pressure for consistent results.
Assembling your KitchenAid cheese grater might seem daunting at first, but once you get the hang of it, you’ll be grating cheese like a pro in no time. Imagine how much easier your next pizza night could be with freshly grated mozzarella cascading onto your dough, thanks to your perfectly assembled cheese grater. Let’s break down the process into easy steps, ensuring you can assemble your grater quickly and safely.Parts And Attachments
Start by familiarizing yourself with the various parts and attachments. You have the main body, the grating drum, and the pusher. Each has a specific role in the grating process. The main body is the backbone, while the grating drum does the actual grating. The pusher is your assistant, ensuring every bit of cheese is grated smoothly. Keep these parts organized on your countertop. This way, you won’t have to scramble around trying to find the right piece in the middle of assembly.Safety Precautions
Safety is crucial when assembling your cheese grater. Before starting, ensure your appliance is unplugged. This simple step can prevent accidental starts and potential injuries. Watch your fingers when attaching the grating drum. It’s sharp and meant for cheese—not your skin. Handle it carefully as you slot it into place. Lastly, always secure the attachments firmly. Loose parts can lead to a messy kitchen, or worse, damage to your grater. Double-check everything is locked in before you begin grating. Does your kitchen routine often feel like a game of chance? With a properly assembled KitchenAid cheese grater, you can confidently add a touch of precision to your culinary adventures. What will you grate next?
Credit: www.amazon.com
Grating Techniques
Grating cheese can transform your dishes with texture and flavor. Using a Kitchenaid cheese grater makes this task easy and efficient. Understanding different grating techniques helps achieve the perfect cheese consistency for your recipes.
Fine Vs. Coarse Grating
Fine grating produces small, powder-like cheese pieces. It blends smoothly into sauces or soups, ensuring a creamy texture. Coarse grating creates larger, distinct cheese shreds. It’s ideal for toppings on salads or casseroles. Choose the right grating size based on your dish’s requirements.
Efficient Grating Angles
Hold the cheese at a slight angle for optimal results. This ensures even pressure on the grater surface. A consistent angle prevents the cheese from sticking or clumping. Experiment with different angles to find what feels comfortable. Adjusting your technique can improve efficiency and ease.
Cleaning And Maintenance
Cleaning and maintaining your Kitchenaid cheese grater ensures it lasts longer. Proper care keeps it performing well and maintains hygiene. Knowing how to clean it correctly is essential. This section provides practical tips on cleaning and storing your cheese grater.
Proper Cleaning Methods
Always wash your grater after each use. Use warm, soapy water and a soft brush. Scrub gently to remove cheese remnants. Rinse thoroughly to ensure no soap residue remains. Dry completely with a towel to prevent rust.
For stubborn cheese bits, soak the grater in warm water. Add a little vinegar to help dissolve the cheese. Scrub again with a brush after soaking. Avoid using abrasive materials that might damage the surface.
Storage Tips
Store your cheese grater in a dry place. Moisture can cause rust. Keep it in a kitchen drawer or cabinet. Ensure the grater is completely dry before storing. Use a protective cover to avoid scratches.
Avoid storing heavy items on top of the grater. This can cause deformation. Keep it accessible for easy use. Proper storage keeps the grater in good condition.
Troubleshooting Common Issues
Kitchenaid cheese graters can face issues like clogging or uneven grating. Ensure cheese is firm for better results. Regular cleaning prevents residue build-up, enhancing performance.
When using your Kitchenaid Cheese Grater, you might run into a few hiccups. Don’t worry—these are usually easy to fix. Whether you’re dealing with cheese that just won’t budge or a grater that’s not working smoothly, we’ve got you covered. Let’s dive into some practical solutions to get your grater back on track.Dealing With Stuck Cheese
Cheese getting stuck in the grater is a common issue. One way to prevent this is by choosing the right type of cheese. Softer cheeses can be tricky, so try chilling them in the freezer for about 10 minutes before grating. If the cheese is already stuck, don’t panic. Stop the grater immediately to avoid any damage. Use a spatula or a soft brush to gently remove the cheese. Have you ever tried using a light spray of cooking oil on the grater before use? This simple trick can create a non-stick surface, making the grating process much smoother.Handling Grater Malfunctions
Sometimes the grater itself might not perform as expected. Check if the attachment is properly secured. A loose attachment can cause unexpected stops. If the grater still isn’t working, inspect the power supply. Ensure the appliance is plugged in correctly and the outlet is functional. You’d be surprised how often it’s just a simple power issue. Consider the last time you cleaned the grater. Build-up inside can lead to malfunctions. Regular cleaning not only ensures efficiency but also prolongs the life of your appliance. What if these solutions don’t work? It might be time to consult the user manual or reach out to customer support for further assistance. Remember, maintaining your equipment can save you from bigger headaches down the line. By keeping these tips in mind, you can troubleshoot common issues quickly. What’s your go-to fix when your kitchen gadgets act up? Share your experiences in the comments below!Creative Uses For Grated Cheese
Grated cheese is a versatile ingredient in the kitchen. It adds flavor and texture to many dishes. The KitchenAid cheese grater makes grating cheese quick and easy. Once you have your grated cheese, the possibilities are endless. From culinary creations to unexpected uses, grated cheese can do it all.
Culinary Applications
Sprinkle grated cheese on top of your pasta dishes. It melts beautifully and enhances the flavor. Grated cheese also works well in soups. Stir it in for a creamy texture. Use it as a filling for omelets or stuffed peppers. It provides a rich taste that pairs well with vegetables and eggs. Add it to homemade bread or rolls. It creates a cheesy crust that’s hard to resist.
Mix grated cheese into your burger patties. It adds moisture and a savory note. Create a cheese sauce for nachos or pasta by melting it down. Combine with milk and butter for a smooth consistency. Top your salads with grated cheese. It adds a touch of luxury to fresh greens.
Non-culinary Ideas
Grated cheese can be more than just food. Use it in arts and crafts projects. Mold it into shapes for a fun texture. It can be a creative activity for kids. Cheese sculptures can become a unique centerpiece for parties. Just be sure to keep them cool.
In the garden, grated cheese can act as a natural pest deterrent. It attracts beneficial insects that keep pests away. This use requires careful consideration, as it may also attract unwanted wildlife.
Even pets can enjoy grated cheese as an occasional treat. It should be given in moderation. Always check with a vet before feeding cheese to pets.
Credit: www.kitchenaid.com
Frequently Asked Questions
How Do I Assemble Kitchenaid Cheese Grater?
To assemble the Kitchenaid cheese grater, attach the grater attachment to your stand mixer. Secure the blade by inserting it into the attachment. Ensure it clicks into place. Next, tighten the attachment knob on the mixer. Make sure everything is secure before grating.
Follow the manufacturer’s instructions for proper assembly.
Can I Grate Hard Cheese With Kitchenaid?
Yes, you can grate hard cheese using a Kitchenaid cheese grater. Choose a fine or coarse blade based on your preference. The powerful motor easily handles hard cheeses like Parmesan. Ensure the cheese is cut into manageable chunks before grating.
This ensures even grating without overloading the machine.
What Speed Setting Should I Use?
Use a low to medium speed setting for optimal cheese grating. Start with the lowest speed to ensure safety. Gradually increase speed if necessary. A slower speed helps avoid overheating and ensures a consistent texture. Always monitor the grating process and adjust as needed for best results.
How Do I Clean The Cheese Grater?
Detach the grater attachment from the mixer for cleaning. Rinse the blade under warm water immediately after use. Use a small brush to remove stuck cheese. Clean the attachment body with a damp cloth. Ensure all parts are completely dry before storing to prevent rust or mold.
Conclusion
Mastering the KitchenAid cheese grater is easy and satisfying. With practice, grating becomes quick and efficient. Enjoy grated cheese for any dish you desire. Clean up is simple, saving you time and effort. Safe handling ensures you avoid any kitchen mishaps.
Now, you can confidently add freshly grated cheese to your meals. Your dishes will taste fresher and more delicious. Remember, the right tool makes cooking enjoyable. Happy grating with your KitchenAid cheese grater!

Home Improvement Expert & Senior Writer at HomeFixio
Eliot Granger is a seasoned home improvement expert with years of experience transforming living spaces. Specializing in everything from kitchen renovations to bathroom upgrades, Eliot shares his knowledge through practical, insightful articles. His passion for creating functional, beautiful homes drives him to offer expert tips and solutions for every corner of your house. As a trusted writer for HomeFixio, Eliot is dedicated to helping homeowners make informed decisions and achieve precision in their projects.


