How to Vent a Bathroom Fan Through the Wall: Easy DIY Guide
Are you struggling with a bathroom that feels damp and stuffy? Venting your bathroom fan through the wall can be the simple fix you need to keep moisture and odors out of your space.
But if you’re unsure where to start or worried about making mistakes, you’re not alone. In this guide, you’ll discover easy, step-by-step instructions that anyone can follow to get your fan vented properly. By the end, you’ll know exactly how to improve your bathroom’s air quality—and protect your walls from damage.
Ready to tackle this project? Let’s dive in!
Tools And Materials Needed
Before you start venting your bathroom fan through the wall, gathering the right tools and materials is crucial. Having everything on hand saves time and prevents frustrating interruptions. It also ensures your project runs smoothly and safely.
Essential Tools For The Job
- Power Drill:You’ll need this for making holes in the wall and securing screws.
- Hole Saw or Jigsaw:Ideal for cutting the vent hole precisely without damaging surrounding areas.
- Measuring Tape:Accuracy is key, so measure twice before cutting once.
- Utility Knife:Handy for trimming drywall or insulation neatly.
- Screwdriver:For installing vent covers and securing duct connections.
- Caulking Gun:To seal gaps and prevent moisture or air leaks.
- Level:Ensures the vent is installed straight, which improves airflow and appearance.
Materials You’ll Need
- Vent Duct:Choose rigid or semi-rigid ducting for durability and efficient airflow.
- Wall Vent Cap:A cover for the exterior wall that keeps out rain, pests, and debris.
- Vent Collar:Connects the fan to the duct securely.
- Drywall Patch Kit:In case you need to repair or smooth the wall around the vent hole.
- Foam or Fiberglass Insulation:Use around the duct to minimize heat loss and reduce noise.
- Caulk or Weatherproof Sealant:Essential to seal exterior openings against the elements.
What Makes These Tools And Materials Work Together?
Think about your last home improvement project. Did you pause mid-task because you were missing a tool or part? That’s exactly why preparing this checklist saves you headaches.
With the right tools, you cut clean holes without damaging your wall. The right materials ensure your vent remains functional and weatherproof for years. Can you imagine the frustration of a leaky vent or poor airflow just because you skipped one small item?
So, take a moment and organize your workspace. Laying out everything before you begin means you can focus on making your bathroom fresh and dry, not scrambling for missing pieces.
Credit: www.diychatroom.com
Choosing The Right Vent Location
Choosing the right vent location is key to proper bathroom fan installation. The vent spot affects airflow, moisture removal, and fan efficiency. A good vent location helps prevent mold and damage inside walls.
Think about the outside wall where the fan will push air out. The vent should be close enough to the fan to reduce duct length. Short ducts work better and keep the fan quieter.
Consider Wall Material And Structure
Check what the outside wall is made of before cutting. Some walls have insulation or wiring that can be damaged. Avoid cutting near electrical wires or pipes for safety. Solid walls like brick or concrete need special tools for vent installation.
Look For Clear Outdoor Space
Find a spot on the wall with clear space outside. Avoid places blocked by bushes, fences, or other objects. Clear space helps air flow freely and stops moisture buildup. Make sure the vent outlet is away from windows and doors to prevent air from coming back inside.
Mind Local Building Codes
Check local rules about vent placement and size. Some areas require vents to be a certain distance from windows or neighbors. Following codes keeps your home safe and avoids fines. It also ensures the vent works well with your house design.
Avoid High Traffic Areas
Place the vent where it won’t be in people’s way. Avoid spots near walkways or patios. This prevents damage to the vent and keeps the area neat. A hidden vent looks better and lasts longer.
Plan For Weather Protection
Choose a location that shields the vent from rain and snow. Use vent covers or hoods to stop water from entering. Proper weather protection extends the vent’s life and keeps the fan working well.
Measuring And Marking The Wall
Measuring and marking the wall correctly is a crucial step when venting a bathroom fan through the wall. This ensures the vent fits perfectly and works efficiently without causing any damage to your home structure.
Accuracy matters here. Even a small miscalculation can lead to improper installation, air leaks, or the need to patch up the wall later.
Have you ever tried cutting into a wall without measuring twice? It rarely ends well. Taking your time to measure and mark properly saves you headaches and extra repairs.
Gathering The Right Tools
Before you start, make sure you have a measuring tape, pencil, level, and a stud finder. These tools help you mark the spot precisely and avoid cutting into studs or electrical wires.
A level ensures your markings are straight, which is essential for the vent to fit flush against the wall. The stud finder protects your home’s structure and prevents costly mistakes.
Locating The Best Spot On The Wall
Identify where your bathroom fan is located inside and trace a line on the wall directly behind it. This is usually the shortest and most efficient path for the vent.
Check the outside of the wall for any obstructions like pipes, wires, or structural elements that could interfere with the vent placement.
Ask yourself: Is this spot practical for running the vent pipe without bending or stretching it too much? A straight, short run improves airflow and reduces noise.
Measuring The Vent Size And Marking The Cutout
Refer to your fan’s vent size specifications and measure the diameter of the vent pipe. Use this measurement to draw the exact size of the hole on the wall.
Mark the center point first, then use a compass or a round object of the same diameter to trace the circle. Double-check the measurements before making any cuts.
Use a pencil for marking so you can easily adjust if needed. Precision here means a snug fit, which keeps your vent secure and prevents drafts.
Ensuring Safety And Accuracy
Run the stud finder over your marked area to confirm you aren’t cutting into a stud. Also, scan for electrical wires to avoid dangerous accidents.
Mark any studs or wires with a contrasting color pencil or tape so you can avoid them during the cutting process.
Have you considered what might be behind your walls? Taking these precautions helps protect your home and your safety during installation.
Credit: www.i-sells.co.uk
Cutting The Vent Hole
Cutting the vent hole is a crucial step in venting your bathroom fan through the wall. It requires precision and care to ensure a proper fit and to avoid damaging your wall or surrounding structures. Taking your time here will save you headaches later and improve the overall performance of your ventilation system.
Choosing The Right Location For The Vent Hole
Pick a spot on the wall that’s close to your bathroom fan but also easy to access from the outside. Avoid areas with electrical wiring, plumbing, or studs that could get in the way. Use a stud finder and inspect both sides of the wall before marking your spot.
Marking The Vent Hole Size And Shape
Check the size of your vent duct and fan outlet to know the exact hole dimensions. Most bathroom vents need a round hole of about 4 inches in diameter, but always measure your specific parts. Use a pencil and a template or a cardboard cutout to trace the shape clearly on the wall.
Tools You’ll Need For Cutting The Hole
- Drill with a hole saw attachment (for round holes)
- Keyhole saw or drywall saw
- Measuring tape
- Stud finder
- Safety goggles and dust mask
Having the right tools makes the job easier and cleaner. A hole saw drill bit is especially helpful for neat, precise round cuts.
Cutting The Hole Safely And Accurately
Start by drilling a pilot hole inside your marked circle to insert the saw blade. Then, carefully cut along the outline, keeping your hand steady to avoid jagged edges. Wear safety goggles to protect your eyes from dust and debris.
Checking The Fit And Making Adjustments
After cutting, test fit the vent duct through the hole. It should slide in snugly without forcing. If the hole is too tight or uneven, use sandpaper or a utility knife to smooth and slightly enlarge it.
Installing The Vent Duct
Installing the vent duct is a crucial part of venting a bathroom fan through the wall. The duct must be properly selected and securely fastened to ensure efficient airflow and prevent moisture buildup. Getting this right can save you from future repairs and keep your bathroom fresh and dry.
Selecting Duct Material
Choosing the right duct material affects the fan’s performance and longevity. Rigid metal ducts, like aluminum or galvanized steel, are the best choice because they resist crushing and don’t collect moisture easily. Flexible plastic or foil ducts might seem easier to install, but they often reduce airflow and can trap moisture, leading to mold problems.
Think about the path the duct will take—will it go through tight spaces or straight through the wall? If the run is short and straight, rigid ducts work perfectly. For bends, use minimal and gentle curves to keep air moving smoothly.
Securing The Ductwork
Once you have your duct material, make sure to fasten it firmly to both the fan and the wall vent. Use metal foil tape to seal all joints—avoid duct tape because it loses stickiness over time. This prevents air leaks and keeps moisture out of your walls.
Support the duct every few feet with straps or hangers to stop sagging, which can trap moisture and reduce airflow. Remember, a loose or poorly supported duct can cause noise and reduce fan efficiency. Have you checked if your duct feels solid and well-connected after installation?
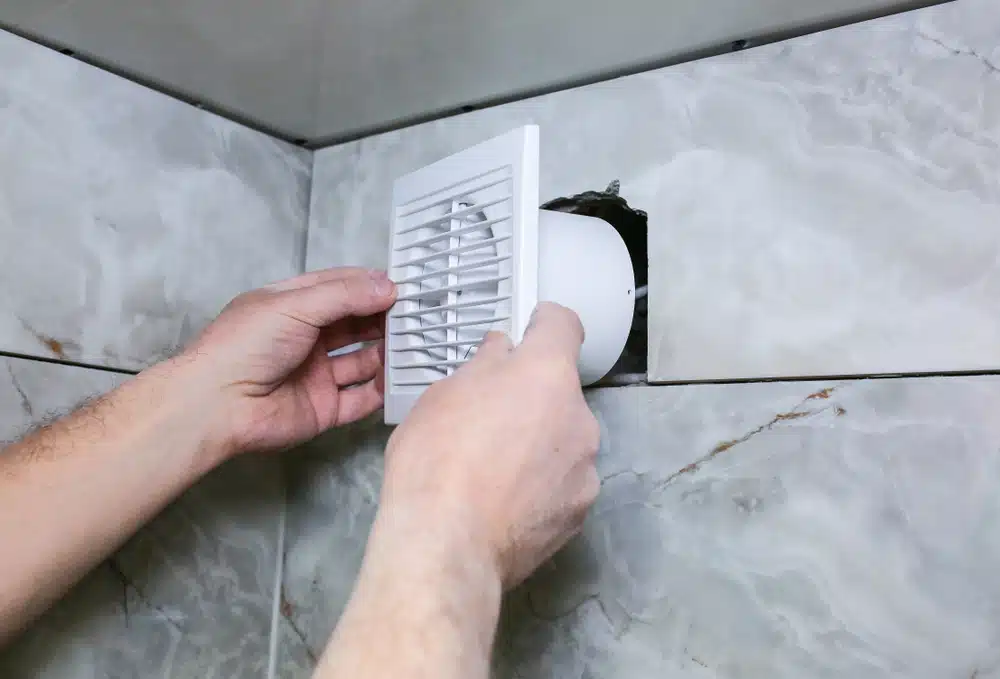
Mounting The Exterior Vent Cap
Mounting the exterior vent cap is a key part of venting a bathroom fan through the wall. This step allows air to flow outside and prevents moisture buildup inside. The vent cap should be placed securely on the wall, aligned with the duct opening. A proper mount ensures efficient airflow and keeps pests out.
Choose a vent cap that fits the duct size and suits your home’s exterior. Attach the vent cap with screws, making sure it is flush against the wall. This prevents gaps that could let water or air inside. Check that the vent flap or screen can open and close freely.
Sealing The Edges
Seal the edges of the vent cap to stop air leaks and water damage. Use a high-quality exterior caulk or silicone sealant. Run a bead of sealant around the entire edge where the cap meets the wall.
Press the sealant firmly to fill any gaps. Smooth the sealant with a putty knife or your finger for a tight seal. Inspect the seal after it dries to ensure no cracks or holes remain.
Weatherproofing Tips
- Choose a vent cap made from weather-resistant materials like plastic or metal.
- Install a vent cover with a built-in damper to keep rain and snow out.
- Apply flashing tape around the vent cap edges for extra protection.
- Keep the vent clear of debris like leaves or dirt to maintain airflow.
- Inspect the vent annually for damage or wear and reseal if needed.
Connecting The Fan To The Duct
Connecting your bathroom fan to the duct is a key step in ensuring proper ventilation and preventing moisture buildup. This connection must be secure to avoid air leaks that can reduce efficiency and cause damage over time. Let’s look at how to make this link both tight and reliable.
Ensuring A Tight Seal
Start by choosing the right duct size that matches your fan’s outlet. A snug fit is essential to prevent air from escaping. Use metal foil tape, not regular duct tape, to seal the joint firmly.
Wrap the tape around the connection point several times for a durable seal. Don’t rely on clamps alone; tape adds extra security. If you notice any gaps, add more tape or consider using a mastic sealant for a stronger hold.
Have you ever felt your bathroom fan wasn’t working efficiently? A loose connection could be the culprit. Tight seals keep air flowing out smoothly, which keeps your bathroom dry and fresh.
Testing The Connection
Once sealed, turn on the fan and check for air leaks around the duct joint. Use your hand to feel for any escaping air or hold a piece of tissue near the connection to see if it flutters. This simple test can reveal hidden leaks.
If you detect leaks, reinforce the seal with additional tape or sealant. Also, listen for unusual rattling or vibration sounds, which might indicate a loose or improperly connected duct. Fixing these issues early saves you from costly repairs later.
Have you ever ignored a small leak only to find mold later? Testing your connection now helps you avoid that problem. You want your bathroom fan to work quietly and efficiently, not cause extra headaches.
Final Checks And Maintenance Tips
After venting your bathroom fan through the wall, paying attention to final checks and ongoing maintenance is crucial. These steps help you avoid future problems like moisture damage or inefficient airflow. Regular upkeep ensures your fan works effectively, keeping your bathroom fresh and free from mold.
Inspecting For Leaks
Check the vent area on both sides of the wall for any signs of air or water leaks. Look for damp spots, peeling paint, or unusual smells around the vent opening. If you spot any leaks, seal gaps with weatherproof caulk or foam to prevent moisture from entering your walls.
Don’t forget to inspect the exterior vent cap too. Make sure it closes properly and isn’t blocked by debris or insects. A loose or damaged vent cap can let rain or pests inside, causing damage and reducing fan efficiency.
Regular Cleaning Advice
Dust and grime buildup can reduce your fan’s performance over time. Clean the fan cover and vent duct every few months to keep air flowing smoothly. Use a vacuum with a brush attachment or a damp cloth to remove dust from accessible parts.
Take the time to check the vent hood outside as well. Remove leaves or nests that may block airflow. Have you noticed your fan sounding louder or working less efficiently? That’s a sign it’s time for a thorough cleaning.

Credit: forum.nachi.org
Frequently Asked Questions
How Do I Vent A Bathroom Fan Through The Wall?
To vent a bathroom fan through the wall, cut a hole in the exterior wall aligned with the fan. Install a vent cap outside and connect ductwork from the fan to the vent. Seal all gaps to prevent leaks and moisture buildup.
What Materials Are Needed For Wall Vent Installation?
You need a vent cap, duct pipe, duct tape, screws, a drill, a saw, and sealant. Use rigid or flexible ducting designed for bathroom fans. Proper materials ensure efficient airflow and prevent moisture damage.
Can I Vent A Bathroom Fan Directly Outside?
Yes, venting directly outside prevents moisture buildup and mold. Avoid venting into the attic or crawl spaces. Use a vent cap with a damper to keep out pests and weather elements.
How Do I Prevent Drafts From A Bathroom Wall Vent?
Install a vent cap with a built-in damper to block outside air. Seal all duct connections with foil tape, not duct tape. Proper sealing keeps warm air inside and stops cold drafts.
Conclusion
Venting a bathroom fan through the wall helps remove moisture fast. It stops mold and keeps your bathroom fresh. Use the right tools and follow safety steps carefully. Seal all gaps to avoid air leaks. Check local rules before you start any work.
A well-vented bathroom stays clean and healthy. Take your time and work with care. Small efforts bring big benefits to your home’s air quality.

Home Improvement Specialist & Writer at HomeFixio
Caden Rutherford is a seasoned home improvement specialist with extensive hands-on experience in residential construction, renovations, and design. With a keen eye for detail and a passion for transforming spaces, Caden shares practical advice and expert solutions to enhance the functionality and beauty of homes. As a writer for HomeFixio, Caden combines technical knowledge with creative flair, providing readers with informative guides on everything from structural improvements to aesthetic upgrades, empowering homeowners to achieve their ideal living spaces.