How to Install Toilet Paper Roll Holder: Easy DIY Guide
Imagine this: you’re in your newly renovated bathroom, admiring the gleaming tiles and shiny fixtures. Everything is perfect, except for one glaring omission—the toilet paper roll holder.
It’s the little details that can make or break a space, and installing a toilet paper roll holder is easier than you might think. Don’t let the fear of drilling holes or choosing the wrong spot hold you back. This guide will walk you through the simple steps to confidently install a toilet paper roll holder that not only functions seamlessly but also complements your bathroom’s design.
By the end, you’ll not only have added a touch of practicality but also a sense of accomplishment that comes from tackling a home improvement project. Ready to transform your bathroom space with a small yet significant change? Let’s dive in and get that holder up and running in no time!

Credit: www.wikihow.com
Tools And Materials Needed
Installing a toilet paper roll holder is a simple home improvement task. It requires some basic tools and materials. Preparing the right items ensures a smooth installation process. Let’s explore what you need.
Tools Needed
A few essential tools will make your job easier. You will need a drill. It helps create holes for screws. A screwdriver is important for securing screws tightly. A level is crucial to ensure the holder is straight. Use a measuring tape to find the perfect spot on the wall.
Materials Needed
Gather all necessary materials before starting. Purchase a toilet paper roll holder of your choice. Ensure it fits your bathroom style. You will need screws and wall anchors. These secure the holder to the wall. If your wall is tile, get a tile drill bit. It prevents damage to the tiles.
Safety Gear
Safety is always important. Wear safety glasses to protect your eyes. Gloves can help prevent cuts or scratches. Use a dust mask if drilling into drywall. It keeps dust out of your lungs.
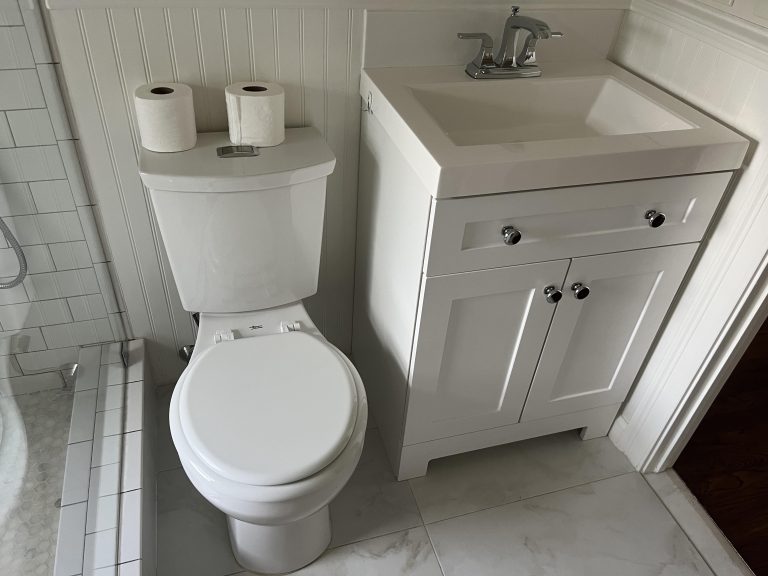
Choosing The Right Location
Finding the ideal spot ensures easy access and comfort. Consider height and reach for optimal convenience. Choose a location that complements your bathroom’s layout for seamless integration.
Choosing the right location for your toilet paper roll holder can make all the difference in your bathroom experience. Imagine reaching for the roll and finding it effortlessly within arm’s reach. The placement isn’t just about convenience; it’s about creating a seamless and enjoyable bathroom routine.Consider Accessibility
Start by thinking about who will use the bathroom. Will children need easy access, or are you accommodating elderly family members? Ensure the holder is within a comfortable reach for everyone. It should be neither too high nor too low, sparing you from awkward stretches.Think About Traffic Flow
Bathrooms are often bustling spaces, especially during busy mornings. Place the holder where it won’t be in the way. You don’t want to bump into it every time you walk in. Consider areas that are less likely to be a hindrance yet still accessible.Evaluate Wall Space
Look at the available wall space near your toilet. A cramped corner might not be ideal. Opt for an area that allows easy access without cluttering the room. A good rule of thumb is to install it about 26 inches above the floor and 8 to 12 inches from the toilet.Test Before You Drill
Before committing to a spot, test it out. Hold the roll holder in place and mimic your usual bathroom routine. Does it feel natural? Is it easy to reach? Sometimes the best spots aren’t immediately obvious until you simulate daily use.Factor In Aesthetics
While functionality is crucial, aesthetics shouldn’t be overlooked. Choose a location that blends with your bathroom’s design. A well-placed holder can complement your décor, adding a touch of style to the room.Account For Future Changes
Consider any future bathroom renovations or changes. Will the holder’s location still make sense if you update your space? Planning ahead can save you time and effort later. Choosing the right location for your toilet paper holder isn’t just a small detail; it’s a thoughtful decision that enhances your bathroom’s functionality and style. Where will you place yours?Measuring And Marking
Installing a toilet paper roll holder seems simple. Yet, measuring and marking are critical steps. With precise measurements, the holder will fit perfectly. Let’s explore these steps in detail.
Measuring The Correct Height
Place the holder at a comfortable height. The standard height is 26 inches from the floor. Use a tape measure for accuracy. Mark this spot with a pencil.
Determining The Distance From The Toilet
Keep the holder within arm’s reach. Typically, 8 to 12 inches from the toilet is ideal. Measure this distance carefully. Mark the spot clearly to avoid errors.
Ensuring Level Placement
A level holder looks neat. Use a spirit level for this task. Align it horizontally with your marks. Adjust if necessary to ensure it’s perfectly level.
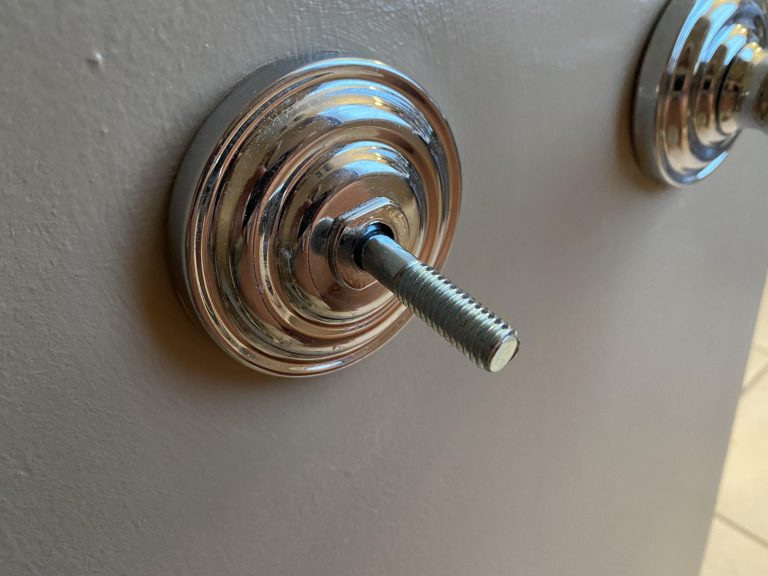
Marking The Drill Points
Hold the base of the holder against the wall. Mark where the screws will go. Use a pencil for clear visibility. Double-check the alignment with the spirit level.

Credit: www.youtube.com
Drilling Holes
Installing a toilet paper roll holder requires precision when drilling holes. Begin by marking the spot with a pencil for accuracy. Carefully drill holes using a suitable drill bit, ensuring they align with the holder’s brackets for secure attachment.
Installing a toilet paper roll holder might seem like a mundane task, but getting it right can make a significant difference in your bathroom experience. A crucial step in this process is drilling holes, which ensures your holder stays firmly attached to the wall. If you skip this step or do it incorrectly, you might find your holder repeatedly slipping off or hanging awkwardly. Whether you’re a DIY enthusiast or just someone wanting to fix a loose holder, understanding the drilling process can save you time and frustration. Let’s dive into the essentials of drilling holes for your toilet paper roll holder.Gather Your Tools
Before you start drilling, make sure you have the right tools at hand. You will need a drill, drill bits suitable for your wall type, a pencil for marking, and a level to ensure straight alignment. Having everything within reach keeps the process smooth and efficient. You don’t want to pause midway to hunt for a missing tool.Mark The Spot
Decide where you want your holder to be. Use a pencil to mark the spots where you will drill the holes. It’s crucial to get this right, as uneven or misplaced holes can lead to a crooked holder. Measure the distance between the holes on the holder to ensure accurate placement. Consider the height and accessibility for all users to make sure it’s comfortable and convenient.Use A Level
Before drilling, check your markings with a level. This ensures your holder will be straight once installed. A crooked holder not only looks unappealing but can also be inconvenient to use. Take a moment to adjust the markings if necessary. A simple mistake here can lead to a frustrating installation later.Drill With Care
When you’re ready to drill, start slowly to avoid damaging your wall. Use the appropriate drill bit for your wall material, whether it’s drywall, tile, or concrete. Applying too much pressure can crack tiles or create larger holes than needed. It’s better to drill gradually and check your progress frequently.Test The Fit
After drilling, test the fit of your holder by inserting screws into the holes. Make sure they fit snugly and the holder aligns perfectly. If the fit isn’t right, you may need to adjust the holes slightly. A secure fit ensures your toilet paper roll holder will withstand everyday use without issues. Think about the satisfaction of a perfectly installed holder. How much easier will your daily routine be with a holder that doesn’t wobble or fall apart? Taking the time to drill accurately can transform a simple task into a rewarding accomplishment.Attaching The Holder
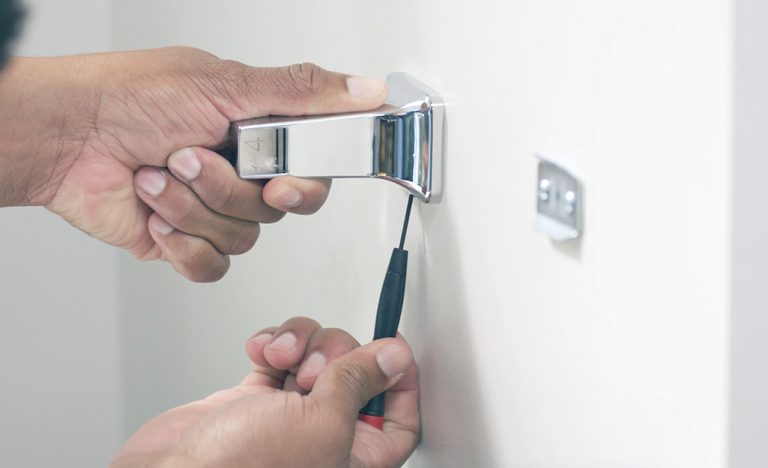
Attaching the toilet paper roll holder is a straightforward task. It’s crucial for maintaining a tidy bathroom. Proper installation ensures easy access to toilet paper. This section will guide you through attaching the holder securely. Follow these simple steps for a hassle-free experience.
Securing With Screws
Begin by selecting the right spot on the wall. Make sure it’s within reach from the toilet seat. Use a pencil to mark the positions for screws. Drill small holes at marked spots. Ensure the drill bit matches the screw size. Insert screws into the holes. Use a screwdriver to tighten them. Check they are firm and secure.
Ensuring Stability
Check the holder’s alignment. It must sit evenly against the wall. Adjust the holder if needed. Ensure it doesn’t wobble. Tighten screws further to prevent movement. Test by gently pulling the holder. It should remain stable. A sturdy holder ensures long-lasting use. Enjoy a neatly organized bathroom space.
Final Adjustments
Secure the toilet paper roll holder to the wall. Ensure it is level and firmly attached. Tighten all screws for stability.
Once you’ve secured your toilet paper roll holder to the wall, it’s crucial to ensure everything is perfectly in place. Final adjustments are the key to a functional and aesthetically pleasing installation. This is the moment to make sure it not only stays put but also operates smoothly.Aligning The Holder
Precision is essential when aligning your toilet paper holder. Check that it is level by using a small spirit level or even a smartphone level app. A crooked holder can be an eyesore and inconvenient to use. Consider how the holder looks from different angles in the bathroom. Stand back and assess its alignment in relation to other fixtures. It should feel like a seamless part of the room. If you notice misalignment, gently adjust the screws or brackets. It’s often a matter of minor tweaks to achieve perfection.Testing The Installation
After aligning, it’s time to test your installation. Place a roll of toilet paper on the holder and see how it spins. It should rotate smoothly without resistance. Pay attention to the holder’s stability. Give it a gentle tug to ensure it’s securely fastened. It should withstand regular use without wobbling or detaching. Think about the future. Will this holder accommodate larger rolls or different types of toilet paper? It’s worth considering now to avoid headaches later. Have you ever installed a holder that seemed perfect, only to find it wasn’t practical in daily use? This is your chance to avoid that mistake. Make adjustments now to ensure your holder is both functional and durable. Once you’re satisfied with the alignment and stability, you can take a step back and admire your handiwork. You’ve successfully tackled a DIY task with attention to detail and practicality.Tips For Maintenance
Installing a toilet paper roll holder involves selecting a suitable spot and using a drill for precision. Ensure the holder is level and securely fixed to avoid future maintenance. Simple steps like this can enhance bathroom functionality.
Ensuring your toilet paper roll holder stays in top condition is easier than you might think. A few simple maintenance tips can extend the life of your holder and keep it looking new. Whether it’s a classic chrome holder or a trendy wooden one, regular upkeep is key. These tips will help you keep everything running smoothly and ensure your bathroom remains a pleasant space.1. Regular Cleaning
Dust and grime can accumulate quickly. Wipe down your holder weekly with a damp cloth to maintain its shine. Avoid harsh chemicals that could damage the finish.2. Tighten Loose Screws
Over time, screws can loosen with regular use. Check them monthly and tighten if necessary. This prevents wobbling and ensures the holder stays securely attached to the wall.3. Address Rust Promptly
If you notice any rust spots, act quickly. Use a mixture of baking soda and water to gently scrub away rust. Consider applying a clear coat spray to prevent future corrosion.4. Inspect For Damage
Regularly check for cracks or chips. If you spot any, consider replacing the holder to avoid injury or further damage. A small crack can quickly turn into a bigger problem.5. Lubricate Moving Parts
If your holder has moving parts, like a spring-loaded arm, a little lubrication can go a long way. Use a small amount of silicone spray to keep things moving smoothly.6. Choose The Right Environment
Bathrooms are humid places. Consider the material of your holder and how it reacts to moisture. Materials like stainless steel or plastic are better choices for high-humidity areas.7. Educate Your Household
Make sure everyone knows how to properly use the holder. It might sound basic, but yanking on the roll can lead to unnecessary wear and tear. A gentle touch can prevent future issues. Maintaining your toilet paper roll holder doesn’t require much effort, but it pays off in the long run. By following these simple tips, you ensure that your holder remains a functional and stylish part of your bathroom for years to come. What other bathroom fixtures could use some TLC in your home?
Credit: www.youtube.com
Frequently Asked Questions
How Do I Choose The Right Location?
Select a spot near the toilet for easy access. Ensure it’s within reach for all users. Avoid tight or awkward spaces. Consider the height and comfort of the installation. A convenient location enhances the bathroom experience.
What Tools Do I Need For Installation?
You’ll need a drill, screws, a screwdriver, and a level. A pencil for marking holes is useful too. Ensure you have wall anchors if mounting on drywall. These basic tools help ensure a secure and straightforward installation.
Can I Install Without Drilling?
Yes, adhesive holders are an option for drilling-free installation. They are easy to install and remove. However, they might not be as durable as drilled ones. Ensure the adhesive is strong enough for the holder’s weight.
How High Should I Mount The Holder?
Mount the holder 26 inches from the floor for optimal reach. This height suits most users and ensures comfort. Adjust based on personal preference or specific needs. Consistency in height maintains a uniform bathroom aesthetic.
Conclusion
Installing a toilet paper roll holder is simple and quick. First, gather all your tools. Then, choose the perfect spot for your holder. Make sure it’s easy to reach. Next, use a pencil to mark the screw holes. Drill carefully and attach the holder.
Tighten the screws securely. Finally, test your holder with a roll of toilet paper. Enjoy the convenience of having it within easy reach. A well-installed holder adds neatness to your bathroom. Now, you can confidently tackle this task yourself. Happy DIY!

Home Improvement Specialist & Writer at HomeFixio
Caden Rutherford is a seasoned home improvement specialist with extensive hands-on experience in residential construction, renovations, and design. With a keen eye for detail and a passion for transforming spaces, Caden shares practical advice and expert solutions to enhance the functionality and beauty of homes. As a writer for HomeFixio, Caden combines technical knowledge with creative flair, providing readers with informative guides on everything from structural improvements to aesthetic upgrades, empowering homeowners to achieve their ideal living spaces.