How to Put a Toilet Paper Holder on the Wall: Easy Steps
Are you tired of your toilet paper rolling across the floor? Installing a wall-mounted toilet paper holder is not only simple but also a game-changer for your bathroom experience.
Imagine the convenience of having toilet paper right where you need it, every single time. In this guide, you’ll discover how easy it is to put a toilet paper holder on the wall, transforming your bathroom into a more organized space.
Whether you’re a DIY novice or a seasoned pro, this step-by-step process will empower you to tackle the task with confidence. Say goodbye to the daily frustration and hello to a neat, accessible solution that enhances your bathroom’s functionality. Ready to get started? Let’s dive in and make your bathroom a more efficient place.
Credit: www.homedepot.com
Choosing The Right Location
Choosing the right location for your toilet paper holder is crucial. It ensures ease of use and enhances bathroom functionality. Thoughtful placement contributes to a seamless experience. Consider accessibility, height, and distance to find the perfect spot.
Accessibility And Convenience
Place the holder within easy reach from the toilet. Users should not stretch or lean to grab the toilet paper. A spot next to the toilet seat is ideal. This minimizes effort, making usage effortless.
Height And Distance Considerations
Mount the holder at a comfortable height. Around 26 inches from the floor is standard. This height suits most adults. Distance matters too. Position it 8 to 12 inches from the toilet. This ensures easy access without obstruction.
Gathering Necessary Tools
Installing a toilet paper holder is a simple task. Yet, it requires the right tools. Gathering these tools beforehand makes the job smoother. You don’t want to start and then search for a screwdriver. Knowing what you need saves time.
Let’s look at what you’ll need. Some tools are essential. Others are optional but can help with precision. Having the right equipment ensures a neat and secure installation.
Essential Tools List
Start with a drill. It’s key for making holes in the wall. A screwdriver is next. You’ll use this to tighten screws. Have a level handy. It ensures your holder is straight. A measuring tape helps with placement. Lastly, you’ll need screws and anchors. These hold the toilet paper holder securely.
Optional Tools For Precision
Consider using a pencil. It marks where to drill. A stud finder is useful. It finds the best spot on the wall. Masking tape can be helpful too. It prevents the wall from chipping while drilling. A spirit level is another option. It gives extra accuracy for leveling.
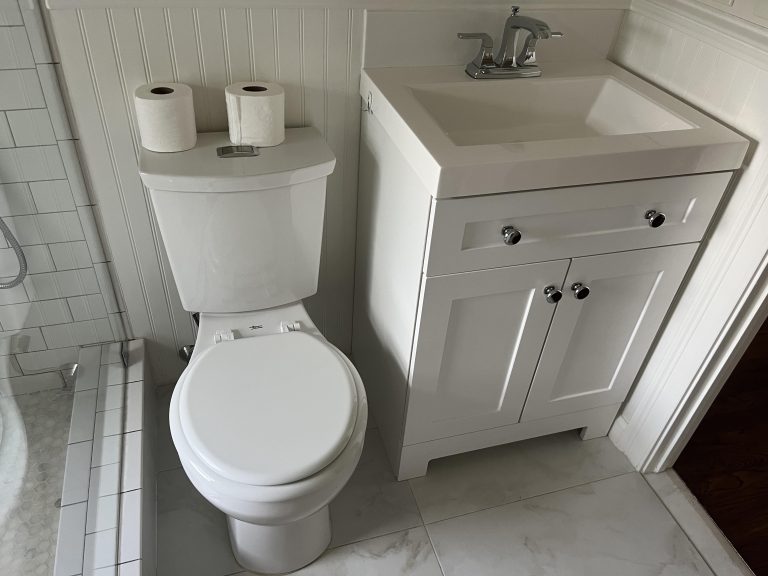
Preparing The Wall
Begin by cleaning the wall where the holder will go. Ensure it’s dry and free of dust. Measure and mark the spot for accurate placement. Use a level tool to ensure straight alignment.
Putting a toilet paper holder on the wall might seem straightforward, but preparing the wall properly is crucial. Imagine the frustration of realizing your holder is crooked or worse, damaging a pipe hidden behind the drywall. A little prep work can save you from a lot of hassle. Let’s dive into the steps to ensure your wall is ready for this simple yet essential installation.
Marking The Spot
Begin by deciding where you’d like your toilet paper holder. Consider the reach from the toilet and the ease of use. Use a pencil to mark the exact spot on the wall. A slight tweak in height can make a big difference in comfort. Trust me, there’s nothing like realizing it’s too low when you’re in the middle of something important!
Checking For Studs Or Pipes
Before you grab the drill, check for any hidden obstacles. Use a stud finder to locate any wooden supports behind the wall. It’s not just about avoiding damage; screws anchored into studs ensure a sturdy fixture. Think about the potential horror of drilling into a pipe. A simple stud finder can avert a costly plumbing emergency. Do you feel confident enough to tackle this task, or is there something holding you back? Remember, preparation is the unsung hero of every successful DIY project.

Credit: www.youtube.com
Installing The Holder
Installing a toilet paper holder can seem like a simple task, yet it holds the power to transform your bathroom experience. Proper installation ensures that your toilet paper is always within arm’s reach, avoiding those awkward moments of searching for a roll. Let’s dive into the nuts and bolts of securing this essential fixture to your wall.
Drilling Holes
Start by determining the ideal spot for your toilet paper holder. Consider convenience and accessibility. Use a pencil to mark where you want the holder to be.
Once marked, grab your drill and a suitable drill bit. The size of the bit should match the screws provided with your toilet paper holder. Drill holes carefully at the marked spots.
Don’t rush the drilling process. The wall material might differ; drywall, tile, or plaster each require a different approach. If you’re drilling into tile, use a tile drill bit to avoid damaging the surface.
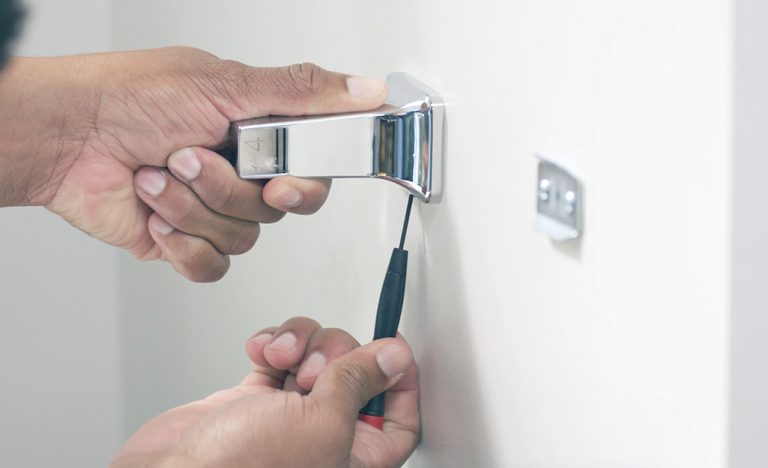
Securing The Mounting Bracket
After drilling, it’s time to secure the mounting bracket. Align the bracket with the drilled holes. This is where precision pays off, ensuring the holder sits straight and firm.
Use the screws provided to attach the bracket to the wall. Tighten them securely, but be cautious not to overtighten as it might damage the wall. A snug fit will prevent wobbling.
Once the bracket is securely fastened, attach the toilet paper holder to it. Check if it’s stable. A loose holder is the last thing you want during an important moment.
Installing a toilet paper holder is more than just a chore. It’s a small project that boosts your bathroom’s functionality. Do you have any tips or tricks that worked for you? Share them in the comments!
Attaching The Toilet Paper Holder
Mounting a toilet paper holder involves marking the spot, drilling holes, and securing it with screws. Use a level for alignment and ensure it’s reachable from the toilet seat for convenience.
Attaching a toilet paper holder to your bathroom wall may seem like a simple task, yet the satisfaction of doing it right can be surprisingly rewarding. Whether you’re refreshing your bathroom decor or fixing a broken holder, getting it securely in place is crucial. You want it to be sturdy enough to withstand everyday use while complementing the rest of your bathroom fixtures. Let’s dive into the details to ensure you attach your holder perfectly!
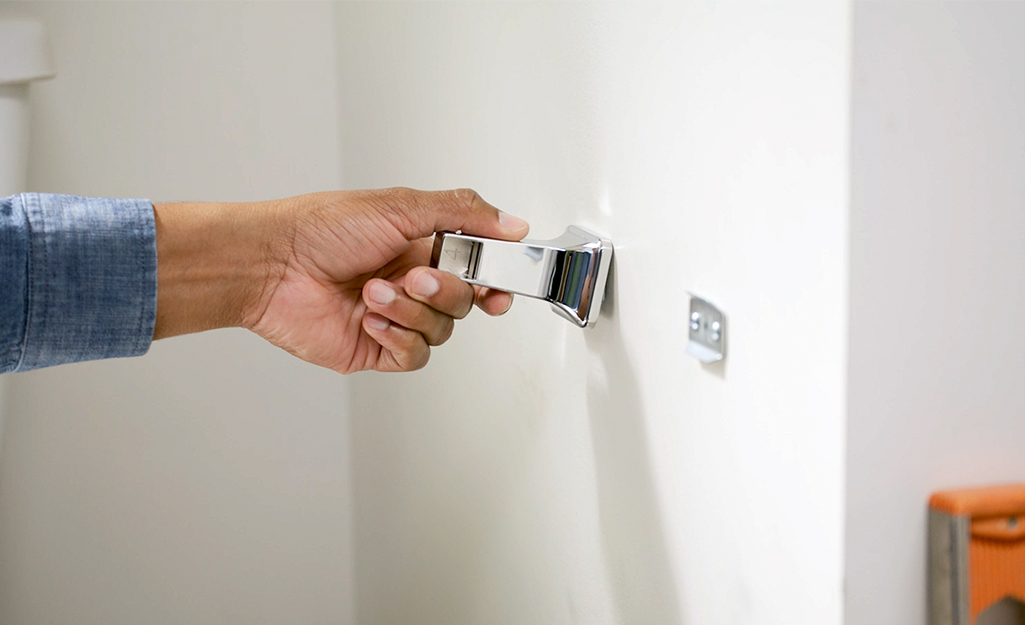
Aligning The Holder
First things first—deciding where exactly the holder should go is key. You’ll want it within easy reach of the toilet, but not so close that it becomes a nuisance. Think about the height as well. If you have kids, consider placing it lower to ensure accessibility for everyone. Grab a pencil and mark the spot on the wall where you plan to attach the holder. This simple step can prevent a lot of hassle later on.
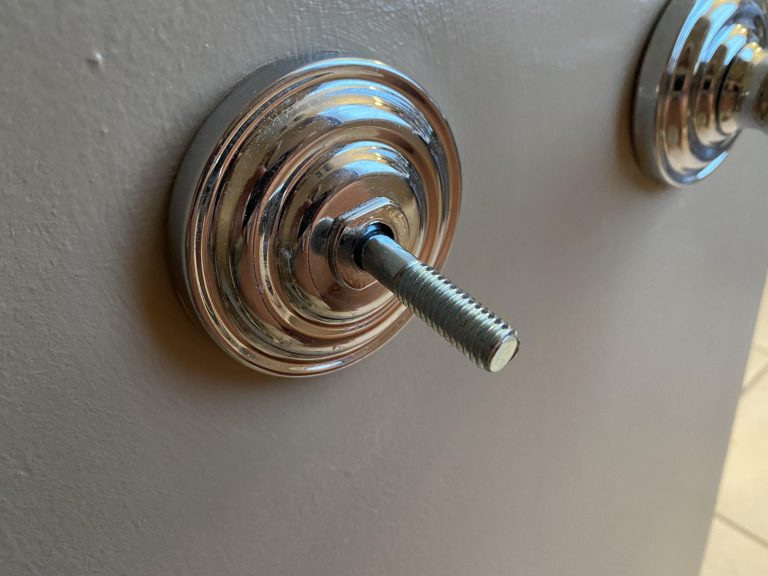
Fixing The Holder In Place
Now comes the exciting part—actually securing the holder to the wall. Depending on the type of holder you have, the process might vary slightly. Most holders come with screws and anchors. Use a drill to make holes at the marked spots and insert the anchors to ensure the screws hold firmly. If you’re using adhesive-backed holders, make sure the surface is clean and dry before sticking them on. Press firmly for several seconds to ensure they adhere properly.
Have you ever attached something and watched it slowly tilt over time? Avoid this by ensuring your screws are tight and your adhesive is strong. Remember, your bathroom is a place of relaxation. Having a toilet paper holder that’s securely attached adds to the overall comfort and functionality. Have you noticed how the little details make a huge difference? Now, whenever you reach for a fresh roll, you can take pride in knowing it’s mounted securely, thanks to your handiwork.
Finishing Touches
The final step in installing a toilet paper holder is crucial. It’s about adding those perfect finishing touches. These ensure your holder stays secure and functions as intended. This step involves checking stability and ensuring proper functionality. Let’s dive into these aspects.
Testing Stability
First, gently apply pressure to the holder. It should not wobble or shift. If it does, check the screws. Tighten them if necessary. A stable holder prevents accidents. It also prolongs the life of your bathroom fixture.
Ensuring Proper Functionality
Next, place a roll of toilet paper on the holder. Rotate it to ensure smooth movement. The roll should spin without resistance. If it sticks, adjust the holder arms. Proper functionality adds convenience in daily use. It also reflects a job well done.
Troubleshooting Common Issues
Installing a toilet paper holder can be tricky. Ensure the wall is clean before drilling holes. Use a level for accuracy to prevent uneven placement.
Installing a toilet paper holder can seem like a straightforward task, but sometimes things don’t go as planned. You might find yourself wrestling with a holder that wobbles or doesn’t sit comfortably. Before frustration sets in, let’s troubleshoot some common issues you might encounter. From ensuring your holder is secure to adjusting it for optimal comfort, these tips will help you achieve a flawless installation.
Holder Loose Or Unstable
It’s frustrating when you install a holder, only to find it wobbles every time you reach for the paper. This could be due to screws that aren’t tight enough or anchors that aren’t properly seated. Double-check that all screws are firmly tightened without stripping them. Consider using wall anchors if they weren’t part of your initial setup. Anchors provide extra grip and stability, especially in drywall. If the holder still feels loose, you might need to reposition it to hit a stud. Studs provide a strong, stable base for mounting. Use a stud finder to locate them easily.
Adjusting For Comfort
Positioning your toilet paper holder in the right spot is crucial for comfort. Ask yourself, is it easy to reach without twisting or straining? A common mistake is mounting it too far from the toilet. Aim to place the holder within arm’s reach. Ideally, it should be about 26 inches above the floor and 8-12 inches in front of the toilet bowl. These measurements offer a comfortable reach for most people.
Consider the preferences of all household members. You might need to adjust the height slightly if you have young children or taller adults at home. Have you ever found a paper holder so inconvenient that it made you rethink its placement? Small adjustments can make a big difference in your daily comfort. By addressing these issues, you’ll ensure that your toilet paper holder not only looks great but works perfectly too.

Credit: www.youtube.com
Frequently Asked Questions
How To Choose The Right Toilet Paper Holder?
Selecting the right holder involves considering style, material, and placement. Choose a design that complements your bathroom decor. Opt for durable materials like stainless steel or brass for longevity. Ensure the holder fits well within the available space and is easily accessible for convenience.
What Tools Do I Need For Installation?
You’ll need a drill, level, measuring tape, pencil, and screwdriver. These tools ensure precise installation, keeping your holder securely mounted. A level helps in aligning the holder correctly, while a measuring tape ensures proper distance from the floor or wall.
Where Should I Position The Toilet Paper Holder?
Position the holder within easy reach, about 26 inches above the floor. It should be placed 8 to 12 inches from the front of the toilet seat. Proper placement ensures comfort and convenience for all users, preventing awkward reaching or straining.
Can I Install A Holder On Tile Walls?
Yes, you can install on tile walls using a masonry drill bit. Start by marking the holes, then carefully drill through the tiles. Use appropriate anchors to secure the holder, preventing damage to the tile. Ensure the holder is level and securely fastened.
Conclusion
Installing a toilet paper holder is simple with the right steps. Gather your tools and materials before starting. Measure carefully to ensure even placement. Mark spots for screws precisely. Use a drill for cleaner holes. Secure the holder tightly to avoid wobbling.
Test its stability with a gentle tug. This small task adds convenience to your bathroom. Plus, it’s a DIY project anyone can tackle. Practice these steps to boost your confidence in home repairs. Happy installing!

Home Improvement Specialist & Writer at HomeFixio
Caden Rutherford is a seasoned home improvement specialist with extensive hands-on experience in residential construction, renovations, and design. With a keen eye for detail and a passion for transforming spaces, Caden shares practical advice and expert solutions to enhance the functionality and beauty of homes. As a writer for HomeFixio, Caden combines technical knowledge with creative flair, providing readers with informative guides on everything from structural improvements to aesthetic upgrades, empowering homeowners to achieve their ideal living spaces.