How to Replace a Bathroom Vanity Top: DIY Made Easy
Are you tired of looking at that outdated or damaged vanity top every time you enter your bathroom? Replacing it might be easier than you think.
Imagine transforming your bathroom into a space that feels fresh and modern, simply by swapping out the vanity top. You don’t need to be a professional contractor to do it. With the right guidance and a little elbow grease, you can tackle this project yourself and give your bathroom a stunning makeover.
In this guide, we’ll walk you through each step of replacing your bathroom vanity top, ensuring you have the confidence and know-how to complete the task with ease. Ready to dive in and create a bathroom space you’ll love? Let’s get started!
Choosing The Right Vanity Top
Choosing the right vanity top for your bathroom is more than just picking a pretty surface. It’s about finding the perfect blend of functionality, durability, and style that fits your space. The right choice can transform your bathroom into a personal oasis, adding value to your home while enhancing your daily routine.
Material Options
When selecting a vanity top, consider the material carefully. Each has its own pros and cons. Granite and marble are popular for their elegance and durability, but they can be heavy and require regular maintenance. Quartz offers a similar look but is more stain-resistant and easier to care for. If you’re on a budget, laminate can mimic the look of natural stone without the hefty price tag.
Think about how you use your bathroom. Do you often deal with spills or makeup stains? A non-porous surface like quartz might be ideal. Don’t just go for the trendiest option; choose a material that aligns with your lifestyle.
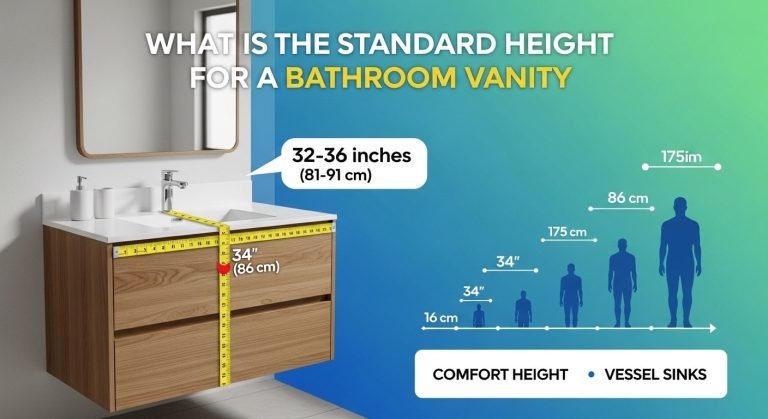
Size And Style Considerations
Size matters when it comes to vanity tops. Measure your space accurately before making a decision. A too-large top can overwhelm a small bathroom, while a tiny one might look out of place in a spacious area. Your vanity top should fit comfortably and leave enough room for other essentials.
Consider the style as well. Do you prefer a sleek, modern look or something more traditional? The edge design can also impact the overall aesthetic. A beveled edge offers a classic appearance, whereas a square edge contributes to a contemporary feel.
Remember, this is not just a piece of furniture; it’s a reflection of your personal style. How do you want your bathroom to greet you every morning? Choose a vanity top that makes you smile every time you see it.
Replacing a bathroom vanity top is an exciting opportunity to refresh your space. Take your time selecting the right one, keeping in mind the material, size, and style. This thoughtful approach ensures your bathroom remains functional and beautiful for years to come. Ready to make your choice?
Credit: m.youtube.com
Tools And Materials Needed
Essential tools for replacing a bathroom vanity top include a wrench, caulk, and a putty knife. Materials like a new vanity top, adhesive, and silicone sealant are crucial for successful installation. Ensure all components are ready before starting to streamline the process.
Replacing a bathroom vanity top can transform the look of your bathroom, giving it a fresh and modern feel. But before you dive into this rewarding DIY project, it’s crucial to gather the right tools and materials. Having everything at your fingertips not only makes the process smoother but also saves you from mid-project trips to the store. Let’s explore what you’ll need to successfully complete this task.Essential Tools
To start, make sure you have a tape measure handy. Accurate measurements are key to ensuring your new vanity top fits perfectly. You’ll need a screwdriver set to remove the old vanity and secure the new one. A utility knife is essential for cutting through caulk and ensuring clean edges. A putty knife will help you scrape off old adhesive and prep surfaces. Don’t forget a level to guarantee your vanity top sits evenly. Lastly, a drill can save you time and effort when driving screws into tough surfaces.Additional Supplies
Besides tools, certain supplies are necessary for a flawless installation. Silicone caulk is crucial for sealing edges and preventing water leaks. Have some plumber’s tape on hand for a secure connection between pipes and fittings. Sandpaper is useful for smoothing any rough surfaces before installation. If your new vanity top is heavier, consider using extra support brackets to reinforce stability. A small but vital item is a bucket or container to catch any water when disconnecting plumbing. Does this list seem extensive? It’s all about preparation. Imagine standing in your bathroom ready to replace your vanity top, only to realize you’re missing something essential. It’s not just about having the tools; it’s about being ready to tackle unexpected challenges with confidence. As you gather these tools and materials, ask yourself: How can you make this process even smoother? Could you borrow tools from a friend to cut costs, or perhaps invest in a quality toolset for future projects? Engaging with these questions not only helps you prepare but empowers you to approach DIY tasks with enthusiasm.Preparing For Installation
Begin by gathering all necessary tools and materials for the vanity top replacement. Ensure the area is clean and prepared for installation, minimizing potential disruptions. Proper preparation simplifies the process and enhances efficiency.
Upgrading your bathroom vanity top can dramatically change the look and feel of the space. But before you dive into this rewarding project, preparation is key. Ensuring you have everything ready will make the installation process smoother and more enjoyable. So, how do you get started? Let’s explore the steps to prepare for this transformation.Removing The Old Vanity Top
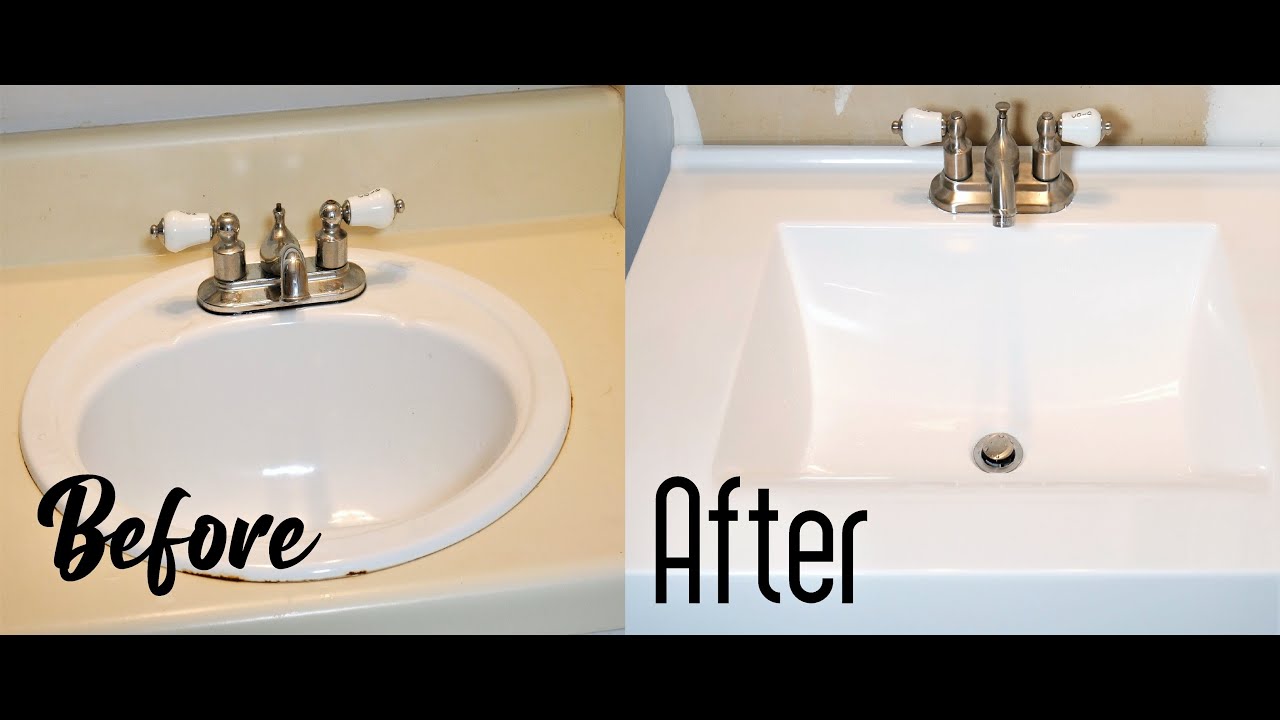
To begin, you need to remove the old vanity top. Start by turning off the water supply to prevent any leaks. Disconnect the plumbing and carefully lift the vanity top away from the base. If it’s stuck, you may need to use a putty knife to gently loosen any caulk or adhesive. Be sure to have a friend or family member help you with the lifting. Vanity tops can be heavy and awkward to handle alone. Once removed, set the old top aside for disposal or recycling.Cleaning The Surface
With the old vanity top removed, it’s time to clean the surface. A clean base ensures a better fit for the new vanity top. Use a mild cleaner and a cloth to wipe away any dirt, dust, or adhesive residue. Pay attention to the corners and edges where debris can easily collect. A clean surface not only makes installation easier but also helps your new vanity top adhere better. Have you ever skipped cleaning only to find something doesn’t quite fit right? Don’t let that be you. This preparation step might seem simple, but it sets the stage for a successful installation. Are you ready to see your hard work pay off with a stunning new bathroom vanity top?
Credit: www.cravingsomecreativity.com
Installing The New Vanity Top
Installing a new vanity top in your bathroom can transform the space. It adds style and functionality. Follow these steps to ensure a smooth installation process. This guide covers positioning, securing, and connecting plumbing.
Positioning And Securing
Start by placing the vanity top onto the cabinet. Align it carefully with the edges. Check for balance and proper fit. Adjust if necessary. Use a level to ensure it sits evenly.
Secure the vanity top in place using silicone caulk. Apply a bead along the edges of the cabinet. Press firmly to attach. This prevents movement and creates a seal. Let it dry before moving to the next step.
Connecting Plumbing
Reconnect the plumbing for your sink. Attach the faucet and drain pipes first. Ensure all connections are tight. Use plumber’s tape on threads to prevent leaks.
Test the water flow to check for leaks. Turn on the faucet and observe. If leaks occur, tighten the connections. Repeat until there are no leaks.
Finally, clean the area to remove debris. Your new vanity top is now installed. Enjoy your updated bathroom space.
Finishing Touches
Once you’ve successfully installed your new bathroom vanity top, it’s time to add the finishing touches that will bring everything together. These steps will not only enhance the look but also ensure longevity and functionality. Paying attention to details can make a huge difference in the overall appearance of your bathroom. Let’s dive into the essential steps that make your vanity top complete.
Sealing Edges
Sealing the edges is crucial to prevent water damage and maintain the integrity of your vanity top. Apply a bead of silicone sealant around the edges where the vanity top meets the wall and sink.
Ensure the sealant is evenly applied; use a caulking gun for precision. Smooth it out with a damp finger or tool for a clean finish. This step not only protects against leaks but also gives a polished look.
Have you ever noticed water damage in older bathrooms? A simple sealant can prevent such issues. It’s a small effort with a big payoff. Don’t skip this step thinking it’s just a minor detail!
Installing Fixtures
With the edges sealed, it’s time to install your fixtures. Position the faucet and handles over their designated holes and secure them tightly. This is where the magic happens, turning a slab into a functional piece.
Connect the water supply lines carefully, ensuring there are no leaks. Test the faucet to confirm it’s working properly. This is the moment when your bathroom starts to feel like a personal spa.
Have you chosen fixtures that reflect your style? Fixtures are more than functional; they set the tone for the room. Consider mixing metals or opting for a matte finish for a modern touch.
By focusing on these final touches, you ensure your vanity top is not only beautiful but also durable and efficient. What small changes will you make to personalize your space? This attention to detail reflects care and creativity in every corner of your bathroom.
:max_bytes(150000):strip_icc()/7_remove-vanity-top-56a4a26d3df78cf772835b2d.jpg)
Credit: www.thespruce.com
Troubleshooting Common Issues
Replacing a bathroom vanity top can encounter issues like improper fitting or plumbing leaks. Ensure accurate measurements for a smooth installation. Check connections to avoid water damage and ensure durability.
Replacing a bathroom vanity top can be a straightforward DIY project. However, it’s not uncommon to encounter a few hiccups along the way. Troubleshooting common issues promptly can save time and frustration. In this guide, we’ll tackle some typical problems like leaks, drips, and uneven surfaces, and provide actionable solutions to keep your project on track.Leaks And Drips
Leaks and drips are frustrating but fixable. After installing your new vanity top, double-check all connections. Ensure that plumbing fixtures are tightly secured. It’s surprising how often a simple twist can stop a persistent drip. Consider using plumber’s tape on threaded connections. This can create a better seal and prevent leaks. If you notice water pooling underneath, inspect the faucet and drain connections. You might need to tighten these fittings or replace worn-out washers. What if the leaks persist? It’s possible that the sink basin wasn’t sealed properly. Applying a silicone sealant around the edges can form a waterproof barrier. This small step can make a big difference in preventing water damage.Uneven Surfaces
An uneven vanity top is more than just an eyesore; it can also lead to functional problems. Before securing the vanity top, use a level to check for flatness. If you spot uneven surfaces, shims can be your best friend. Shims are small wedges that can be inserted between the vanity and the wall. They help level the surface, ensuring stability. In my first vanity replacement, I didn’t use shims, and it led to doors not closing properly. A quick adjustment with shims solved the issue. Are you noticing gaps between the vanity and the wall? These can be filled with caulk for a seamless look. A little patience in leveling and sealing can enhance both appearance and functionality. By addressing these common issues, you can ensure a smooth installation process. Have you faced other challenges while replacing a vanity top? Share your experiences and tips in the comments below. Your insights might be the key to someone else’s DIY success!Maintenance Tips
Replacing a bathroom vanity top can refresh your space. Start by turning off the water supply. Carefully remove the old top, ensuring all connections are disconnected. Secure the new top in place, double-checking all fittings for leaks. Finish by sealing edges for a polished look.
Maintaining your new bathroom vanity top is crucial to keep it looking pristine and extending its lifespan. Whether you’ve just installed a sleek marble or a budget-friendly laminate, proper care is essential. Let’s dive into some practical maintenance tips to ensure your vanity top remains the centerpiece of your bathroom for years to come.Cleaning Guidelines
Cleaning your vanity top is simpler than you might think. Use a soft cloth and mild soap to gently wipe the surface. Avoid harsh chemicals, as they can damage the finish and dull the surface. Regularly remove any stains or spills immediately to prevent them from setting in. If you notice any stubborn spots, a mixture of baking soda and water can act as a gentle scrub. Remember, consistency is key. Set a regular cleaning schedule that fits your routine, perhaps every Saturday morning.Preventing Damage
Preventing damage starts with being mindful of how you use the vanity. Always use trivets or mats under hot hair tools and toiletries to avoid heat marks or chemical stains. Place a small rug or mat in front of the vanity to catch any drips or spills. This not only protects the vanity but also keeps your bathroom floor dry. Do you use heavy items on your vanity top? Consider storing them elsewhere to prevent scratches or chips. A little caution goes a long way in preserving the beauty of your vanity. These maintenance tips are easy to integrate into your daily routine. With minimal effort, you can keep your bathroom vanity top in top-notch condition.Frequently Asked Questions
What Tools Are Needed To Replace A Vanity Top?
To replace a bathroom vanity top, you’ll need a wrench, screwdriver, caulk, and putty knife. A measuring tape is essential for accurate sizing. Having a level ensures proper alignment. Safety goggles and gloves are recommended for protection. Silicone adhesive helps secure the vanity top in place.
How Do I Measure For A New Vanity Top?
Begin by measuring the length and width of your existing vanity top. Measure from the back wall to the front edge. Don’t forget to note the dimensions of any sinks. Accurate measurements are essential for a proper fit. Consider any overhang you might want for aesthetic purposes.
Can I Replace A Vanity Top Myself?
Yes, replacing a vanity top is a manageable DIY project. Ensure you have the right tools and measurements first. Follow safety precautions while handling heavy materials. Removing the old top and securing the new one requires careful alignment. With patience, you can achieve professional-looking results.
How To Remove A Bathroom Vanity Top?
Begin by turning off water supply and disconnecting plumbing. Gently remove the sink and faucet if attached. Use a putty knife to break the caulk seal around the edges. Carefully lift and remove the old vanity top. Clean the area thoroughly before installing the new top.
Conclusion
Replacing a bathroom vanity top is a doable task. Follow the steps carefully. Gather all necessary tools and materials first. Take measurements accurately to avoid mistakes. Remove the old top gently to prevent damage. Install the new top securely for a perfect fit.
Seal the edges properly to avoid leaks. Ensure everything is aligned and stable. Enjoy your updated bathroom with a fresh look. With patience and care, anyone can achieve great results. Your new vanity top will enhance your bathroom’s style and function.
Get started today and enjoy the transformation!

Home Improvement Specialist & Writer at HomeFixio
Caden Rutherford is a seasoned home improvement specialist with extensive hands-on experience in residential construction, renovations, and design. With a keen eye for detail and a passion for transforming spaces, Caden shares practical advice and expert solutions to enhance the functionality and beauty of homes. As a writer for HomeFixio, Caden combines technical knowledge with creative flair, providing readers with informative guides on everything from structural improvements to aesthetic upgrades, empowering homeowners to achieve their ideal living spaces.