How to Make Bean Bags: Easy DIY Guide
Imagine sinking into the perfect bean bag after a long day. It molds to your shape, offering comfort like no other seat in your home.
But what if you could create this cozy oasis yourself? Making your own bean bag is not just a rewarding project; it’s a chance to design something that fits your personal style and needs. You don’t need to be a sewing expert or have a huge budget.
With the right materials and a bit of guidance, you can craft a bean bag that’s uniquely yours. Curious about how you can transform fabric and filling into your new favorite relaxation spot? Keep reading, and discover the simple steps to making your dream bean bag a reality.
Materials Needed
Gather fabric, filling, thread, and a sewing machine to create bean bags. Fabric choice is crucial for durability. Opt for polystyrene beads as filling for comfort and shape.
Crafting your own bean bag can be a fun and rewarding project. It allows you to customize the size, shape, and color to match your personal style or home decor. Before you start sewing, gathering the right materials is essential to ensure your bean bag is both comfortable and durable. Let’s dive into what you’ll need to get started.Fabric
Choosing the right fabric is crucial for the longevity and look of your bean bag. Opt for a durable material like canvas, denim, or upholstery fabric. These options are robust enough to withstand daily use and are relatively easy to clean.Thread
Use strong, high-quality thread to ensure your bean bag holds up over time. Polyester thread is a great choice because it offers strength and slight elasticity, making it ideal for handling the weight and movement of the bean bag.Beans Or Filling
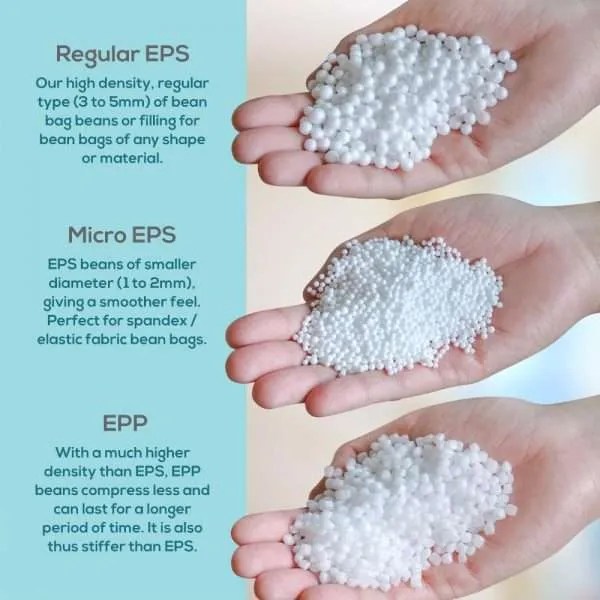
The filling is what gives the bean bag its signature comfort. Consider using expanded polystyrene (EPS) beads for a lightweight and malleable feel. Alternatively, you can use shredded memory foam for a more supportive and cushioned experience.Zipper
A sturdy zipper is essential for easy filling and cleaning. Choose a heavy-duty zipper that’s at least 24 inches long. This will provide a wide enough opening to add or remove filling as needed.Scissors And Sewing Supplies
You’ll need a sharp pair of scissors to cut your fabric accurately. Have a sewing machine ready, along with pins and a measuring tape. These tools will help you achieve clean lines and a professional finish.Patterns And Measuring Tools
Consider using a pattern to guide your cuts and stitching. You can purchase a pattern or create your own based on the desired shape and size of your bean bag. A ruler or measuring tape will ensure precise dimensions.Optional: Liner Fabric
Adding a liner can make your bean bag easier to maintain. It allows you to remove and wash the outer cover without losing the filling. Use a simple cotton fabric for the liner, which is economical and easy to sew. Are you ready to gather these materials and start your bean bag project? With everything in hand, you’re one step closer to lounging in your custom-made creation.Choosing The Right Fabric
Selecting the right fabric is crucial for making comfortable bean bags. Choose durable, easy-to-clean materials like cotton or polyester. They ensure longevity and ease of maintenance.
Choosing the right fabric is a crucial step in making bean bags that are both comfortable and durable. The fabric you select can greatly influence the look and feel of your bean bags, as well as their longevity. Consider the environment where your bean bag will live, whether it’s a cozy reading nook or a lively playroom.Understanding Fabric Types
Different fabrics offer varying levels of comfort and durability. Cotton is soft and breathable, ideal for indoor bean bags. Polyester is more durable and easier to clean, making it suitable for high-traffic areas. Leather adds a luxurious touch but requires careful maintenance.Matching Fabric To Your Lifestyle
Think about how your bean bag will be used. If you have kids or pets, opt for a fabric that’s easy to clean, like polyester or vinyl. If you’re going for a sophisticated look, consider leather, but be prepared for the upkeep.Experimenting With Patterns And Colors
Fabric isn’t just about texture; it’s a chance to showcase your style. Bold colors and patterns can make a statement in a room. Neutral tones can blend seamlessly with existing décor. Picture how different colors will work with your room’s lighting and furniture.Considering Fabric Durability
Durability is key, especially for bean bags in active spaces. Check the fabric’s resistance to wear and tear. A fabric with a tight weave will last longer. Ask yourself: will this fabric withstand daily use without looking worn?Evaluating Fabric Care Requirements
Ease of care can be a deal-breaker. Look for fabrics that are machine washable or easy to spot clean. Consider how much time you’re willing to spend maintaining your bean bag. A fabric that requires dry cleaning might be less practical for everyday use. Choosing the right fabric for your bean bags involves balancing aesthetics with practicality. What kind of fabric fits your lifestyle and enhances your space? Think about this as you select the perfect material for your bean bag project.Deciding On Size And Shape
Choosing the right size and shape for your bean bag is a crucial step in crafting a comfy and stylish piece. Your choice can greatly affect the feel and functionality of your bean bag. Whether you’re aiming for a cozy spot for relaxation or a playful addition to your kids’ room, the size and shape will dictate the overall vibe. Let’s dive into how you can make these decisions wisely.
Understanding Space And Purpose
Consider the space where your bean bag will live. Is it a large living room or a small reading nook? Measure the area to ensure your bean bag won’t overcrowd the space.
Think about its purpose. Will it be a lounging spot or a decorative piece? Large bean bags offer more comfort, while smaller ones can be moved around easily.
Exploring Different Shapes
Round bean bags are classic and versatile, fitting well in any room. They offer a cozy, enveloping feel.
Square or rectangular shapes provide more structure and support, perfect for kids or those who prefer a more defined seating area.
Consider unusual shapes like teardrop or L-shaped for a modern twist. These can add character and style to your space.
Sizing Tips For Comfort
Think about who will be using the bean bag. Adults might prefer larger sizes for comfort, while kids would enjoy smaller, more manageable ones.
Test sitting positions on various surfaces to gauge size needs. A bean bag should support your entire body comfortably.
Imagine yourself lounging on it after a long day. Does it feel inviting or cramped? Your comfort is key.
Personal Experience: A Lesson Learned
When I made my first bean bag, I chose a size too small, thinking it would fit well in the corner. It ended up being less comfortable and rarely used.
After rethinking, I opted for a larger, round shape that became the favorite spot for everyone. It taught me the importance of considering both size and shape.
Have you ever misjudged a space need? Reflecting on past choices can guide you to make better decisions now.
Final Thoughts On Size And Shape
Don’t rush your decision. Take time to visualize how the bean bag will fit and feel in your space.
Ask yourself: Will this size and shape enhance your room’s comfort and style? Your answer will lead you to the perfect choice.
Remember, a well-chosen bean bag can transform your space into a haven of relaxation and fun.
Cutting The Fabric
Creating a bean bag begins with cutting the fabric. This step sets the foundation for your project. Accurate fabric cutting ensures a neat final product. It involves measuring, using patterns, and selecting the right tools. Let’s explore the details of cutting fabric for bean bags.
Measuring Accurately
Precision is key in measuring fabric. Start with a flat surface. Use a measuring tape for correct dimensions. Mark with chalk or a fabric marker. Double-check measurements to avoid errors. Ensure each cut piece matches the design plan. Consistent measurements help avoid wastage.
Using Patterns
Patterns guide fabric cutting. Choose a pattern suitable for bean bags. Lay the pattern on the fabric. Pin it securely to prevent movement. Trace the pattern outlines on the fabric. Follow these lines while cutting. Patterns ensure uniformity in shape and size.
Sewing The Bean Bag
Crafting a bean bag involves selecting durable fabric and measuring precise dimensions. Stitch the pieces together, leaving a small gap. Fill the bag with beans, then sew the opening closed securely. Enjoy your comfy creation.
Sewing the bean bag is an exciting step in bringing your cozy creation to life. This is where precision meets creativity, allowing you to craft a bean bag that’s not only comfortable but also durable. As you prepare to sew, consider the fabric you’ve chosen and the function of the bean bag in your home. Will it be a fun addition to your living room, or a comfy spot in your child’s play area? Sewing is your chance to make it uniquely yours. Let’s dive into the essential techniques to ensure your bean bag stands the test of time.Stitching Techniques
When you start stitching, remember that the type of stitch can affect the durability of your bean bag. A simple straight stitch works well for many fabrics, but if you’re using stretchy materials, a zigzag stitch might be a better choice. Experiment with different stitches on a scrap piece of fabric first. This helps you see how the stitches hold up under pressure. Think about the bean bag’s future—will it be tossed around or dragged across the floor? Choose a stitch that can withstand the wear and tear.Seam Reinforcement
Seams are where your bean bag is most vulnerable. Reinforcing them is crucial to prevent any future mishaps. Consider adding a second row of stitches for extra strength. You might also want to use a heavy-duty thread, especially if your bean bag will be used frequently or by kids. To test the strength of your seams, give them a good tug. If they hold firm without stretching or breaking, you’ve done it right. Your choice of stitches and seam reinforcement can make or break your bean bag. Have you ever had a seam rip on a favorite piece of furniture? It’s frustrating, right? With careful sewing, you can avoid these pitfalls and enjoy your bean bag for years to come.
Credit: hungaricanjourney.com
Filling Options
Explore various filling options for making bean bags. Choose from polystyrene beads, shredded foam, or natural materials like dried beans. Each option offers a unique feel and comfort level.
Creating your own bean bags can be a rewarding project, especially when choosing the right filling options. The filling you select plays a significant role in the comfort and style of your bean bag. Not to mention, it affects how your bean bag adapts to the contours of your body. Let’s dive into the different filling options and how to make the best choices for your creation.Choosing Fill Material
When choosing fill material, you want to strike a balance between comfort and durability. Polystyrene beads are a popular choice due to their lightweight nature and ability to mold to your body. However, over time, they can compress and lose shape. Another option is shredded memory foam, which offers a plush feel and excellent support. It’s heavier than polystyrene beads, but it maintains its shape better over time. Eco-friendly alternatives, such as buckwheat hulls, are also gaining popularity for their natural feel and sustainability. Consider what’s most important to you: comfort, longevity, or environmental impact?Amount Of Filling Needed
How much filling do you need? This depends on the size of your bean bag and the type of filling chosen. For a standard-sized bean bag, you’ll typically need about 100 to 150 liters of polystyrene beads. If you opt for shredded memory foam, you might need a bit less due to its density. Measure your bean bag cover to ensure an accurate fit. A helpful tip: start with less filling than you think you need and add more gradually. It’s easier to add more than to remove excess. Creating the perfect bean bag is about finding the right balance. Have you ever sat on a bean bag that felt just right? That’s what you’re aiming for. By understanding your options and measuring carefully, you’ll craft a bean bag that’s both comfortable and long-lasting.Closing The Bean Bag
Closing the bean bag is a crucial step. It ensures the beans stay secure and the bag remains functional. A well-closed bean bag looks neat and offers comfort. Whether you’re using sewing techniques or fasteners, each method has its own charm. Let’s explore how to effectively close your bean bag.
Sewing The Final Seam
Begin by folding the edges inward. This creates a clean line. Use a strong thread for durability. Stitch the seam carefully, keeping it tight and even. A neat seam enhances the bean bag’s appearance. Double-check the stitching for any gaps. Consistency is key.
Adding Zippers Or Velcro
Zippers and Velcro add convenience. They allow easy refilling and maintenance. Choose a sturdy zipper that matches your fabric. Sew it along the edge securely. Ensure it glides smoothly. Alternatively, use Velcro strips. Attach them to the fabric edges. Press firmly for a strong hold. Both options offer flexibility.
:max_bytes(150000):strip_icc()/BeanBags1-5a3d6b21eb4d520037c7d90d.jpg)
Credit: www.thesprucecrafts.com
Decorating Ideas
Decorating your homemade bean bags can be a fun experience. Simple touches can bring life to your creations. Dive into these creative ideas to personalize your bean bags. Whether you’re crafting them for relaxation or play, decorating can make them unique.
Adding Personal Touches
Personal touches add charm to your bean bags. Use buttons, ribbons, or patches. These elements can reflect your style. Choose colors that match your room theme. Hand-sewn designs can add a special feel. Create patterns using yarn or thread. Simple embroidery can make a statement.
Using Fabric Paints
Fabric paints offer endless possibilities. They are easy to apply and dry fast. You can paint vibrant designs or simple patterns. Use stencils for neat shapes. Experiment with different colors and textures. Metallic paints can add a shiny finish. Custom drawings can turn your bean bags into art pieces.
Care And Maintenance
Bean bags offer a cozy spot for relaxation and fun. Keeping them clean and in good shape ensures they last longer. The right care helps maintain their comfort and appearance. Let’s dive into some easy tips for cleaning and repairing bean bags.
Cleaning Tips
Regular cleaning keeps your bean bag looking fresh. Use a vacuum to remove dust and dirt. For stains, spot clean with mild soap and water. Make sure to test any cleaning solution on a small area first. Avoid using harsh chemicals, as they can damage the fabric. Allow the bean bag to dry completely after cleaning.
Repairing Minor Damages
Small tears can happen over time. Fix them quickly to prevent further damage. Use a needle and thread to sew up minor tears. For larger holes, consider using fabric patches. These patches can be ironed on for a strong bond. Always choose a patch color that matches your bean bag. Regular checks help identify and fix damages early.
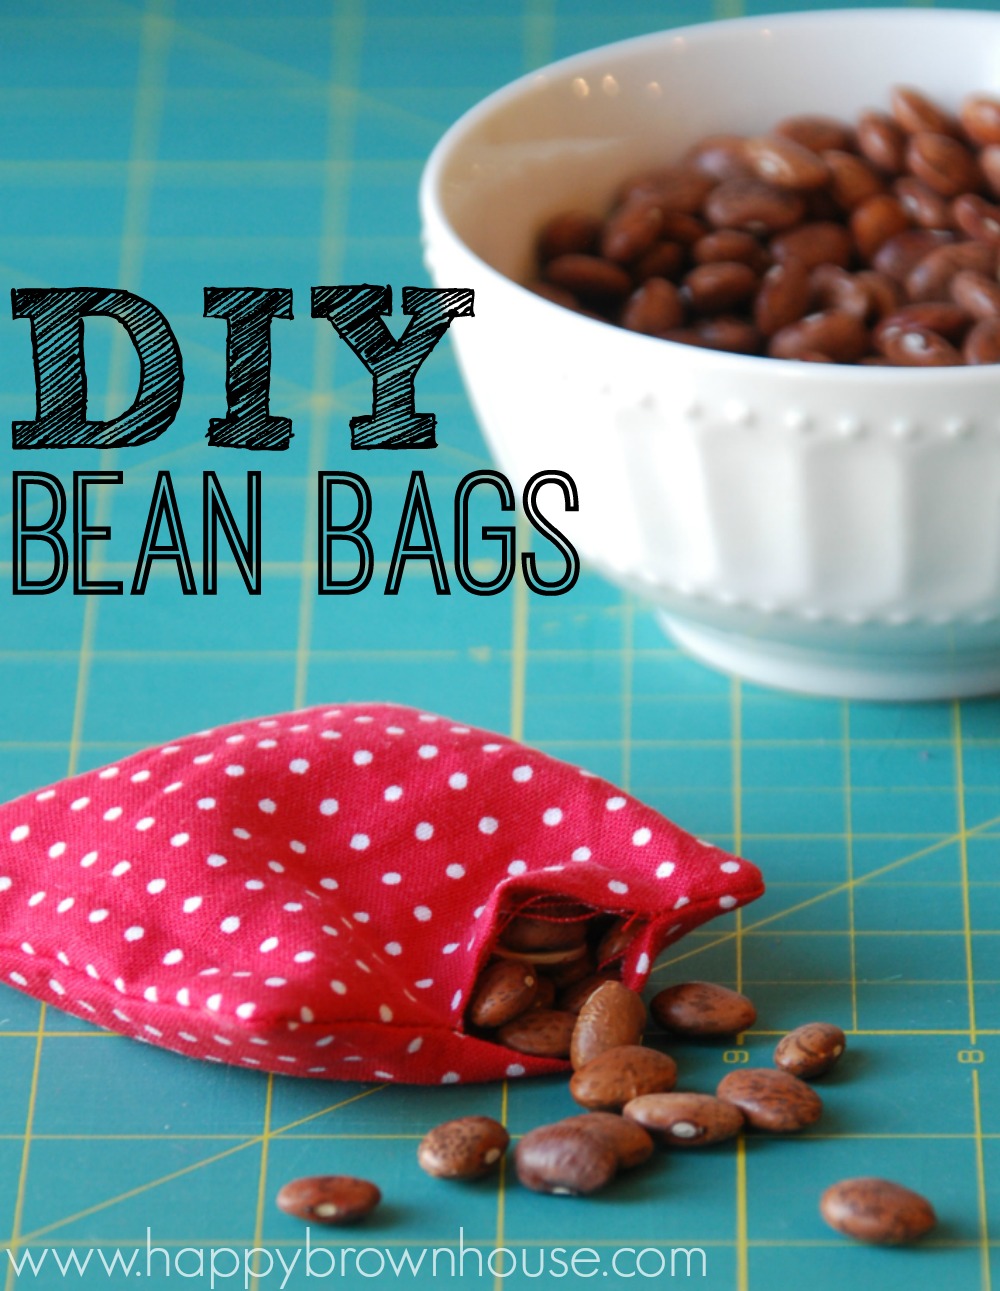
Credit: happybrownhouse.com
Frequently Asked Questions
What Materials Do I Need For Bean Bags?
To make bean bags, you’ll need fabric, filler material like beans or foam, a sewing machine, scissors, and thread. Choose durable fabric for longevity. Consider using a liner for added strength. The filler should be comfortable yet firm, ensuring the bean bag maintains its shape.
How Do I Sew A Bean Bag?
Start by cutting fabric into desired shapes, usually circular or square. Sew the edges together, leaving a small opening. Fill the bag with your chosen material, then sew the opening shut. Ensure seams are tight and secure to prevent leaks and maintain durability.
Can I Customize My Bean Bag Design?
Absolutely! Choose colors, patterns, and sizes that fit your style and space. Add features like handles or pockets for functionality. Personalize with embroidery or patches. Experiment with different shapes for unique designs. Customizing allows your bean bag to reflect your personality and enhance your decor.
How Much Filler Is Needed For Bean Bags?
The amount of filler depends on the size of your bean bag. Typically, large bean bags require around 3-4 cubic feet of filler. Smaller bags may need 1-2 cubic feet. Ensure the bag is filled adequately for comfort. Overfilling can make it too firm, while underfilling may cause sagging.
Conclusion
Creating your own bean bags is simple and fun. With a few materials, you can craft cozy seating for any room. Choose fabrics that suit your style. Fill them with beans or foam for comfort. Stitch them securely for durability.
Add zippers for easy filling and cleaning. Personalize designs with colors and patterns. Enjoy the process and the result. Make memories while crafting. Your bean bags can add warmth to your space. Invite friends over to admire your handiwork. Relax in your handmade creation.
It’s a rewarding project for all ages.

Home Interior Design & Renovation Expert at HomeFixio
Sierra Wellington is a skilled home interior designer with extensive experience in plumbing, fittings, and home renovations. Having worked on numerous residential projects, Sierra specializes in creating functional and aesthetically pleasing spaces. With a keen eye for design and a deep understanding of the technical aspects of home improvement, he provides expert advice on everything from layout planning to fixture installations. As a writer for HomeFixio, Sierra shares his practical insights and creative solutions, helping homeowners elevate their spaces with precision and style.