How to Remove a Broan Bathroom Fan: Easy Step-by-Step Guide
Are you ready to fix or replace your Broan bathroom fan but not sure where to start? Removing a bathroom fan might seem tricky, but with the right steps, you can do it yourself quickly and safely.
This guide will walk you through each part of the process, making it easy to follow even if you’re not a DIY expert. Keep reading to save time, avoid common mistakes, and get your bathroom fan ready for an upgrade or repair.
Your bathroom’s fresh air is just a few simple steps away!
Tools Required
Removing a Broan bathroom fan requires a few basic tools. These tools help you work safely and efficiently. Having the right tools ready will save time and prevent damage.
Gathering all tools before starting makes the process smoother. Each tool has a specific purpose for disconnecting and removing the fan unit.
Screwdriver Set
A screwdriver set with both flathead and Phillips heads is essential. Screws holding the fan cover and housing need these tools. Different screws may require different heads.
Voltage Tester
A voltage tester checks if the power is off. It ensures safety by confirming no electricity runs to the fan. Always test before touching any wires or parts.
Utility Knife
A utility knife helps cut through paint or caulk sealing the fan. It also trims any insulation or tape around the fan housing. Sharp and precise cutting is important.
Pliers
Pliers assist in gripping and pulling wires or connectors. They also help twist wire nuts off safely. A good pair of pliers provides better control during removal.
Step Ladder
A step ladder allows easy access to the ceiling fan. Make sure it is stable and tall enough to reach the fan safely. Never stretch or stand on unsafe surfaces.

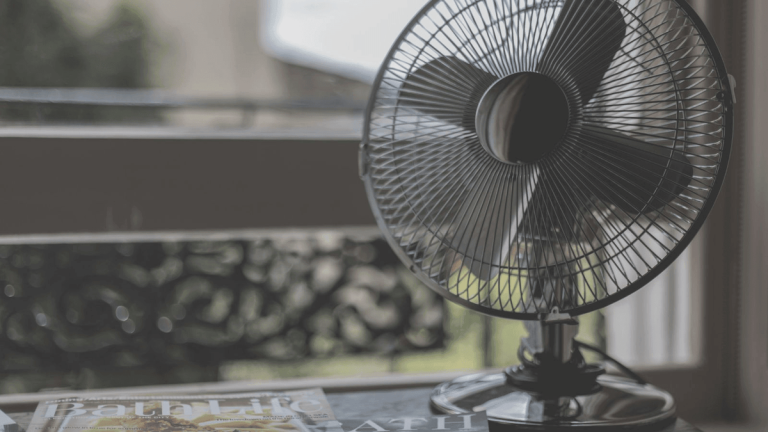
Credit: www.youtube.com
Safety Precautions
Removing a Broan bathroom fan needs careful attention to safety. Electrical work can be risky. Taking precautions protects you from harm and damage.
Always prepare your workspace before starting. Clear the area and gather tools. Make sure you understand the task to avoid surprises.
Turn Off Power At The Circuit Breaker
Switch off the power to the bathroom fan at the main circuit breaker. Do not rely on the wall switch alone. Confirm the fan is off by trying to turn it on.
Use A Voltage Tester
Check wires with a voltage tester to ensure no electricity flows. This step avoids electric shocks. Test all wires connected to the fan before touching them.
Wear Protective Gear
Put on safety glasses to guard your eyes from dust and debris. Use gloves to protect hands from sharp edges and wires. Wear a dust mask if the fan area is dirty.
Work With Proper Lighting
Good lighting helps you see clearly. Use a portable lamp or flashlight if the bathroom light is off. Avoid working in dark or dim places.
Follow Manufacturer’s Instructions
Read the Broan fan manual carefully before removal. Instructions may include specific warnings or tips. Following them reduces risks and helps the process go smoothly.
Power Off The Circuit
Turning off the power is the first and most important step before removing a Broan bathroom fan. This step keeps you safe from electric shock. It also prevents damage to the fan or other electrical parts.
Never start any electrical work without cutting off the power supply. The bathroom fan is connected to your home’s electrical system. Simply flipping the fan switch does not stop the electricity.
Locate The Circuit Breaker Panel
Find the main circuit breaker panel in your home. It is usually in the basement, garage, or utility room. The panel controls all electrical circuits in your house.
Identify The Correct Circuit Breaker
Look for the breaker labeled for the bathroom or fan. If the breakers are not labeled, turn off the main breaker to cut all power. Use a flashlight if needed to see clearly.
Switch Off The Circuit Breaker
Flip the breaker switch to the off position. This stops electricity from flowing to the bathroom fan. Make sure the switch stays in the off position.
Verify Power Is Off
Test the fan switch to ensure no power is running. The fan should not turn on or make noise. Use a voltage tester if you have one for extra safety.
- Never touch wires without turning off the breaker.
- Double-check the power is off before proceeding.
- Safety first to avoid accidents and injuries.
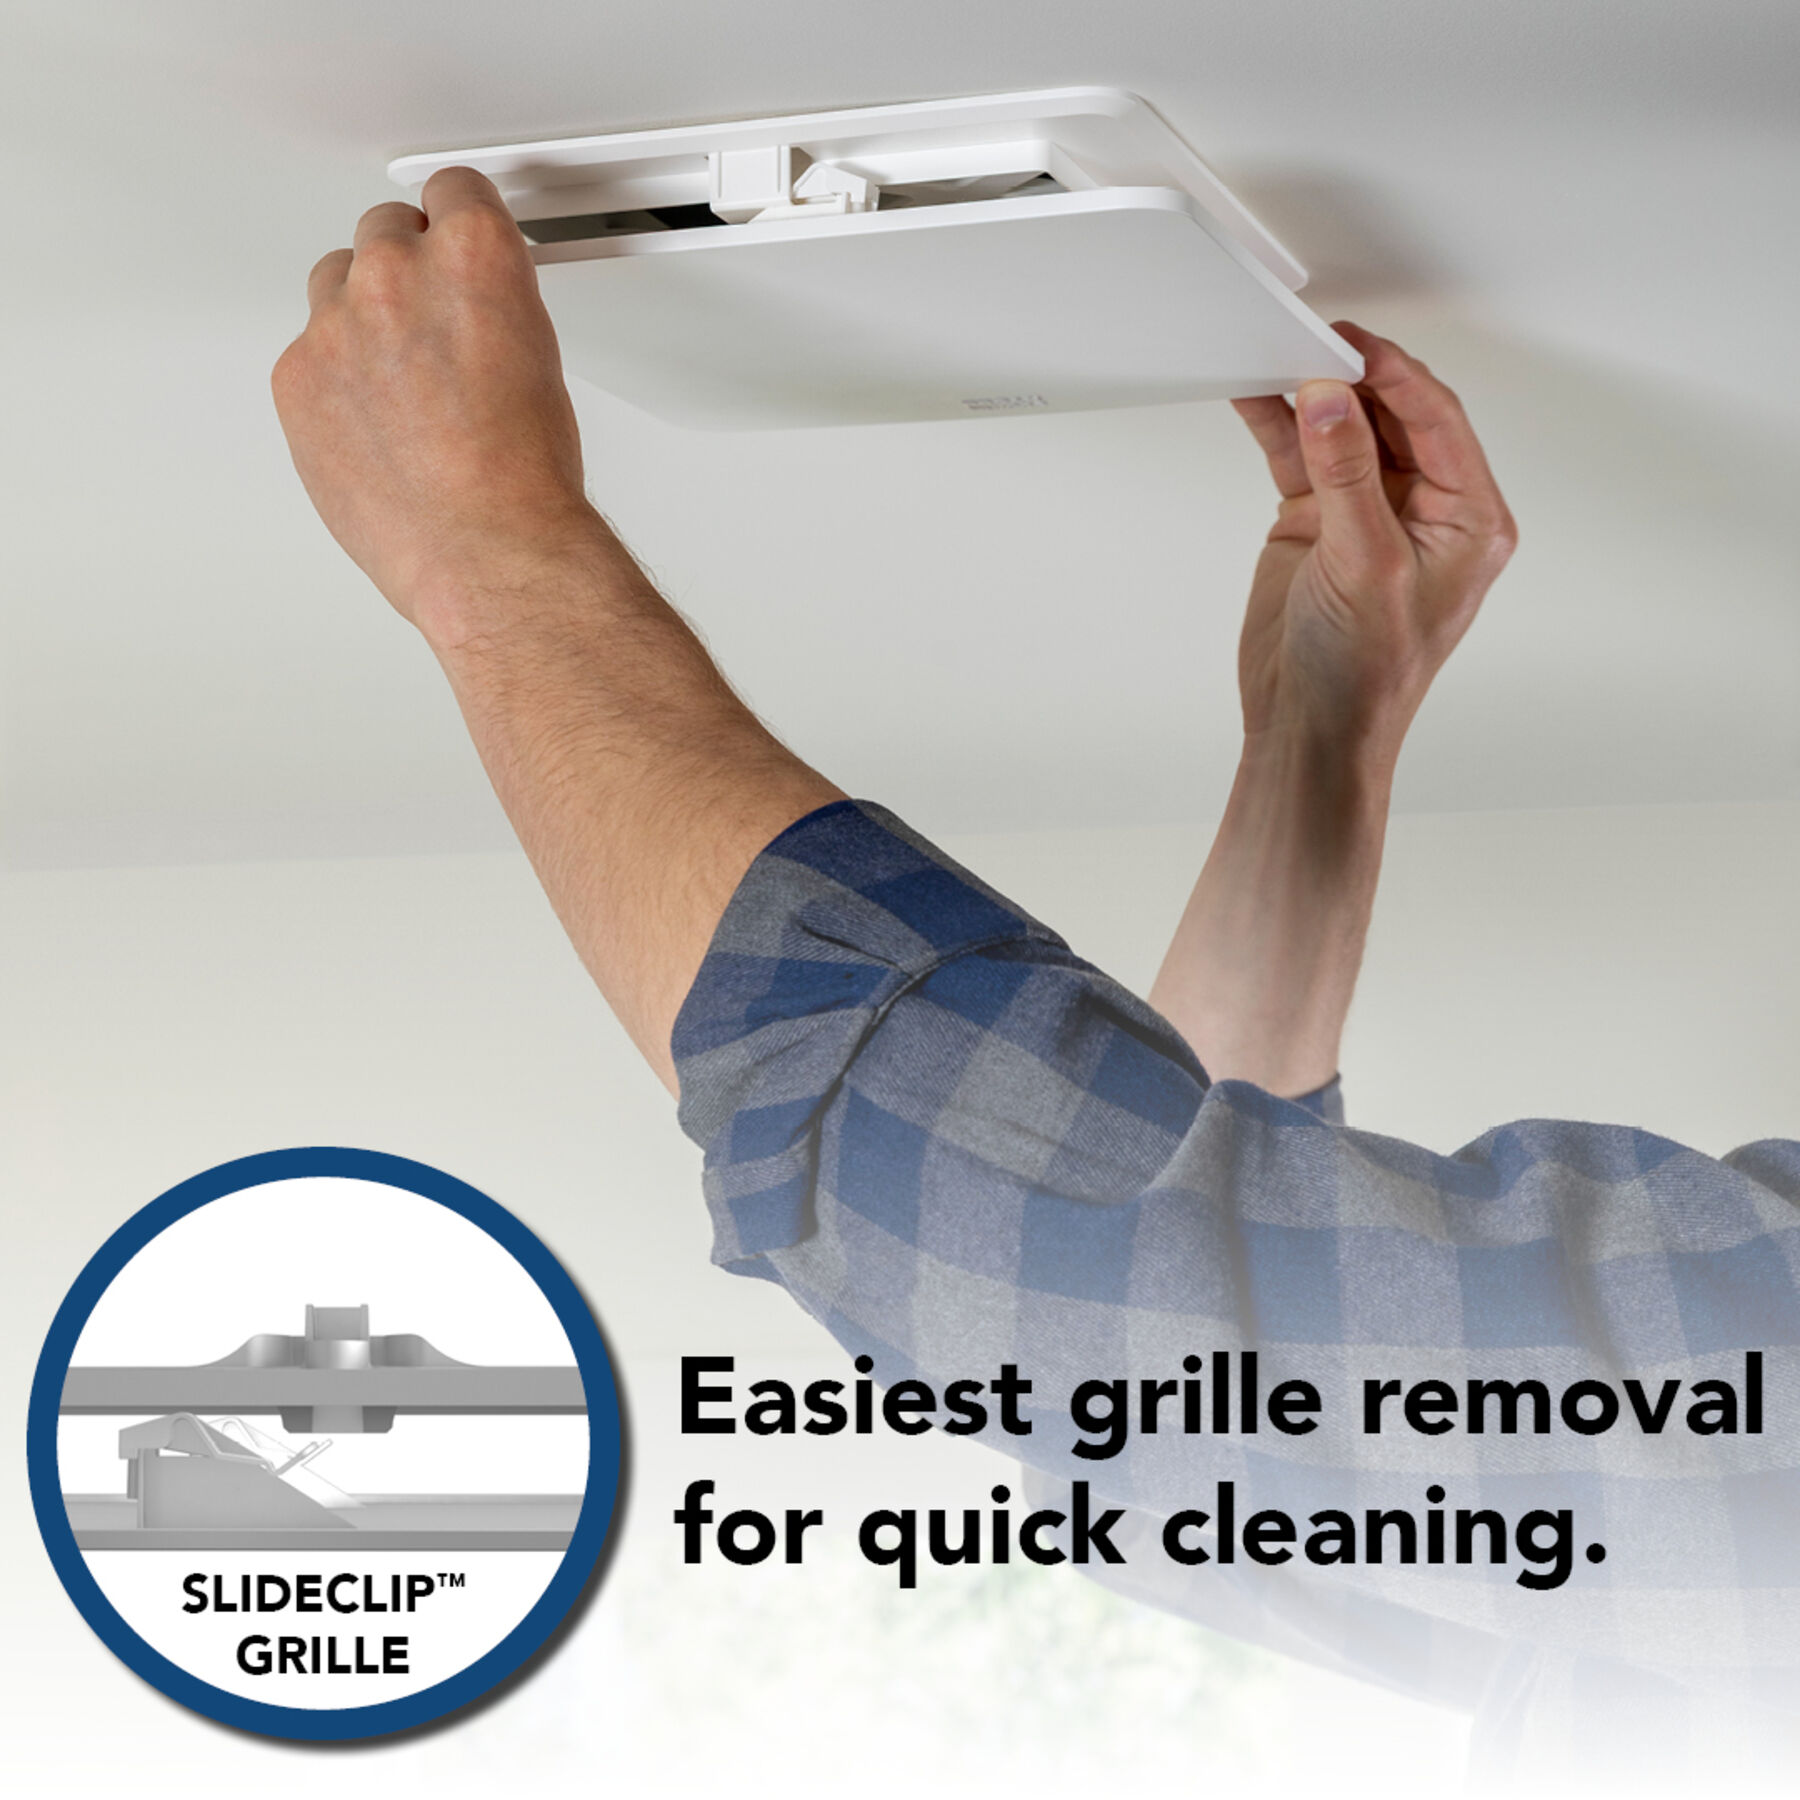
Remove Fan Cover
Removing the fan cover of your Broan bathroom fan is the first step toward maintenance or replacement. The fan cover protects the internal components and often collects dust and grime over time. Taking it off carefully can save you time and avoid damage to the fan or ceiling.
Locate The Retaining Mechanism
Most Broan fan covers are held in place by either spring clips or screws. Check around the edges of the cover to see which type your fan uses. If you spot screws, you’ll need a screwdriver; if there are clips, you can usually remove the cover by gently pulling it down.
Use Proper Tools For Removal
Using the right tool makes a big difference. A flathead or Phillips screwdriver often works best for removing screws. If your cover is held by spring clips, try pressing the cover inward slightly and then pulling it down slowly to release the clips.
Handle The Cover With Care
Fan covers can be fragile, especially if they’re plastic and have been in place for years. Avoid using excessive force that could crack or break the cover. If it feels stuck, double-check for hidden screws or tabs before pulling harder.
Clean The Cover Before Reinstalling
Once removed, take a moment to clean the cover. Dust and buildup can reduce your fan’s efficiency and air quality. Wiping it with a damp cloth or washing it in warm, soapy water will make a noticeable difference.
Detach Wiring
Detaching the wiring is a crucial step when removing your Broan bathroom fan. It requires care and attention to avoid electrical hazards and ensure a smooth removal process. If you’ve ever faced the frustration of tangled wires or unclear connections, you know how important it is to approach this step methodically.
Turn Off The Power
Before you touch any wires, make sure to turn off the power at your circuit breaker. This prevents shocks and keeps you safe throughout the process. Double-check by flipping the light switch or using a voltage tester to confirm the power is off.
Remove The Fan Cover
Take off the fan cover to access the wiring inside the housing. Usually, it snaps off or is secured with screws. Handling this carefully avoids breaking any clips or damaging the cover, which you’ll want to reuse or replace later.
Identify And Label The Wires
Once you see the wires, identify each one by its color and function. Typically, black or red is hot, white is neutral, and green or bare copper is ground. Labeling them with tape or a marker prevents confusion when reinstalling or replacing the fan.
Disconnect The Wiring
Carefully untwist wire nuts or disconnect connectors holding the wires together. If the wires are secured with electrical tape, gently unwrap it to avoid damaging the wires. Keep the wires separated and neat to avoid any short circuits or confusion later.
Secure The Loose Wires
After detaching, cap each wire with a wire nut to prevent accidental contact. This small step protects you from electrical shocks and keeps your wiring safe during the rest of the removal. It’s a simple habit that can save you from unexpected mishaps.
Unscrew The Fan Housing
Unscrewing the fan housing is a crucial step in removing your Broan bathroom fan safely and efficiently. This part holds the fan in place and often hides the screws you need to access. Taking your time here will save you from damaging the unit or the ceiling.
Locate The Screws Holding The Fan Housing
Start by inspecting the fan housing closely. Most Broan models have screws around the edge or inside the grille area. These screws might be visible or hidden behind a cover, so look carefully.
If you don’t see screws immediately, try gently twisting or pulling the grille to reveal them. Have a flashlight ready—it can help you spot any small or recessed screws easily.
Choose The Right Tools For The Job
Using the correct screwdriver makes the process smoother and prevents stripping the screws. Broan fans usually require a Phillips head screwdriver, but some models might need a flathead or even a nut driver.
Before you start, gather a few screwdriver types. This way, you won’t have to pause mid-task to find the right tool. Do you have a magnetic screwdriver? It can hold screws securely, especially when working overhead.
Unscrew Carefully To Avoid Damage
Once you’ve found the screws and have the right tool, unscrew them slowly. Avoid rushing; forcing the screwdriver can strip the screws or crack the housing. Keep the screws in a small container so you don’t lose them.
Sometimes screws might be tight or stuck due to age or moisture. Applying a little WD-40 or a similar lubricant can help loosen them. Remember, patience here means less hassle later.
Take Out The Fan Unit
Taking out the Broan bathroom fan unit is a simple task with the right approach. Removing the fan carefully prevents damage to the ceiling or electrical wiring. This step allows for easy replacement or cleaning.
Turn Off The Power
Start by switching off the power to the bathroom fan. Use the circuit breaker to ensure no electricity flows to the unit. This step keeps you safe during removal.
Remove The Fan Cover
Gently pull the fan cover down from the ceiling. Some covers have spring clips; squeeze them to release. Others may require unscrewing. Set the cover aside carefully.
Disconnect The Wiring
Locate the wiring connected to the fan motor. Unscrew the wire connectors or clips holding the wires. Carefully separate the wires and tuck them safely away.
Unscrew The Fan Unit
Find the screws or mounting brackets holding the fan unit to the ceiling joist. Use a screwdriver to remove each screw. Keep the screws for reinstalling later.
Lower The Fan Housing
Slowly pull the fan housing down from the ceiling. Support the unit with one hand. Avoid pulling on the duct or wiring to prevent damage.
Inspect And Clean The Area
Before removing your Broan bathroom fan, take a moment to inspect and clean the area around it. This step can save you time and prevent damage during removal. A clean space also helps you spot any hidden issues that might affect the fan’s performance or your bathroom’s ventilation.
Check For Dust And Debris Buildup
Look closely around the fan grille and inside the vent housing. Dust and debris often accumulate in these spots, which can reduce airflow and strain the fan motor.
Use a vacuum with a brush attachment or a soft cloth to gently remove dirt. This not only improves air quality but makes the removal process cleaner and easier.
Inspect For Signs Of Mold Or Moisture
Bathrooms are prone to moisture, which can cause mold to grow near the fan. Look for dark spots or a musty smell around the vent area.
If you spot mold, clean it carefully with a mixture of water and vinegar or a mild bleach solution. Addressing mold early prevents health risks and structural damage.
Clear Surrounding Fixtures And Obstacles
Remove any items close to the fan, like light fixtures or wall decorations. These can get in your way or be accidentally damaged during the fan removal.
Clearing the area gives you more room to work safely and reduces the chance of dropping screws or tools into tight spaces.
Examine Electrical Connections
Before you start disconnecting wires, visually inspect them for fraying or corrosion. Damaged wiring can be dangerous and may need professional attention.
Ensuring safe electrical connections protects you from shocks and makes reconnecting the new fan smoother.
Dispose Of The Old Fan Properly
After you remove your Broan bathroom fan, it’s important to dispose of the old unit properly. Simply tossing it in the trash can harm the environment and may violate local disposal rules. Handling disposal carefully ensures you stay eco-friendly and compliant with regulations.
Check Local Disposal Regulations
Before you throw the fan away, check your city or county’s rules about electronic and appliance disposal. Many areas require special handling for items with electrical components or motors.
Some places have designated drop-off sites or scheduled collection days for appliances. You can often find this information on your local government’s website.
Recycle The Fan Components
Fans like your Broan model contain metal, plastic, and electrical parts that can be recycled. Removing these parts and taking them to a recycling center reduces landfill waste.
Look for a recycling center that accepts small appliances or electronic waste. Some hardware stores also offer recycling programs for these items.
Donate Or Sell Working Parts
If parts of your old fan still work, consider donating or selling them. Some DIY enthusiasts or repair shops might want the motor or housing for their projects.
This approach not only reduces waste but can also help someone save money on replacement parts.
Use Proper Packaging For Disposal
When you’re ready to dispose of the fan, package it carefully to avoid injury to sanitation workers. Wrap sharp edges or exposed wires in thick paper or bubble wrap.
Secure the packaging with tape and label it clearly if required by your disposal service. This small step makes a big difference in safety.

Credit: www.youtube.com
Preparation For New Installation
Preparing for a new bathroom fan installation is just as important as removing the old one. Getting ready properly helps avoid common pitfalls and ensures your new fan works efficiently from day one. Let’s look at how to set yourself up for success before you start the installation.
Gather All Necessary Tools And Materials
Before you touch the fan, make sure you have everything you need. This includes a screwdriver, wire stripper, voltage tester, and possibly a drywall saw if the new fan size differs.
Also, have the new fan, mounting hardware, and ducting ready. Missing a tool midway can turn a simple job into a frustrating delay.
Turn Off The Power Safely
Safety must come first. Locate your bathroom circuit breaker and switch it off to cut power to the fan.
Use a voltage tester on the fan wires to confirm there’s no electricity running through. This step prevents electric shocks and keeps you safe throughout the process.
Inspect The Existing Wiring And Ventilation
Look closely at the wires and duct connected to the old fan. Are the wires frayed or the duct clogged or damaged?
Noticing issues here means you can fix them before installing your new fan. Ignoring this can reduce your fan’s lifespan or cause ventilation problems.
Measure The Fan Opening And Ceiling Space
Take precise measurements of the current fan opening and ceiling space. New fans come in different sizes, so knowing the exact dimensions helps you pick the right model.
Accurate measurement prevents unnecessary cuts or patchwork, saving you time and effort. Have you ever tried fitting a device that just wouldn’t align? Avoid that hassle now.
Plan The Vent Route And Airflow
Check where the duct leads outside. Clear airflow is crucial for your fan’s performance.
Consider if you need to extend or reroute the duct. Planning this in advance means your bathroom will stay fresh and dry without surprises later.
Credit: www.broan-nutone.com
Frequently Asked Questions
How Do I Safely Remove A Broan Bathroom Fan?
Turn off the power at the circuit breaker. Remove the fan cover, disconnect wiring, and unscrew the fan housing carefully.
What Tools Are Needed To Remove A Broan Bathroom Fan?
You need a screwdriver, voltage tester, wire nuts, and possibly pliers to remove the fan safely and efficiently.
Can I Remove A Broan Fan Without Electrical Knowledge?
It’s best to have basic electrical knowledge or hire a professional to avoid safety risks and electrical hazards.
How Long Does It Take To Remove A Broan Bathroom Fan?
Removing a Broan fan typically takes 20 to 30 minutes with proper tools and safety precautions.
Conclusion
Removing a Broan bathroom fan is easier than it seems. Follow each step carefully and take your time. Always turn off the power before starting work. Use the right tools for safety and efficiency. After removal, clean the area well before installing a new fan.
This simple task can improve your bathroom’s air quality. Stay safe and double-check connections before finishing. You can handle this project with confidence and care.

Home Improvement Specialist & Writer at HomeFixio
Caden Rutherford is a seasoned home improvement specialist with extensive hands-on experience in residential construction, renovations, and design. With a keen eye for detail and a passion for transforming spaces, Caden shares practical advice and expert solutions to enhance the functionality and beauty of homes. As a writer for HomeFixio, Caden combines technical knowledge with creative flair, providing readers with informative guides on everything from structural improvements to aesthetic upgrades, empowering homeowners to achieve their ideal living spaces.