How to Replace a Bathroom Vanity And Sink: DIY Guide
Are you tired of your outdated bathroom vanity and sink? Perhaps you’ve noticed it’s starting to show its age, or maybe you’re just looking to give your bathroom a fresh, modern look.
Either way, replacing a bathroom vanity and sink may seem like a daunting task, but it doesn’t have to be. Imagine transforming your bathroom into a stylish space you can be proud of, without spending a fortune on professional help.
In this guide, you’ll discover step-by-step instructions that make the process straightforward and achievable. You’ll find out how you can upgrade your bathroom’s appearance and functionality, all while enjoying the satisfaction of doing it yourself. Keep reading to uncover the secrets of a hassle-free vanity and sink replacement, and get ready to transform your bathroom into the oasis you deserve.
Preparation Steps
Gather tools like a wrench, screwdriver, and plumber’s tape. Turn off the water supply. Drain pipes and disconnect plumbing.
Replacing a bathroom vanity and sink can be a rewarding DIY project. But before diving into the installation, it’s crucial to prepare properly. Preparation is key to ensuring a smooth and efficient process, minimizing unexpected hiccups. Here’s how you can get ready for this transformation, starting with some essential preparation steps.Gather Tools And Materials
First, gather all the tools and materials you need. Having everything at hand saves time and frustration. You’ll need basic tools like a screwdriver, wrench, and pliers. Don’t forget plumbing essentials like plumber’s tape and a pipe wrench. Check that you have the new vanity and sink ready, along with any hardware or fixtures. It’s a good idea to have a bucket or basin nearby to catch any water from disconnected pipes. Do you have everything you need for the job?Measure And Plan Layout
Accurate measurements are vital. Measure the space where the new vanity and sink will go. This ensures that they fit perfectly without any surprises. Consider the plumbing layout too. Is the new sink compatible with your current plumbing setup? Planning this beforehand can prevent future headaches. Think about the aesthetics. How will the new vanity look in your bathroom? Aligning it with existing decor can enhance the overall vibe of the room. Are you ready to see your bathroom in a new light?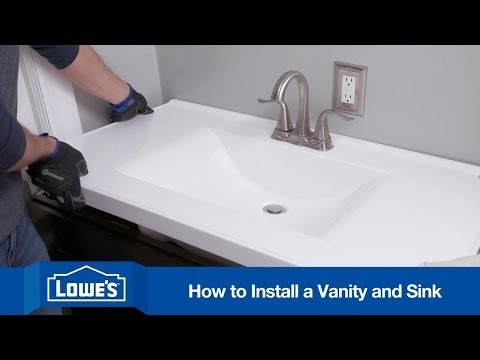
Credit: www.youtube.com
Removing The Old Vanity
Replacing a bathroom vanity can refresh your space instantly. The first step is removing the old vanity. This task involves careful planning and execution. Let’s break it down to ensure a smooth process.
Turn Off Water Supply
Start by shutting off the water supply. Locate the valves under the sink. Turn them clockwise to stop the water flow. Double-check to ensure no water leaks remain.
Disconnect Plumbing
With the water supply off, disconnect the plumbing. Use a wrench to loosen the nuts on the pipes. Remove the drainpipe and water lines carefully. Keep a bucket handy to catch any residual water.
Detach Vanity From Wall
Now, detach the vanity from the wall. Use a screwdriver to remove screws securing it. If caulk holds it, cut through with a utility knife. Gently pull the vanity away from the wall.
Installing The New Vanity
Replacing a bathroom vanity and sink involves careful steps. Begin by disconnecting the plumbing and removing the old vanity. Secure the new vanity, reconnect the sink, and ensure everything is level for a fresh, updated look.
Replacing your bathroom vanity and sink can transform the space into a more functional and stylish area. Installing the new vanity is a crucial step, requiring attention and care. With the right preparation, you can ensure it fits perfectly and serves you well for years.Position And Secure Vanity
Begin by positioning the new vanity in its designated space. Ensure it’s centered and level. Use a spirit level to check this. Secure the vanity by attaching it to the wall. Most vanities have pre-drilled holes for this purpose. Use screws that are appropriate for your wall type, such as drywall or plaster. Consider how the vanity aligns with other elements in your bathroom, like the shower or toilet.Reattach Plumbing
Once the vanity is secured, it’s time to reconnect the plumbing. This step can be intimidating, but careful attention will make it smooth. Begin by reconnecting the water supply lines to the faucet. Ensure all connections are tight to avoid leaks. Next, attach the drain pipe to the sink. Double-check for any potential blockages. If you’re unsure about any connection, it might be worth consulting a professional. Wouldn’t you prefer a small fee over a flooded bathroom? Replacing a bathroom vanity and sink can be rewarding, offering a fresh look and improved functionality. With these steps, you’re well on your way to a successful installation.
Credit: www.youtube.com
Sink Installation
Replacing a bathroom vanity and sink involves removing the old unit, preparing the area, and installing the new fixtures. Ensure all plumbing connections are secure and test for leaks. Proper tools and patience make the task manageable and rewarding.
Replacing a bathroom vanity and sink can transform the look of your bathroom, giving it a fresh and updated feel. One of the crucial steps in this process is the sink installation, where you can really make a difference with attention to detail. When I installed my first sink, I realized how vital each step was to ensure not only functionality but also the aesthetic appeal. Are you ready to dive into the practical aspects of sink installation? Let’s get started!Seal The Sink
After positioning the sink on the vanity, the next step is sealing it effectively. This not only secures the sink but also prevents water from seeping under and causing damage. Use a high-quality silicone sealant around the edge of the sink. Apply the sealant evenly and press the sink firmly into place. Once done, wipe away any excess sealant for a clean finish. This simple step can save you headaches down the line.Connect Faucet And Drain
With the sink sealed, it’s time to connect the faucet and drain. Start by attaching the faucet to the sink, ensuring it is tightly secured. Tighten all nuts and bolts to avoid any leaks. Next, connect the drain pipe underneath the sink. Pay attention to any washers or seals, as these prevent leaks. It’s these small details that make a huge difference in preventing water damage. Have you ever wondered why some sinks last longer without issues? It often boils down to the meticulousness of the installation. Ensure everything is snug and secure to avoid water problems later. In the end, a well-installed sink not only enhances the functionality but also adds to the beauty of your bathroom. As you complete each step, you’ll find a sense of accomplishment in knowing you did it yourself.Final Touches
You’ve made it this far, and now it’s time for the final touches that will bring your bathroom vanity and sink replacement to a satisfying close. These last steps are crucial for ensuring everything functions well and looks beautiful. Let’s dive into the finishing details that will make your bathroom feel polished and complete.
Check For Leaks
Turn on the water and carefully inspect the plumbing connections. Place your hand around the pipes to feel for any moisture. A small leak can cause significant damage over time, so it’s important to catch it early.
If you notice any leaks, tighten the connections or apply plumber’s tape for extra security. Trust me, nothing feels better than knowing your hard work has resulted in a leak-free vanity. Are you experiencing any issues with water pressure?
Add Decorative Elements
Now that your vanity and sink are securely in place, it’s time to enhance the aesthetic. Consider adding a stylish mirror that complements your vanity’s design. A well-chosen mirror can make a small bathroom feel more expansive.
Think about adding some greenery or a scented candle to bring warmth and freshness to the space. Little touches like these can transform a functional bathroom into a personal oasis. What’s your favorite decorative element to enhance a room?
Remember, your bathroom is more than just a utility space—it’s a part of your home. By focusing on these final touches, you ensure it’s both functional and inviting. Enjoy the satisfaction of a job well done and the beauty of your newly refreshed bathroom.
Troubleshooting Tips
Replacing a bathroom vanity and sink can seem daunting. Start by turning off water supply and disconnecting pipes. Carefully remove old fixtures, ensuring not to damage plumbing. Install the new vanity, aligning it properly. Reconnect water lines and check for leaks.
Keep tools handy for adjustments.
Troubleshooting tips can save time and frustration during a bathroom vanity installation. Even with careful planning, unexpected issues may arise. Knowing how to address these problems can lead to a smoother installation process. Below, we explore common challenges and offer practical solutions.Common Installation Issues
Misalignment is a frequent problem during vanity installation. The vanity may not sit flush against the wall. This can result from uneven wall surfaces. Use a level to check the wall’s straightness. If needed, adjust the placement or use shims for balance. Another issue is securing the vanity to the wall. Screws might not hold if the wall lacks proper support. Identify wall studs before drilling. Use a stud finder for accurate results. Secure the vanity into the studs for stability. Cabinet doors or drawers may not open smoothly. This often stems from misaligned hinges. Check each hinge and adjust as necessary. Tighten loose screws and ensure proper alignment.Solutions For Plumbing Problems
Water leaks are common after connecting the sink. Check all connections for tightness. Ensure washers are in place to prevent leaks. If the leak persists, inspect the pipes for cracks. Draining issues can occur if pipes are misaligned. Confirm the alignment of the drain pipe with the sink. Adjust the pipes to ensure a smooth water flow. Use a plumber’s tape to seal joints effectively. Sometimes, the faucet may not function properly. Check the water supply lines for kinks or blockages. Make sure the valves are fully open. Clear any debris from the aerator for better water flow. These troubleshooting tips aim to ease the installation of your bathroom vanity and sink. Addressing common issues can make your DIY project a success.:max_bytes(150000):strip_icc()/8_remove-sink-base-cabinet-56a4a26d3df78cf772835b30.jpg)
Credit: www.thespruce.com
Frequently Asked Questions
How Do I Remove My Old Vanity?
Start by turning off the water supply. Disconnect plumbing fixtures carefully. Remove screws and brackets holding the vanity in place. Lift the vanity away from the wall. Ensure all connections are detached before removal. Be cautious to avoid damaging the surrounding area.
What Tools Are Needed For Vanity Replacement?
You’ll need a wrench, screwdriver, utility knife, and measuring tape. A drill can be helpful for securing new fixtures. Use a level to ensure proper alignment. A bucket is useful for water drainage. These tools will aid in a smooth installation process.
Can I Replace A Vanity Myself?
Yes, you can replace a vanity yourself with basic tools. Follow a step-by-step guide for best results. Ensure plumbing connections are secure. Take measurements accurately for proper fit. If unsure, consult a professional for assistance. DIY replacement can be a rewarding task.
How Do I Install A New Sink?
Position the sink over the vanity opening. Secure it with brackets and adhesive. Connect plumbing fixtures carefully, ensuring watertight seals. Test for leaks after installation. Ensure the sink is level and stable. Follow manufacturer instructions for specific installation details.
Conclusion
Replacing a bathroom vanity and sink is a rewarding task. It updates your space and enhances functionality. First, gather the necessary tools and materials. Follow each step carefully for best results. Ensure all connections are secure to prevent leaks. Take your time during installation.
Measure accurately for a perfect fit. This project boosts your home’s value and appeal. Enjoy the satisfaction of a job well done. Embrace your refreshed bathroom space. It’s more inviting and practical now. Remember to maintain your new vanity and sink regularly.
Happy renovating and enjoy your new bathroom look!

Home Improvement Specialist & Writer at HomeFixio
Caden Rutherford is a seasoned home improvement specialist with extensive hands-on experience in residential construction, renovations, and design. With a keen eye for detail and a passion for transforming spaces, Caden shares practical advice and expert solutions to enhance the functionality and beauty of homes. As a writer for HomeFixio, Caden combines technical knowledge with creative flair, providing readers with informative guides on everything from structural improvements to aesthetic upgrades, empowering homeowners to achieve their ideal living spaces.