How to Stop a Leaky Shower Head: Quick Fix Guide
A leaky shower head can be more than just a minor annoyance. Those constant drips can lead to higher water bills and even cause damage over time.
But before you start imagining costly repairs or replacements, take a moment to breathe. You have the power to stop that pesky leak and save both money and frustration. Imagine stepping into your bathroom and hearing. . . Silence. No more drips.
Just the satisfaction of a job well done. In this guide, you’ll discover simple, effective steps to fix your leaky shower head, all without needing to call in a professional. Ready to dive in and reclaim your peace of mind? Let’s get started on turning that drip into a distant memory.
Identifying The Leak Source
Identifying the leak source in your shower head is the first crucial step to stopping the drip-drip-drip that’s driving you crazy. A leaky shower head not only wastes water but can also hike up your water bill. Knowing where the leak originates helps you tackle the problem effectively and prevents future headaches. Let’s dive into where these pesky leaks commonly occur and the signs you should watch out for.
Common Leak Locations
Most shower head leaks are due to issues in one of a few common spots. The connection between the shower arm and the wall is a prime suspect. If the plumbing tape or washer here is worn out, expect a leak.
The shower head itself can be another source. Over time, mineral deposits may clog the holes, creating pressure that leads to leaks. Additionally, the valve that controls water flow can wear down, leading to a constant drip.
Have you ever thought about checking the seals within the shower head? These small parts can degrade over time, leading to water seeping out. Identifying these locations can save you time and frustration.
Signs Of A Leak
Spotting the signs of a leak early can save you from bigger problems later. Dripping sounds when the shower is off are a clear indicator something isn’t right. Is your water bill unexpectedly high? That could be a silent leak speaking to you.
Water stains on the bathroom floor or walls might also point to a hidden leak. Have you noticed reduced water pressure during your shower? That could mean water is escaping somewhere it shouldn’t.
Keep an eye out for mold or mildew around your shower area. This often grows due to excess moisture and could indicate an ongoing leak. By being vigilant, you can stop small problems from becoming costly repairs.
Have you experienced any of these issues with your shower head? Addressing them promptly ensures your shower remains a relaxing escape rather than a source of stress.
:max_bytes(150000):strip_icc()/how-to-fix-a-leaking-shower-head-4154274-hero-96869029aa204b64abe6ecc27bd82d55.jpg)
Credit: www.thespruce.com
Necessary Tools And Materials
Fixing a leaky shower head can be simple with the right tools. This guide outlines the necessary tools and materials for the task. Even beginners can handle this repair with ease.
Basic Tools List
Start with a wrench or pliers. These help loosen and tighten connections. Have a screwdriver ready for removing screws. An adjustable wrench is useful for various sizes. A cloth protects the shower head from scratches. A small bucket is handy for catching water. A pair of safety goggles keeps your eyes safe.
Materials For Repair
Begin with a roll of plumber’s tape. This seals and prevents leaks. Silicone grease lubricates moving parts. Replacement washers are crucial for stopping leaks. Ensure washers fit your shower head model. A clean rag wipes excess grease or water. Have a cleaning brush for scrubbing connections. A bucket of warm water helps clean residue.
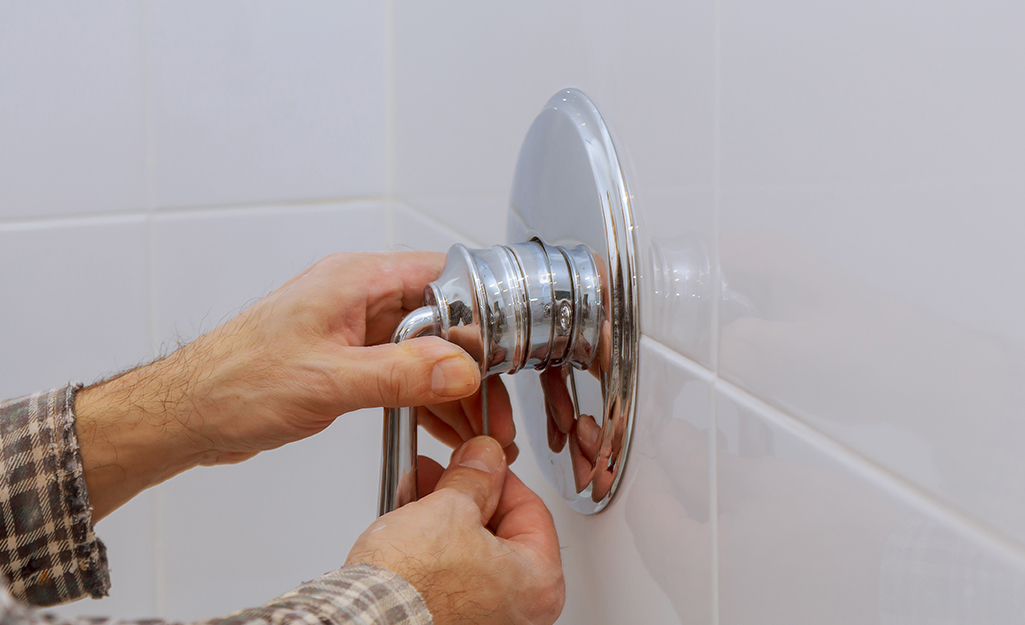
Turning Off Water Supply
Turning off the water supply is crucial when fixing a leaky shower head. It prevents water from flowing while you work on the repairs. This step ensures safety and avoids further damage. Let’s learn how to locate the shut-off valve and ensure no water flow.
Locating The Shut-off Valve
First, find the main water shut-off valve. It is typically located near where the water line enters your home. Look in the basement or near the utility room. If you live in an apartment, it might be in a common area. The valve is usually a round handle or lever. Turn it clockwise to shut off the water.
Ensuring No Water Flow
After turning off the valve, check if water still flows. Turn on the shower and observe. No water should come out. This confirms the valve is correctly turned off. If water still flows, double-check the valve position. You might need to turn it tighter. Once verified, proceed with fixing the shower head.
Credit: www.homedepot.com
Removing The Shower Head
Facing a leaky shower head can be frustrating. Removing it is the first step towards fixing the issue. Understanding how to properly detach the shower head is crucial. A successful removal process ensures no damage occurs. Let’s explore effective methods to remove the shower head safely.
Unscrewing Techniques
Begin by turning off the water supply. This prevents any leaks while working. Use a wrench or pliers to grip the shower head’s base. Wrap the tool with a cloth to avoid scratches. Slowly turn counterclockwise to loosen it. Apply gentle pressure to prevent breakage. If tight, use penetrating oil to ease the process. Wait a few minutes before attempting again.
Handling Different Types Of Shower Heads
Different shower heads require specific approaches. Fixed shower heads are usually easier to remove. They attach directly to the pipe. Hand-held models often have a flexible hose. Disconnect the hose first before removing the head. Some shower heads have unique designs. Consult the manual for special removal instructions. Use correct tools to avoid damage.
Cleaning And Inspecting Components
Cleaning and inspecting components can help stop a leaky shower head. Scrub away mineral build-up and check for damaged parts. Replace worn-out washers or seals to ensure a tight fit, preventing leaks. Regular maintenance keeps your shower head functional and water-efficient.
Cleaning and inspecting the components of your shower head is essential to prevent leaks and ensure optimal performance. By taking the time to carefully examine and clean each part, you can avoid the hassle of a dripping shower and save yourself from costly repairs. Many homeowners overlook this critical step, but it’s easier than you might think. All it takes is a little patience and attention to detail. So, grab your tools and let’s dive into the specifics.Checking For Mineral Deposits
Mineral deposits can be sneaky culprits behind a leaky shower head. These deposits, often from hard water, can clog nozzles and hinder water flow. A simple solution is to soak the shower head in vinegar overnight. This natural cleaner dissolves the build-up effectively. You might be surprised at how much smoother your shower works afterward. After soaking, scrub the nozzles gently with an old toothbrush. This helps remove stubborn residues. Have you ever noticed how your shower head starts to spray unevenly? Mineral deposits might be to blame. A good cleaning can make all the difference.Inspecting Gaskets And Seals
Gaskets and seals are small but mighty components that prevent leaks. Over time, they can wear out or become misaligned. Carefully remove the shower head and check these parts for signs of damage. Are they cracked or loose? If so, it’s time to replace them. You can find replacement gaskets and seals at your local hardware store. It’s a small investment that pays off in preventing leaks. Imagine the relief of a perfectly functioning shower head after replacing a worn-out gasket. Reinstall the shower head and tighten it securely. A snug fit is crucial to avoid future leaks. If you’ve ever been frustrated by a constant drip, a simple check of these components might be your solution. Cleaning and inspecting your shower head components not only stops leaks but also enhances your shower experience. Isn’t it satisfying when something simple makes such a big difference?
Credit: www.youtube.com
Replacing Worn Parts
Fix a leaky shower head by replacing worn parts like washers or O-rings. This simple repair can save water and prevent damage. Regular maintenance ensures your shower functions efficiently.
A leaky shower head can waste water and increase your bills. Replacing worn parts can fix this problem. It is often a simple task. Old gaskets and seals wear out over time. This allows water to escape. Here is how you can tackle this issue efficiently.Selecting New Gaskets
Gaskets are small but vital. They ensure a tight seal in the shower head. Choose the correct size for your shower model. Check the user manual for specifications. Most hardware stores stock various gasket types. Rubber or silicone gaskets work best. They resist water and wear.Installing Replacement Seals
Seals prevent water from leaking out. To install, first remove the old seal. Use a flat tool to pry it out gently. Clean the area to remove debris. Place the new seal in its position. Ensure it fits snugly in place. Tighten the shower head back on. Test the shower to ensure no leaks occur. `Reattaching The Shower Head
Fixing a leaky shower head involves reattaching it properly. First, turn off the water supply. Then, remove the shower head and clean any debris. Reattach it securely, ensuring a snug fit to prevent drips.
Reattaching a shower head might seem like a straightforward task, but doing it correctly ensures you won’t be greeted by an unexpected shower spray every time you turn on the water. Whether you’ve just finished a renovation or simply needed to fix a leak, reattaching the shower head properly is crucial. Picture this: you’re ready for a relaxing shower, but a loose shower head turns it into a messy experience. Avoid that scenario with these practical tips.Proper Tightening Methods
Begin by ensuring that the shower arm threads are clean. Any debris or old plumber’s tape can prevent a proper seal. Use a cloth to wipe the threads clean. When you’re ready to attach the shower head, apply new plumber’s tape around the threads of the shower arm. Wrap it clockwise to ensure it doesn’t unravel when screwing on the head. Carefully screw the shower head onto the shower arm. Use your hand to tighten it, ensuring it’s snug but not overly tight. Over-tightening can lead to damage or leaks. A good grip often does the trick.Ensuring A Secure Fit
Once the shower head is hand-tightened, turn on the water to check for leaks. If water drips from the connection, it’s time to secure it a bit more. Use a wrench for a quarter turn if necessary. Place a cloth between the wrench and the shower head to avoid scratching it. Check again by turning the water on. There should be no leaks if the head is properly attached. Remember, a secure fit is more about precision than force. Have you ever faced the frustration of a leaking shower head despite your efforts? It might be because the threads weren’t properly aligned or the tape was missing. Ensuring these small details can save you from future hassles and keep your shower relaxing and leak-free.Testing For Leaks
Fixing a leaky shower head involves identifying the source of the leak. Tightening loose connections is often effective. Replacing worn washers or seals can also help. Regular maintenance can prevent further issues.
Testing for leaks is an essential step in fixing a leaky shower head. Identifying the source of the drip can save time and prevent further water damage. You need to ensure the repair is effective before declaring the task complete. This process involves a few simple tests to confirm the leak is resolved.Restoring Water Supply
Begin by turning the water supply back on. Make sure the shower head is securely attached. Once the water is flowing, observe the shower head closely. Look for any signs of immediate leaks or drips. Pay attention to areas around the seal and the nozzle. These are common spots where leaks occur.Checking For Drips
After restoring the water supply, let the shower run for a few minutes. This helps identify slow leaks that might not appear right away. If you notice any dripping, turn the water off and recheck the connections. Tighten any loose fittings and inspect the washers. Repeat the process until no drips are visible. Aim for a completely dry area around the shower head. This confirms the leak has been successfully fixed.Preventive Measures
Preventive measures are crucial to keeping your shower head in perfect shape and preventing annoying leaks. It’s not just about fixing problems when they arise; it’s about stopping them before they start. Think about how much easier life would be if you never had to deal with a leaky shower head again. Let’s dive into some easy ways to avoid future issues and keep your bathroom dry and stress-free.
Regular Maintenance Tips
Start with regular cleaning. Mineral deposits can build up and cause leaks, so make it a habit to clean your shower head monthly. Use vinegar to soak it overnight, then rinse well.
Check for wear and tear. Look for signs of rust or cracks. Replace parts like washers and gaskets before they fail. It’s a small task that can save you from bigger headaches.
Don’t forget the connections. Ensure that the nuts and bolts are tight. Loose connections can lead to leaks, so give them a quick tighten every few months.
Avoiding Future Leaks
Consider installing a water softener. Hard water can cause mineral buildup, which leads to leaks. A water softener reduces this risk and extends the life of your shower head.
Use quality parts when replacing components. It might be tempting to go for cheaper options, but investing in durable materials can prevent frequent replacements.
Think about your shower habits. Do you slam the shower head around? Gentle handling can avoid unnecessary strain on joints and fixtures.
Have you ever dealt with a leaky shower head that seemed to have a mind of its own? Share your story and tips in the comments below. Your experience might be the key to preventing someone else’s plumbing woes.
Frequently Asked Questions
How Can I Fix A Leaky Shower Head?
To fix a leaky shower head, first turn off the water supply. Remove the shower head and inspect for worn-out washers or seals. Replace any damaged parts and reattach the shower head. If the leak persists, consider applying plumbing tape for a tighter seal.
What Causes Shower Heads To Leak?
Shower heads often leak due to worn-out washers or seals. Over time, mineral deposits can also block water flow, causing leaks. Another common cause is improper installation or loose connections. Regular maintenance can help prevent these issues.
Can I Use Tape To Stop Shower Leaks?
Yes, plumbing tape can help stop shower leaks. Wrap the tape around the threads of the shower arm. This provides a tighter seal and prevents water from escaping. Ensure the tape is applied smoothly for best results.
How Often Should I Replace Shower Washers?
Replace shower washers every one to two years. Regular replacement prevents leaks and ensures optimal performance. If you notice water dripping or reduced flow, check washers immediately. Frequent inspection helps maintain shower efficiency.
Conclusion
Fixing a leaky shower head is simple with the right steps. Start by checking for worn parts. Use a wrench to tighten loose fittings. Replace washers or seals if needed. Regular maintenance helps prevent future leaks. Save water and reduce bills by fixing leaks promptly.
A dry shower head improves bathroom safety too. Take action today. Enjoy a leak-free shower experience. Share these tips with friends. Everyone deserves a reliable shower.

Home Improvement Specialist & Writer at HomeFixio
Caden Rutherford is a seasoned home improvement specialist with extensive hands-on experience in residential construction, renovations, and design. With a keen eye for detail and a passion for transforming spaces, Caden shares practical advice and expert solutions to enhance the functionality and beauty of homes. As a writer for HomeFixio, Caden combines technical knowledge with creative flair, providing readers with informative guides on everything from structural improvements to aesthetic upgrades, empowering homeowners to achieve their ideal living spaces.